Leaderboard

Popular Content
Showing content with the highest reputation on 29/07/18 in all areas
-
The new scope.. Sexy Sexy Sexy! @Druid7994 points
-
I'm going to start to write the cut guide for the safe bar. There might be a couple of edits as I make this post. This is to give an aug a Semi only mode, without removing full auto. First you want to remove the safe bar. It just pushes out to either side. Once out there is a small metal clip that you need to keep safe. Look on the back side of the bar, It should have a red dot on it. There should also be 2 grooves cut into this side of the bar. You need to cut a third groove between those existing slots. I find a small triangular file works best for this. You want to try match the existing grooves for depth and width as well as keeping the cut straight. Once the cut is done you put the bar back into the gun (red dot to the shooter). Make sure you get the metal clip in position first before you put the bar in. And once it's back together you should find the safety now has 3 click positions. Split the upper from the lower if you haven't already done so. Now you need to measure the travel on the trigger to the semi position. Grab a marking tool. Pen scalpel it doesn't matter. Set the bar to the safe position and pull the trigger so it stops. Mark this position on the side of the trigger slide. (1) Pull the trigger until it reaches the de-tent where the semi auto shot finishes mark it off (2). Pull the trigger all the way into the full auto position until it stops mark the position(3). Measure between 1 and 2. Transfer that to the safe bar using the front of it as the 1 position. Measurement (B) You now need to take a sideways measurement. Put the safe bar in the auto position. Pull the trigger all the way in. And push the safe bar over towards the safe setting till it stops moving. Use the side of the gun and mark this position on the safe bar. Release the trigger, and push the safe bar to the new middle position. Mark the safe bar on the same side. The distance between these marks is the amount of material you need to remove from the bar (A). Mark the cube that needs cutting and remove it down to the lower level of the bar. The cube of material that remains will act as a stop for the trigger, so do not accidentally cut it off! Working slowly with a scalpel is better than trying to go at it with a big knife, saw or dremel. This should give you a semi only position on an Aug, You may have to refine the cuts, but removing less and working up to the correct measurement is better than removing more.2 points
-
Snow wolf SW-020C aug carbine, they good?
Iceni and one other reacted to Compulsive Reload for a topic
Took the plunge anyway put me requests in the comments box so should be all good 😄 2 points
 -
Gun picture thread
tasum and one other reacted to Compulsive Reload for a topic
That.... Is beautiful! Think am gonna need that towel.2 points -
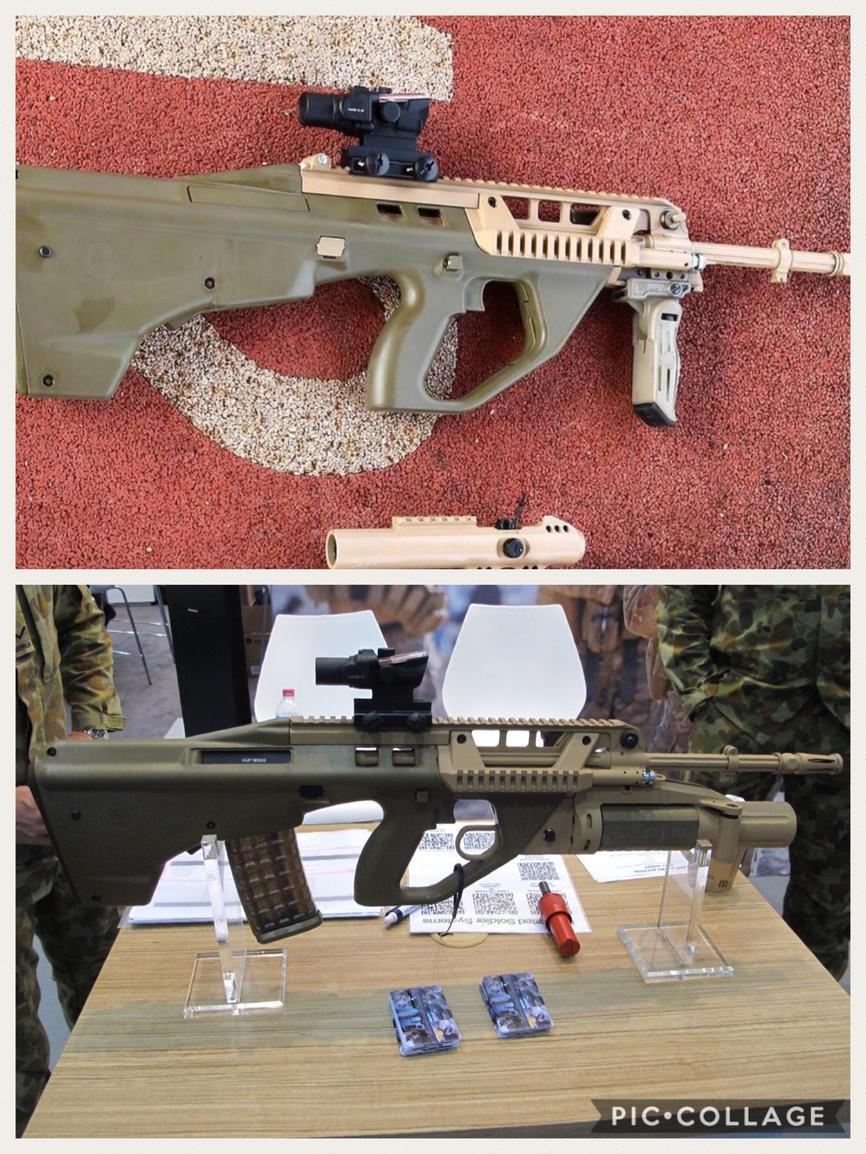
I wish someone would hurry up and copy the new Aus F90 !😍
2 points
-

Snow wolf SW-020C aug carbine, they good?
Compulsive Reload and one other reacted to Iceni for a topic
I've got to do some pictures for the LCT review I'm doing, so while I have the camera out I'll do the AUG pictures as well. I was hoping to get to the gun range to switch up the images a little for the LCT but I don't think that is going to happen in this rain..... And I really wanted to zero my new scope.... I actually didn't think there was any call for the mod to have a tutorial. Perhaps I should review the AUG as a platform at some point and drop in the mods onto that as well.2 points -
It's a JG AUG rebranded as snow wolf. Any good in what way? If you mean compared to other brands - TM are the best out of the box but you will pay tripple the price of that one. APS and JG are almost equal with a slight nod to JG. The JG has a marginally faster motor, and a better stock piston head. Body wise all of the augs are near identical, JG and TM use identical bodies, APS use a slightly different one with a raised pistol grip and body area. To use, that model is the best current variant. It has the best rail position and front hand grip options. And the QC spring. Provided you get the short variant. The one you have linked to is the long variant with the A1/A2 hand grip. The A1/A2 don't have the solid front hand grip. The A1 has no rail, the A2 only has a short high rail The A3 is badly balanced, and looses other features like the tool-less barrel swap. The Phantom/sniper variants are all stupid long, and generally have cheap junk extras, like crap scopes and bipods that don't offer the gun anything. Augs are not like M4's. Nothing is bolted down internally (it's designed that way). They have an issue with BB's getting into the body on mag swaps that can be removed with some shimming. The battery compartment is small but will take a 7.4v 30-35c 2200mAh block in most cases. The dual stage trigger can be sorted so it has a single only position with basic tools. Out of the box the JG guns generally arnt' that bad. Cheap upgrades work with them, And the gearbox is solid. A standard upgrade path would be: ZCI stainless inner barrel 450mm (509mm is stock you want it slightly shorter). £25 Decent bucking (maple leaf ect). £15 with omega nub Mosfet. £15 Shimming. As a gun there noisy to the shooter: So optional upgrades are a silent piston head and cylinder head (plastic type are quietest Element ect) SHS bore up kits with the silent heads are also an option but they have more weight in the piston and will slap but not as badly as a flat alu piston head. The JG is a decent out of the box gun, but there is a lot of room for improvement with upgrades. The BB's getting into the body can be frustrating but you can live with it if you love the platform. Speaking of the platform the AUG is a tweakers wet dream. V3 boxes are fantastic to learn on, and putting in a fet is easy as all the wires are external. The gearbox is removable in about 60 seconds. The hop is one of the better AEG designs, and the barrel/hop are removable without having to strip the gun. It makes for a platform that saves a lot of time if you like to play with different internal options. This is the model I would buy. https://gun-fire.co.uk/product-eng-1152215959-SW-020T-Carbine-Replica-Tan.html Everything above applies apart from the barrel length for the upgrades. It comes with a 320mm inner and can be left stock, or upgraded to the ZCI 320mm. You can see it has the more solid hand grip, but still retains all of the features of the longer variant. If you want to have the long barrel, then I would suggest a 2inch barrel extension and a suppressor to make up the length difference in the outer to 450mm.2 points
-
Stock review: Gun Name and maker: LCT G3 - LC3A3 Slim Olive Drab FPS: 300 (UK import factory downgrade) Hop up: Rotary G36 style Mag Capacity: Supplied Mid Cap 140rnd, High cap (optional) 500rnd Battery: Whatever fits. No lipo protection, and a good sized battery compartment. Plastic/Metal/Both: Steel, Glass re-enforced plastic. My opinion and overall comments: Out of the box the LCT G3 is something to behold. It's weight, and build quality are exceptional. The feel of the body is at a level that is normally only reserved for the very best AK's, Been made out of mostly a very generous thickness stamped steel. The gun feels real, Frighteningly so. It is the single best example of a G3 currently been sold on any airsoft market. The gun is finished in a professional gun blue, that has good scratch resistance, and is a nice deep matt black. This finish can be weathered to produce a used looking rifle. The plastic parts are made out of a very high quality glass re-enforced plastic. The moulds are good with some raised die seams, but no flash on my example. The stock is fixed to a steel end cap and has brass inserts for the steel bolts to hold into. It has a generous thickness of plastic, and is built to last. The foregrip is made from even thicker plastic, it is solid with minimal movement. The plastic parts do not feel like regular airsoft plastic. These are thick solid chunks, made to be abused and feel real. The plastic parts are almost identical dimensions to the real steel wood and plastic counterparts, and various owners have built LCT G3's using both real steel sets. The attention to detail is not perfect, the gearbox through body pin is not present on the real gun, The selector is single side only, and the blanking cap does not move with the selector. The mid cap magazines need some work to feed correctly. And there are a few gearbox niggles, The tappet plate on mine was warped and slightly too short, The cylinder head had a poor airseal, and the rubber washer had come loose. Easy to fix but those problems should not happen on a gun at this price. To further elaborate on those gearbox problems out of the box mine shot at 280fps. With a new tappet plate, and the cylinder head sorting it went up to 355fps. No upgrades were done, That was an out of the box drop of 75fps due to poor QC on my gun. I took my G3 out on the day or purchase, before I sorted these issues, and even at a leaky 280fps, it shot straight and had very good range. The gun felt snappy on a 7.4v 30c battery, and all of the controls worked perfectly. That been said the gearbox component selection bar the tappet plate is very good. Steel gears, Nice alu piston head, Good piston, O-ring airseal nozzle. As such the LCT G3 is not an out of the box package that you can un-box and start to play with and expect 100% performance. The issues it does have are all correctable with a little time. And the second part of this review after the basic review is going to cover that. The finish on the steel parts is also sharp, Some effort has been made to de-burr the steelwork, but it is in no way complete, and I would not recommend handling a new LCT G3 without gloves. Removing the burrs will take you about an hour with either a de-burr tool, a fine file, or some very fine wet and dry paper. And you will still find the odd burr that needs knocking back for the first few days of handling the gun. Overall rating: Out of the box. 9/10 - looks and build quality external. 7/10 - function, midcaps have a feed issue (correctable). 6/10 - internals. Correctable errors by LCT. In function the LCT G3 is the only top end solution for people wanting a steel G3. It has a few issues, but these are correctable. At it's price point these errors should have been picked up in QC and dealt with at the factory. LCT may at some point revise the G3 internals and correct any issue I have highlighted, and these problems are only relevant to my gun. I have a 1 gun sample and can not speak for the LCT QC department as a whole. The closest competitor is the Classic Army range that also see extensive modding to make it look real, but the CA gun isn't steel. The second part of this review is going to deal with the minor issues of my LCT G3 and how I went about making one of these guns into a beast without breaking the bank. First Fix. The very first thing you want to do to an LCT G3 is fix the burrs on the steel work. As previously stated it's going to take about an hour. And in that time you will get a chance to fully investigate the steelwork. You will see just how well it is constructed. The welds are substantial, and the pressed steel is done very well. No expense was spared on the body. Oiling some of the metal on metal components should also be done on the first inspection. The cocking lever will want some oil on the slides, And the spring inside that will want some sticky grease to stop spring twang when you slap it closed. The mag release will want some oil on the flappy paddle mechanism, and will need some working to remove a bit of the stiffness. You will also want to add a mosfet. A basic one was all I required for the gun. So I installed an Xcoretech X304u, and replaced the tamiya mini connector with deans. I also replaced 90% of the loom with silver plated wire. The stock wire is very good, and the loom is clean. Adding the fet gave me the opportunity to open the gearbox, at this point I did not know about the airleaks and thought the spring had been cut short to give 280fps. So initially I went in expecting to have to replace the main spring. The tappet plate was the first thing I noted, It was tight on the sector gear cam and grabbing at the cylinder head on retraction slightly. I had a spare ASG ultimate v2 tappet plate in the bits box and replaced the stock part with that one. This tappet plate was the correct dimensions. Retracting correctly without the resistance, and slightly moving the airseal nozzle forwards. The cylinder head was also tested for airleaks. And was found to be less than perfect. There was a slight warp on the cylinder wall caused by a slightly shallow and slightly too narrow O-ring groove in the cylinder head. I re-cut the grooves with a small file and put the rings back in with added silicone grease. This removed the warp and allowed the head to fully seal. I also had to glue back in the rubber washer. On my example there was no sign of any glue having been applied by the factory. I degreased the face of the cylinder head, Keyed the face with some fine wet and dry, and superglued the washer back into position. I also took the time to re-shim the gearbox. The LCT shimming was decent, but not perfect. The work to the gearbox took me about 3 hours. Most of that was the loom. The fixes increased the FPS considerably. Up to 355 fps. And I didn't change or re-cut the spring from that. A gun tech should be able to do all of the above fixes if needed as part of a regular service. Expect to have to pay for the tappet plate (£10), but the cylinder head should be correctable, and the mosfet is no harder to install than any M4 variant. So don't expect to pay more, or for it to take longer than normal. The mid cap magazines. It took me a little head scratching to work out the feed issue. The LCT mid caps would stop feeding, then if you pulled the mag towards you would feed again (you could hear the spring engage). After a little head scratching and looking at the parts some things are apparent. The feed tube for the Magazine is low compared to the roll-overs. And the internals have some movement and can roll slightly, This rolling motion and the force of the retention clip spring act together to further push the feed tube out of the hop unit, and allow the BB retention clip to partially re-engage. To fix this I filed the back side of the plastic internals where they interact with the tang on the mag outer. I shimmed the magazine internals to remove the rolling action, Using 5x6mm plastic rod roughly cut into pegs. And I reshaped the steel tang on both the front and back of the mag outer to allow the internals to ride as close to the roll-overs as possible. With that all in place the mags feed perfectly. It's hard work for the first mag, but once you know what to look for it's a 20 minute fix per mag. This error seems to affect a lot of the G3 midcaps. I am not alone in having to find a solution to the poor feeding issue. LCT may fix this problem at the factory, but at the time of writing this there has been no information provided that this is the case. Overall rating: First Fix repairs. 10/10 - looks and build quality external. De-burring and possibly weathering complete the look. 9/10 - function, midcaps have a feed issue corrected. 7/10 - internals. Correcting the airseal, Tappet plate, Mosfet, and shimming. The internals are still not Gucci, but the only way to get a 10 here is to be running a gate titan, on helical gears, with CNC shells. 7 is very good for what is in essence still a basic box design. Taking it to the next level. The LCT G3 can be modified with real steel components. Some fit without an issue, other require a little persuasion. This part of the review is going to cover taking this G3 and adding a wood kit, Real steel sight drum, A sling, and optics in 2 styles (stanag claw and rail adapter mount). A real sling should be purchased for this G3. The leather German issue ones are easy to find on-line. You can normally find them in used condition for £10-15. Just make sure you get everything you need with the sling. It should be complete with a snap hook at one end, and a removable rivet to hold the belt style end. Adjustment is done on the Snap hook end. And with the correct sling the gun will sit correctly on the shoulder in both the barrel up and barrel down position. Barrel down is the most comfortable as the cocking lever will not be digging into your back. A muzzle protector included with a sling is also a nice bonus. If you can find a sling with the muzzle protector then it will fit on the LCT flash hider without a problem, and help stop debris getting into the barrel on storage. Using the German sling is very easy, The weight of the gun is transferred directly through the shoulder. Using a more tactical sling might prove troublesome. The gun is heavy, and all that weight acting on your neck and shoulder with the gun horizontal will produce significant strain on the neck. The German vertical sling is the better option for a gun of this weight. LCT have used the correct size ring mount at the fore of the gun for the real sling, and the bar at the rear is also the correct width and height to make installation very easy. The LCT rear sight drum is not correct for German Field issue. It has no range markings. The correct drum will have number 1-4 stamped into it to show you at a glance the range you are shooting. 1 and 2 are 200M range settings, the 1 been the open sight for low light. 3 is 300M, 4 is 400M. The LCT one not been stamped is not an issue for most people, but having those marking makes the gun look and feel more real. A real steel sight drum is not expensive, £15-20. And will fit directly into the LCT mount with no modification. Just make sure you get the spring for the de-tent as the LCT drum uses a different de-tent configuration to the real one. LCT have taken the time to drill the spring hole on the mounting, The LCT drum doesn't use this hole but the addition of it by LCT is a clear commitment to detail and makes installing real drum effortless. I didn't get a spring with mine and had to find a spring out of a mechanical pencil! With the spring in place the real sight works as intended. The LCT windage adjustment screw will fit into the real drum so there is no need to pick up a complete drum with mounting materiel package. If you want to add a scope you have 2 options for mounting it: A rail adapter mount, These come in many lengths, and all do the same basic thing. They have 4 screw style clamps and only fit the gun in one way, with the cut out on the mount resting in a slot on the top of the upper receiver. Adapter mounts for the G3 and MP5 should both work. And when fitted it will be a solid mount giving you a section of regular rail to mount an optic. It is advisable that the mount for the optic should be the type with a through sight design so you can continue to use the iron sight without needing to remove the optic. Mine was £10 and fitted without a problem. Stanag claw mount, These are generally the more expensive mount option. And the most restrictive. There are 2 common designs. Stanag mounting holes that should work with all Stanag optics, The optic is bolted to the claw mount. Or a Stanag conversion plate to allow the mount to have a regular rail on top. These claw style mounts will work on the LCT without a problem. And the steel is both thick enough to take the clamp force and the upper is designed to make full use of the mount. There should be no issues with a claw mount provided it is from a quality manufacturer. Direct fit without any problems. If you are planning on using a claw mount with the conversion plate to a standard rail you will need very low optic mounts, or on rail mounts to keep the optic low, As the claw + a regular mount will be very high on the gun. The Mil surplus claw mount (1240--12-140-9932) will need the rubber grommet at the back of the mount removing. It's a 20 second job and is just pushed in. The UTG/Leapers mount is cheaper, but there is a casting issue with some of the variants. The rubber grommet on the mil spec one was cast in metal directly into some of the UTG/Leapers mounts. If you get one of these you will need to file that extra mount of metal away. There is also an Adapter to Stanag option. This system requires the G3/MP5 rail with the 22mm rail upper, then a conversion plate from 22mm to Stanag. ARMS do 2 plates that will make the final conversion, The ARMS 7 mount and the ARMS 19 mount. The ARMS 7 is very rare, but the 19 is available for a very high price so I don't recommend going this route. It will work out cheaper to mount a Hendsolt scope with a UTG/Leapers claw, or use scope rings with a 22mm rail fitting. Getting your wood on. The foregrip, is a direct swap part for the plastic stock one. You remove the plastic one by removing the pin near the front target post. The handgrip then pulls away from the gun top edge first. The Wood foregrip will go directly into the gun without modification, and you can use either LCT body pins, or real steel ones. The stock is much harder to fit. First you will have to strip the wood stock down into components. The alloy end cap on the stock will need fully removing, This also removes the recoil guide and spring. Inside the stock there is a hole that may need enlarging. a small sharp chisel should be enough to remove this extra wood and make the hole larger without needing a drill. There are a few video's on-line showing this process. You will also have to remove the metal end cap from the LCT plastic stock. It's 2 screws and the stock will be tight in the cap so expect a fight. You then need to mate the LCT end cap to the wood stock. A sharp knife, Dead-blow hammer, some files/rasps, and a bit of wet and dry paper should be all the tools you need. Line the wood up to the end cap and look for the points of contact, it's then a case of removing as little materiel as possible to get the 2 parts to mate. It is better to have as tight a fit as possible so if you have to hammer the stock into the end cap the final result will be stronger. Expect the process to take 1 hour, and when you get it to mate you can put the screws back into the stock and feed through the loom to mount the stock. If done correctly the stock and end cap will mate perfectly. You can use either the LCT body pins or original ones, both sets look and fit correctly. Overall rating: Upgraded Externally. 10+/10 - Looks as close to a real G3 as you can get without actually modifying real steel receivers. 9/10 - function, midcaps have a feed issue corrected. 7/10 - internals. Correcting the airseal, Tappet plate, Mosfet, and shimming. The internals are still not Gucci, but the only way to get a 10 here is to be running a gate titan, on helical gears, with CNC shells. 7 is very good for what is in essence still a basic box design. The external additions are purely cosmetic, and should only be done if you want that full wood look. The fitting is straight forward and not as hard as with other models of gun, LCT have done a fantastic job of keeping to the original dimensions of the real gun and it makes the conversion process almost effortless. Final statement. LCT have done a good job with this gun, It is externally unparalleled. Internally there is room for improvement, and the mag issue is correctable. The gun is almost perfect, and if LCT got the gearbox and mags right it would be perfect. With some basic tech skills this gun can be classed as an intermediate project. You can throw money at it and replace parts, Or you could leave it stock just correcting the basic problems. Doing either will give you a gun that works, and looks fantastic. This is not a gun you can buy and use from the factory. You will have to modify the mags at the very least and perhaps sort some minor gearbox issues, Until LCT correct these issues. I would recommend the gun to anyone that is competent. But I would not recommend it to a new player, or to someone that can't get there head round sorting the mags. The mags are the big killer, And should be your main concern if you are looking at the gun. I have given you all of the information I have about correcting the problem and it has worked on my gun. Just remember it is a 1 gun sample and other problems may be apparent, or I might have an early gun and the problem is already fixed.1 point
-
Snow wolf SW-020C aug carbine, they good?
Druid799 reacted to Compulsive Reload for a topic
Head just exploded haha, I'm sure I'll grasp it once I have it. Take all the time you need, probably be a week or more for it to come due to the technical services I have requested. Cheers1 point -

De-Railed discussions / Rants etc
Tackle reacted to ghostwalker for a topic
For anyone debating one of the ICS pistols. I can assure you they are solid shooters. Fairly decent range for an out of the box non tm pistol, decent kick. Come packages with a thread adapter and bigger back strap. Chrono around 300ish on abbey red gas. Apart from an air bubble problem that formed in the mag and was quickly fixed. I can safely say one of the better pistols i have used. Yes i have the BLE XAE but thats just the fully ambidextrous controls version. Been running mine for about 4 months now.1 point -
1 point
-

The 'What have you just bought' Thread
Duff reacted to sonofsammo for a topic
Tbh, it took longer than I expected.....1 point -
Fwap fwap fwap ! I just did a man wee ! 😵😍1 point
-
Great morning of airsoft. Grenade and pistol kills galore today. Highly unusual for m
Duff reacted to ghostwalker for a status update
Great morning of airsoft. Grenade and pistol kills galore today. Highly unusual for me.1 point -
Lovely work Cheers G1 point
-

Possible to get a proper trigger break?
Duff reacted to Adolf Hamster for a topic
Seems strange, i mean apart from the gate titans i cant think of an etu that would have a timed trigger delay, although plenty lock to semi only.1 point -
Snow wolf SW-020C aug carbine, they good?
Iceni reacted to Compulsive Reload for a topic
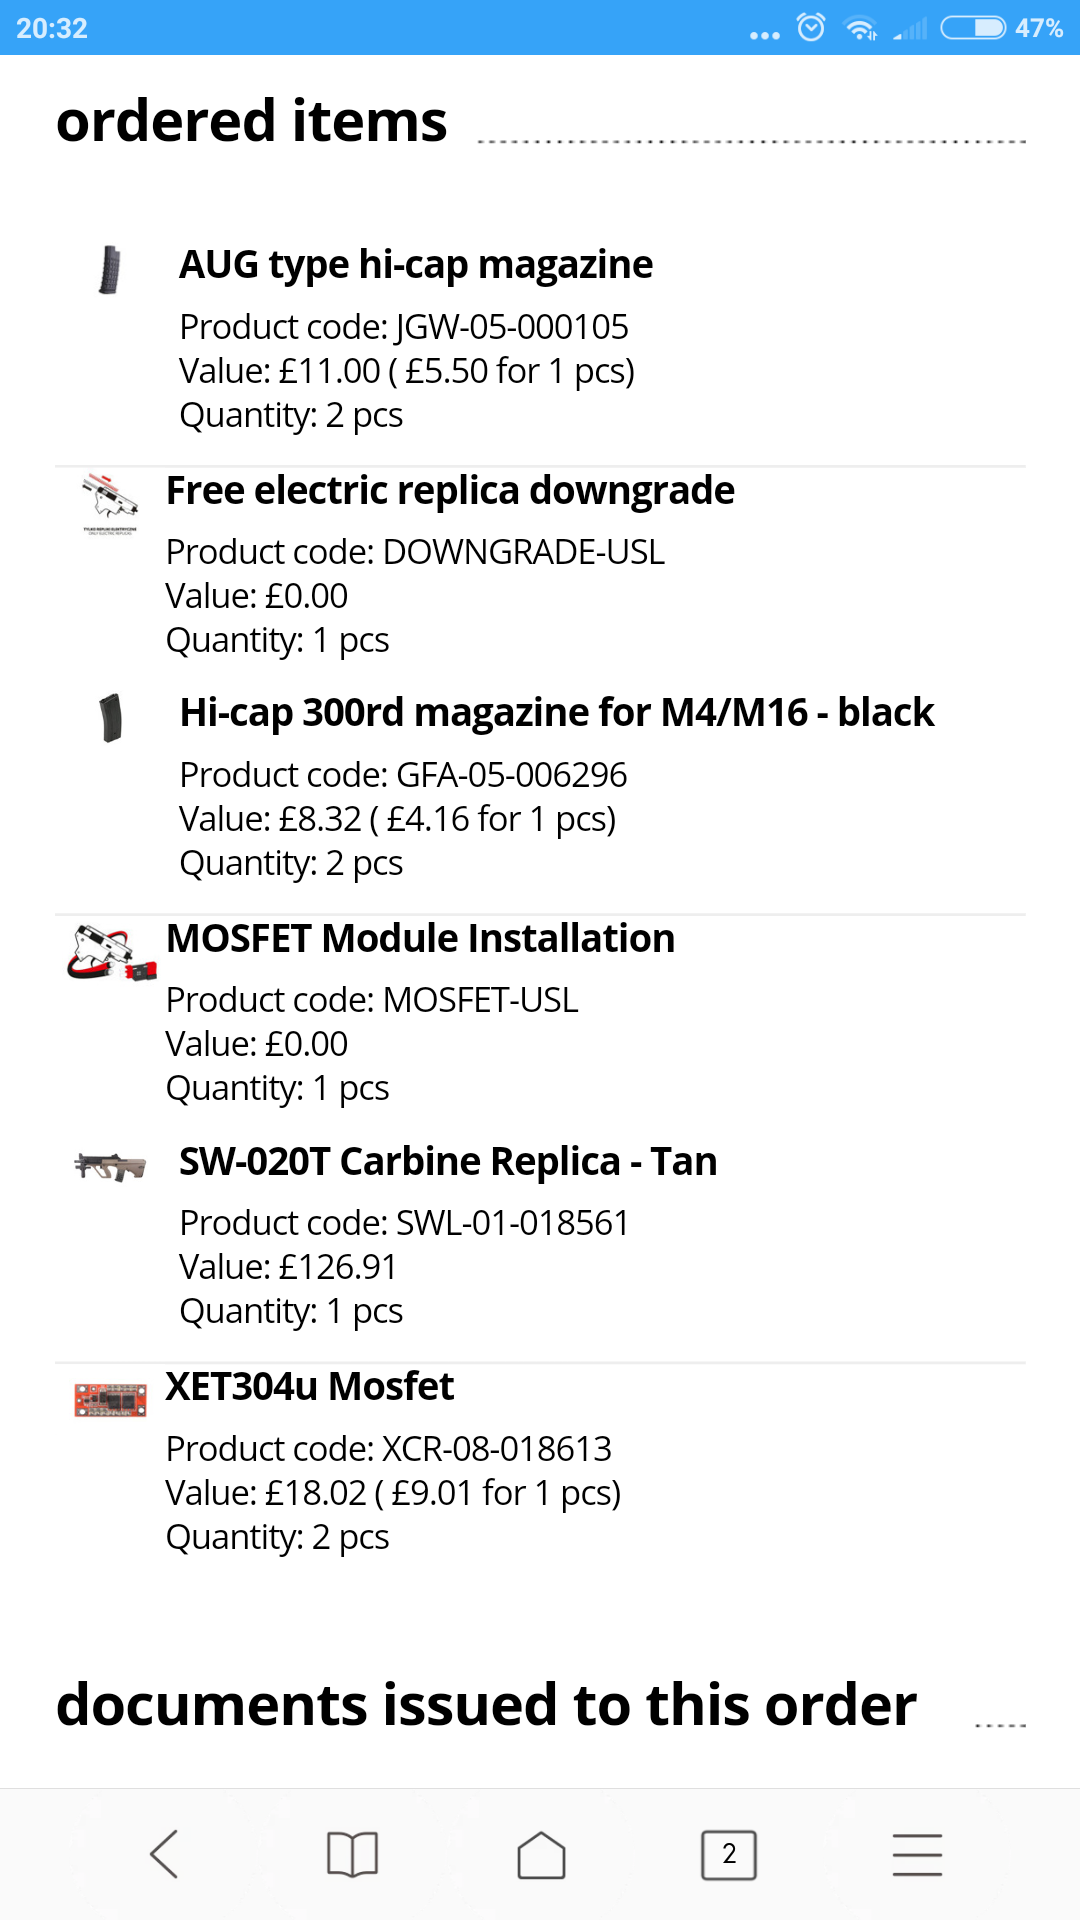
Okay I see, still abit confusing to me though. I may get gunfire to do it if I can explain where I want it, do I need a wireset aswell as it doesn't look like it came with one? I get the mosfet install for free and a downgrade service, however they seem to be cancelling out the 10% discount code which is annoying, don't know whether to order for now and tell them about it as I'm missing out on around £18 off. Cheers1 point -
If they release that with the through mounted grenade trigger, and the grenade unit I'll be all over it. Chances are one of the companies will jump on it, there have been several new variants from China recently, I quite like some of the wire cutter models. So one of the manufacturers is definitely working on AUG parts. All of the new variants are ARMY branded and use what I regard as APS bodies. So chances are it's the same company. http://www.iwholesales.co.uk/211135-army-raptor-7-ris-aug-black-r9071 point
-
Snow wolf SW-020C aug carbine, they good?
Compulsive Reload reacted to Iceni for a topic
Tan. Don't bother with black. There are enough black guns out there and the aug looks best with the colour variations. Tan is also easier to scrim if you wanted to use it outdoors. Black on the other hand requires a lot more work to hide.1 point -
If you could do a tutorial that would be outstanding , I’ve got a JG that I bought from RSOV back in the pre-UKARA days so it’s got to be 13-15yrs old ? And still running like a train !👍1 point
-
That picture is actually mine. lol I put it on here a few years ago! It's the bar from my Aug a3. It shows my first attempt at the mod, the new cuts are in white. The A1 modification are in better positions and look cleaner. There is an order you must do the cuts to get the correct depth and position for the trigger. The push rod doesn't go. There is nothing to break on it. All it is is a plastic and steel bar that pushes through the body onto the gearbox. And on the gearbox it pushes on a regular trigger. The force needed to break it would break any aeg trigger. The bit that appear to have a fault is the contact points on the gearbox. Semi auto is normally fine, but full auto can require a little balancing on how far in/out the contacts sit. Too far out the gun will go straight to auto, too close to the gearbox you won't get full auto. It's very easy to fix.1 point
-
Does just look like a very meh non discript ‘glockish’ looking thing , but I’m inclined to say nothing wrong with it mechanically as I can’t see firesupport shifting a lemon on to there customers , Now any business with ‘BBgunz’ or any other variation of said title in there name ? Yup 100% they’d stiff you with a PoC ! 🤦♂️1 point
-
lol no, The way I do it doesn't involve stripping the gun, and you still have full auto. You just cut a pair of notches out of the safety bar. One is a triangular groove cut with a triangular file halfway between the safe and shoot setting. That adds a detent to locate the new position. The other is the removal of a small block of plastic with the scalpel. This allows the trigger to move, but only as far as the semi stop. When done it add a semi only position to the safe/shoot bar. You can still click that bar over to the standard fire position and still have the standard semi/auto trigger like normal. 30 minute fix, and doesn't require opening the gun or messing with the gearbox. I think I found the fix on an older forum that has long since vanished (brotherhood of AUG). I should at some point do a tutorial on it as I don't think the information to make the mod is available on the forums ATM.1 point
-
Snow wolf SW-020C aug carbine, they good?
Iceni reacted to Compulsive Reload for a topic
Thats okay then. Noise doesn't really bother me honestly so I probably won't. Yeah I really need to learn how to add a mosfet, seems like a standard and something that would be really beneficial considering It's semi only I'll be using. Will probably get the cheaper xbox tech if it comes to it, need to get a soldering iron also as haven't got one. Even the tm eh? Ah well that's easy enough for the bb's then anyway. Cheers!1 point -
Snow wolf SW-020C aug carbine, they good?
Compulsive Reload reacted to Iceni for a topic
If you want it for CQB only then you can swap the upgrade path. Barrel and hop rubber are a much lower priority as the engagement distances are much shorter. The piston and cylinder heads are only needed if the noise is bothering you. Augs are noisy, but only to the shooter. Everyone else hears a normal sounding gun. Your head and chin are directly over the piston. And you feel and hear every shot and will go battle deaf with it. I'd still put a mosfet into it. It doesn't need to be an expensive model. I run one of mine with a gate nanohard (£30), and the other with an Xcoretech x304u (£15). It's just a bit of contact protection because of the batteries I recommend for the AUG. The cheaper solder in model is easier to find space for and should go straight in behind the gearbox plate if you are good at soldering and wire management. I can show you a picture of how mine are done if you want that information. 7.4v 30(60)C 2200mAh 66amp (132amp burst) https://www.componentshop.co.uk/7-4v-2200mah-30c-continuous-discharge-airsoft-lipo-battery.html 7.4v 35(70)C 2200mAh. 77amp (154 amp burst) https://www.componentshop.co.uk/7-4v-2200mah-35c-continuous-discharge-lipo-battery.html Whilst only 7.4v the amps they provide are sufficient to burn the shit out of the contacts. The advantage of those batteries is the gun is very snappy on the trigger pull, And they run absolutely cold. The BB issue is caused because of the magwell design. The bb's that are left in the feed tube roll across the top of the magazine then into a space that runs round the edge of the magwell and into the body. A bit or plastic or foam solves most of the issue. You just have to be quick to pull the mags, and never do it with the gun sideways. If BB's do get into the body you split the gun in the middle, Invert the gun, and just shake them out. It doesn't take much effort to remove them. The TM still suffers from this.1 point -
Yeah I wasn't talking about an HPA DMR but an AEG. Ah right. Yes they are squishey but I was referring to a mosfet that can be programmed to allow only one full trigger pull and release once separated by a second. If I have to have a mosfet for a DMR at Battlelakes I'll leave it at home cos as I understand it theyrr expensive as fuck and so far my Sig cost me £66. Am I right in that it isn't worth doing on such a low end gun?1 point
-
Possible to get a proper trigger break?
Duff reacted to Adolf Hamster for a topic
I think he means more the solid "click" you get in a trigger on a real gun, or on a gbb as opposed to the squishy nothingness that you get on most aeg triggers.1 point -
If you're asking me: Varies from FCU to FCU. I don't know of ones that specifically allow trigger delay, but I don't have a huge amount of personal experience with solenoid HPA anyway. HPA is wasted on a DMR that needs a 1 second delay though, no matter how cheap or expensive it was.1 point
-
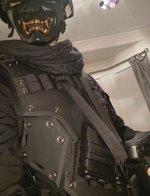
Load-Out / Loadout Picture topic
Polluxtroy69 reacted to ghostwalker for a topic
Found a new pic of me from a couple of weeks ago. Love this pic and gives a close up of the tears of the sun impression thats still wip.
1 point -
pre gameday prep underway. You all know the drill charge this, load that, lose someth
P13 reacted to ghostwalker for a status update
pre gameday prep underway. You all know the drill charge this, load that, lose something, find something you forgot you had. Rinse and repeat.1 point -
1 point
-
The 'What have you just bought' Thread
Huxley reacted to Compulsive Reload for a topic
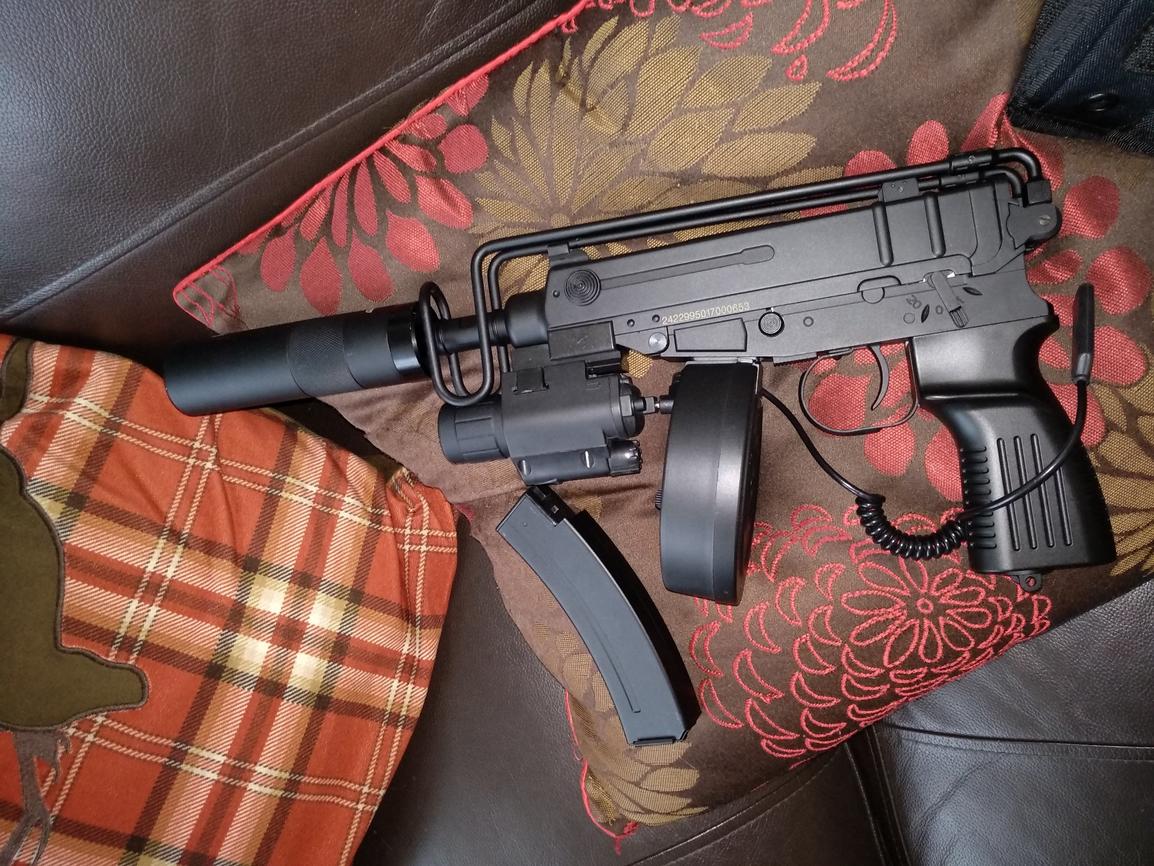
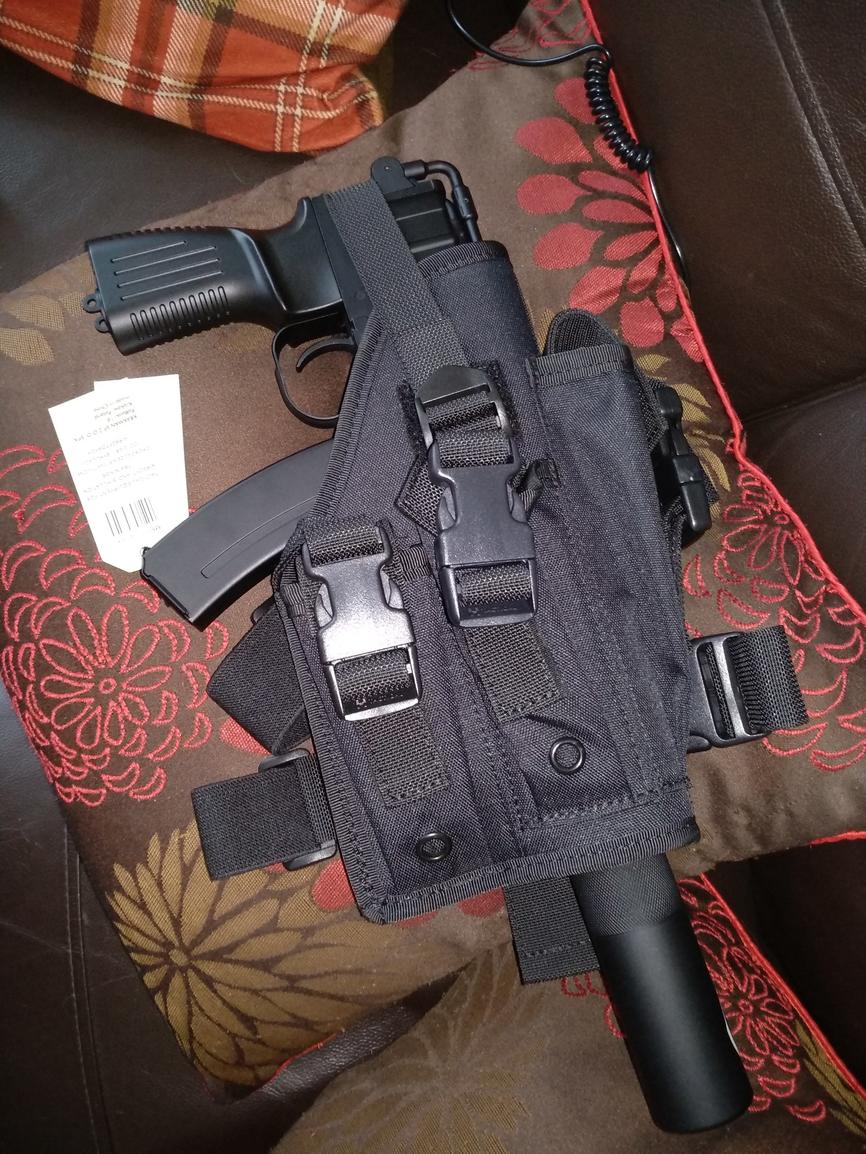
JG vz61 skorpion, got it the other week added a few bit's 👌
1 point