Iceni
-
Posts
1118 -
Joined
-
Last visited
-
Days Won
8 -
Feedback
0%
Content Type
Profiles
Forums
Buy a Patch
Classifieds
Everything posted by Iceni
-
My new lapping paste arrived

Stuff seems legit. And it's easy to clean up been water based.
Been rodding a barrel all evening and the thing is gleaming internally!-

-

It's an ebay set.
Took about 2 weeks to arrive.
I was lapping a stainless ZCI. It took time but otherwise had no trouble cutting at all.
I'm going to try get some pictures of the inside of it at the weekend, once I get it to a stage where It can be shown off. But for a single evening of just testing them out they have exceeded what I expected.
Far easier to clean than the oil based lapping pastes, Just as well graded, And they become a slurry with a little water. You also don't need a lot for it to cut well. So all in all it's a decent product.
https://www.ebay.co.uk/p/7x-THK-Diamond-Plus-5g-Water-Base-Polishing-Lapping-Paste-Pastes-Compound-0-25-5/863501423?iid=182481829920&_trkparms=aid%3D222007%26algo%3DSIM.MBE%26ao%3D2%26asc%3D20160323102634%26meid%3D809d964fe4554f3c848359d0099b5794%26pid%3D100623%26rk%3D2%26rkt%3D2%26mehot%3Dlo%26sd%3D152464926858%26itm%3D182481829920&_trksid=p2047675.c100623.m-1
-
-
Just seen one today that got a report. Guy selling 3 batteries. 2 look in good shape, but the 7.4v vapex lipo (black) is dangerous. Wires cut short, re-soldered, Heat-shrink not fully covering + on battery exit. Swelling, Knackered heat-shrink insulation on battery, Burn mark on the deans..... There is only 1 place that battery should go... and it's not in a gun.
-
Bevel gears have a look on AK2M4. He has the ZCI ones for £5.50 each.
https://www.ak2m4.co.uk/internal-parts/gears/zci-9-tooth-bevel-gear -
Some dude put up more pictures of my last shoot! You can see all my gear in this one
-
Went out Saturday, Oh my the G3 is shooting well.
2 confirmed kills at 65m. Both went down to a single aimed shot on 0.3's. Felt like a sniper.
-
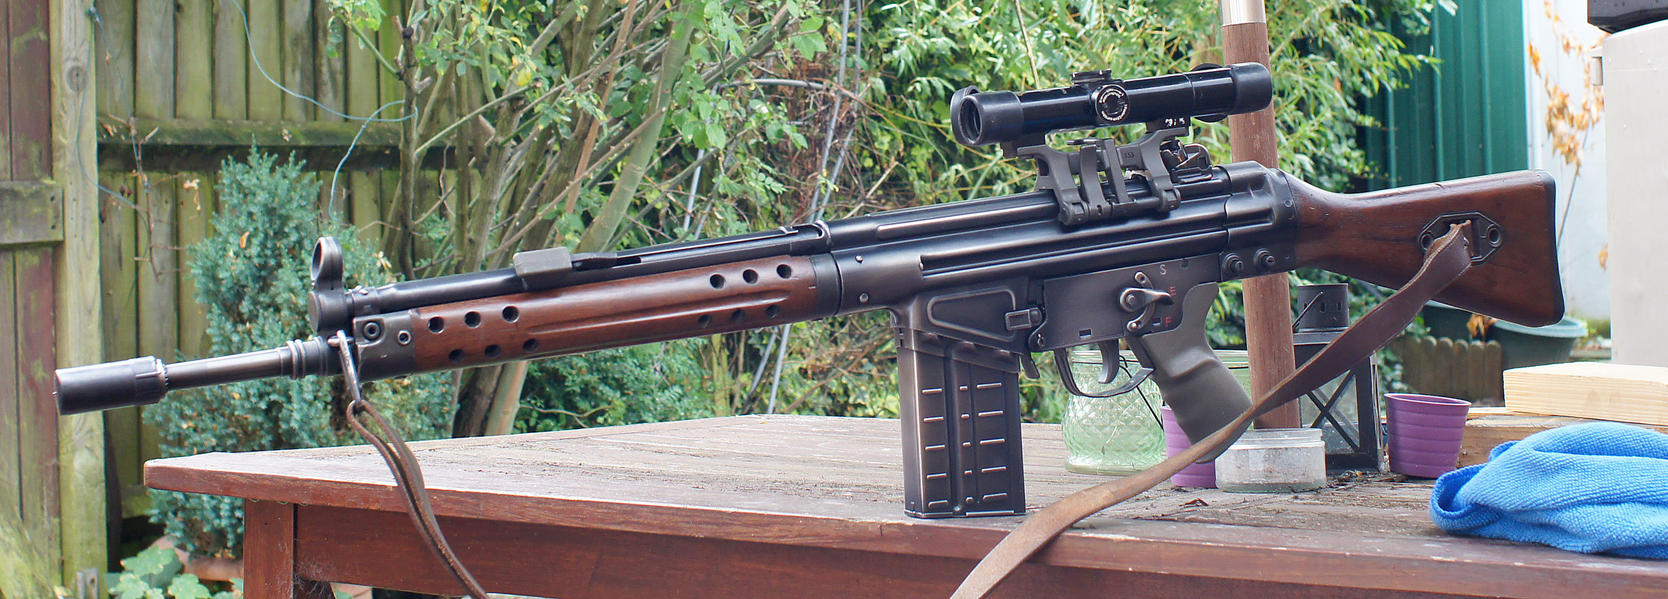
One from my last game! @ the Grange Coventry. Flecktarn + G3 with Hensoldt Model 1.
-
It's an LCT G3 in olive. With a wood kit from Zib militaria, Real sling, Real rear sight drum. The optic is a Hensoldt model 1 on a stanag claw mount again real steel. You can get the base gun for £329 from fire support. It's an all steel gun, so very heavy. https://www.fire-support.co.uk/product/lct-lc-3a3-s-g3a3-green-od-aeg-airsoft-gun I did a review for it, and it highlights some of the flaws of the gun.
-
Spent a few hours on the air rifle range this evening with the G3. Scope is set, Was happily plinking logs and the bigger targets on that range... All the PCP airgunners looking at me like an idiot for having a gun that made them have kittens. I may have walked past them all with the gun in a bag, dropped the mags on the table, thrown in a mid cap quick, and slapped the cocking lever. Before leaving it on the table for a minute or two.... Mostly people were just looking down the table expecting all hell to break loose any second.
I then shot it, and they realised it was airsoft lol.
Gun is shooing past the 65 meter mark and well into the 70's. Just needs a few K's bb's passing through it to get the rubber where I want it. Not a single misfeed.
And I may of put a deposit on a PCP air rifle. -
The new scope.. Sexy Sexy Sexy! @Druid799
-
Love it when I get to see a bit of ankle every now and again.
-
Sort of gun you wouldn't mind taking out for a walk.
-
Ebay :D:D Hensoldt model 1, with stanag claw mount, stanag picatiny mount, case and cleaning kit..... boom! @Duff @Trojax88
-
Feeling Sexual.. Found a scope on ebay, Won auction, for a surprising low price.
G3 with period glass baby! -
It's not much heavier than the plastic kit. I'll drop it on the scales and get a measurement for you. And I can get a crane stock 7.4 2000mAh into it without modifying the stock at all. It's tight but there is a battery in, in those images.
-
I don't like the scope at all, but it's functional until I can get the correct one. I want the claw mount with the z-24 but there pretty hard to get cheap so It'll be a purchase for next year. http://www.augustine-waffenteile.de/shop/MP5-HK94-MP5SD-T94/Optics-and-sights/Hensoldt-Z24-Scope-Optik-Claw-Mount-9mm-Nato-9-x-19::315.html?language=en
-
Finally got pictures of the G3 in wood done! More pictures in the Guns picture thread.
-

I should ban you for posting porn!
Good lord man! Gorgeous!
-
- Iceni and Adolf Hamster
-
 2
2
-
-
-
-
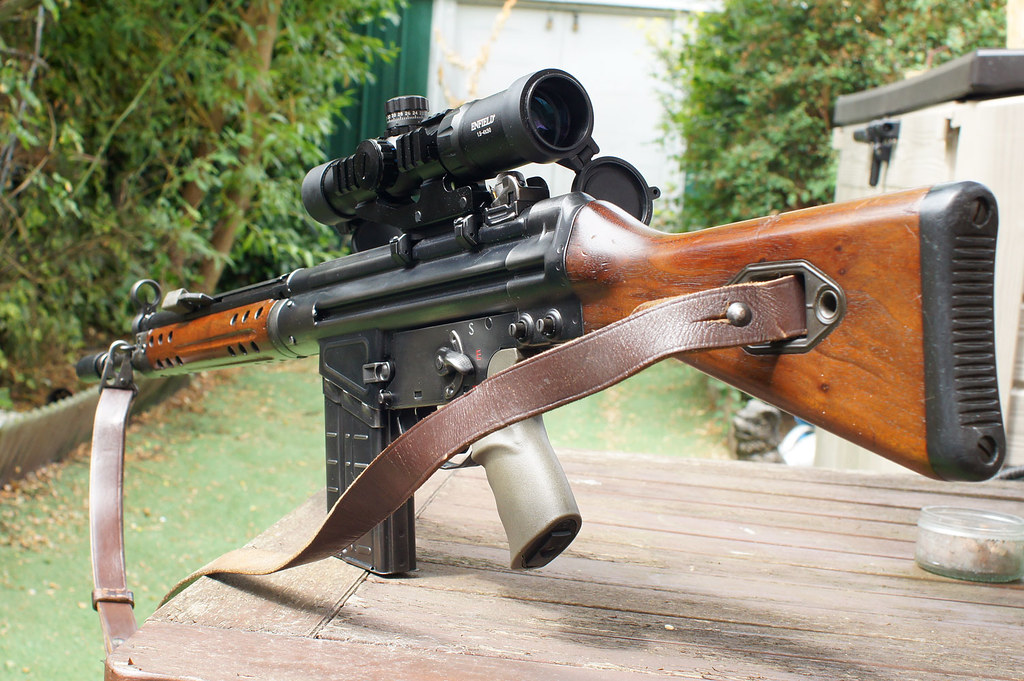
@Duff @Trojax88 LCT G3 with wood, Realsteel rear sight drum, Realsteel sling. Cheap 1.5-4x30 scope. Wood foregrip is on the second coat of oil as it was in poor condition on arival, Stock hasn't been touched.
-
went to buy wood oil.... came back with a scope.
-
Wood kit for the G3 ordered
Tankfest was good, but the traders were a little generic. Epic militaria were the only ones with a well catered for stand.
Got me a German 1980's M1 helmet, And a new pair of Altbergs as well
- Show previous comments 1 more
-
It was just a sea of cheap gear, Loads of it was all the same. It's like they took gear to sell to kids rather than to people that want nice gear.
There were some bargains, The son got an osprey Mk4 for £20 without plates. And my Altbergs are new condition for £45. We would of paid the same price + postage online so it's a minor saving.
There were some tiedye T-shirts for sale.
You know exactly what I mean tho, It would be nice to see someone take the initiative and take decent gear priced to sell.
My hands down favourite stall was the shooting range. Imagine 4 £50 blue two tone Mp5's. Chained to a 5meter shooting range, With a couple of steel targets at the bottom... No prizes, no take away target paper. Literally here's a mid cap, Shoot that way, £5 please! and the stall was rammed. That stall was just printing money. -

-
There was one on the compound corner selling spent brass like it was gold.
He was like a Gypsy Gandalf, Dirty grubby looking bloke, who probably spends more time sniffing brasso and watching porn than doing any real work.
Most of the brass was bulk purchased as well. Typical junk aimed at 13 year old boys.
-
Urgh, USPS have tracked my parcel all the way to London, Royal Mail then don't update its status for 4 days. It could be in customs, it could be out for delivery tomorrow.... Who knows.
In other news the matt clearcoat on the M4 is gassing off. It's gone a lovely shade of USA army green. Courtesy of the plastic soldier company sprays. Spot on product.
http://theplasticsoldiercompany.co.uk/index.php?main_page=product_info&cPath=98_99&products_id=527 -
There were 2 options on the stocks. A basic wire one that rotates the wrong way so you can still use the gun with it folded. https://www.evike.com/products/28966/ And a more advanced one that collapses the same way, and has multiple positions. https://www.evike.com/products/29370/ I have the basic one as an original part of the GR300. I wanted it rear wired with the AR stock because the front handguard is really limited in terms of space, especially if you want to run a fet as well. It is possible, I just didn't want the hassle. The front handguard on mine is also pretty loose with age. So it needs the screws in it to stop it sliding about. Originally they just used friction with a couple of the holes been for swivel sling mounts. I use those sling mounts for screws and have the ring at the front so that whole area can be locked down. So If I wanted to use the front I'd need tools to swap batteries. I quite like the AR stock as well.
-
Mostly working on this this week. It's due a decent paintjob and a few parts. I have the wire stock, but prefer the solid one. It's just a straight swap so no big deal.