Leaderboard
Popular Content
Showing content with the highest reputation on 11/12/24 in all areas
-

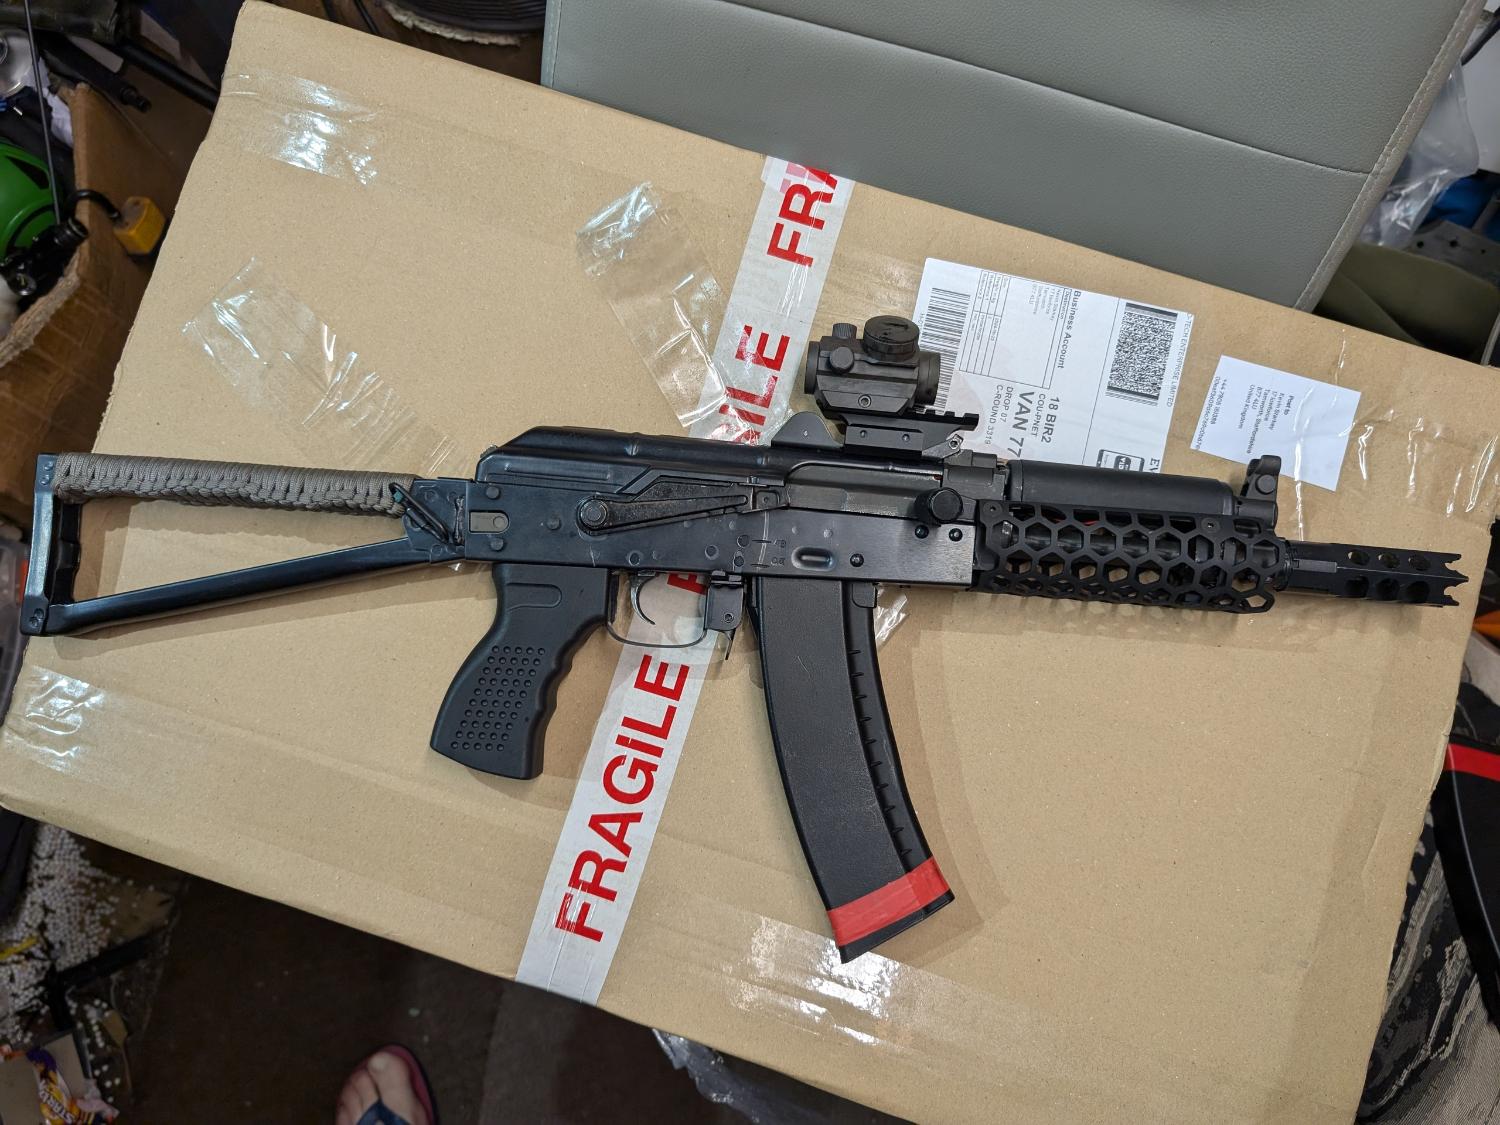
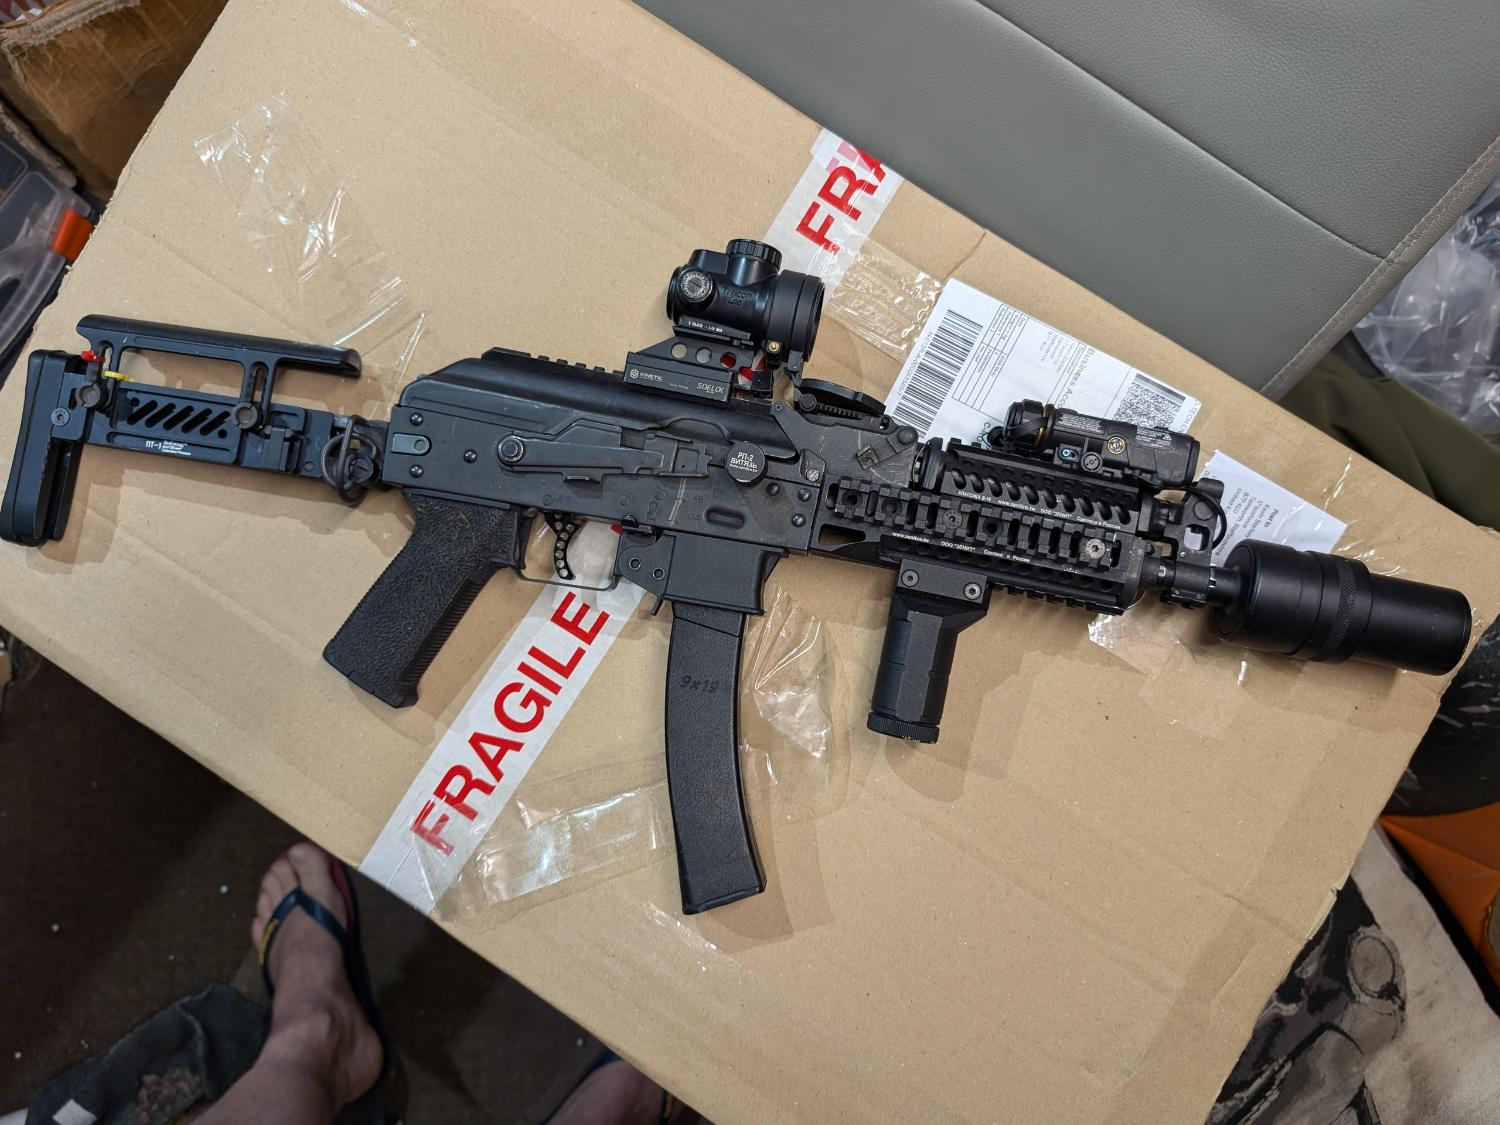
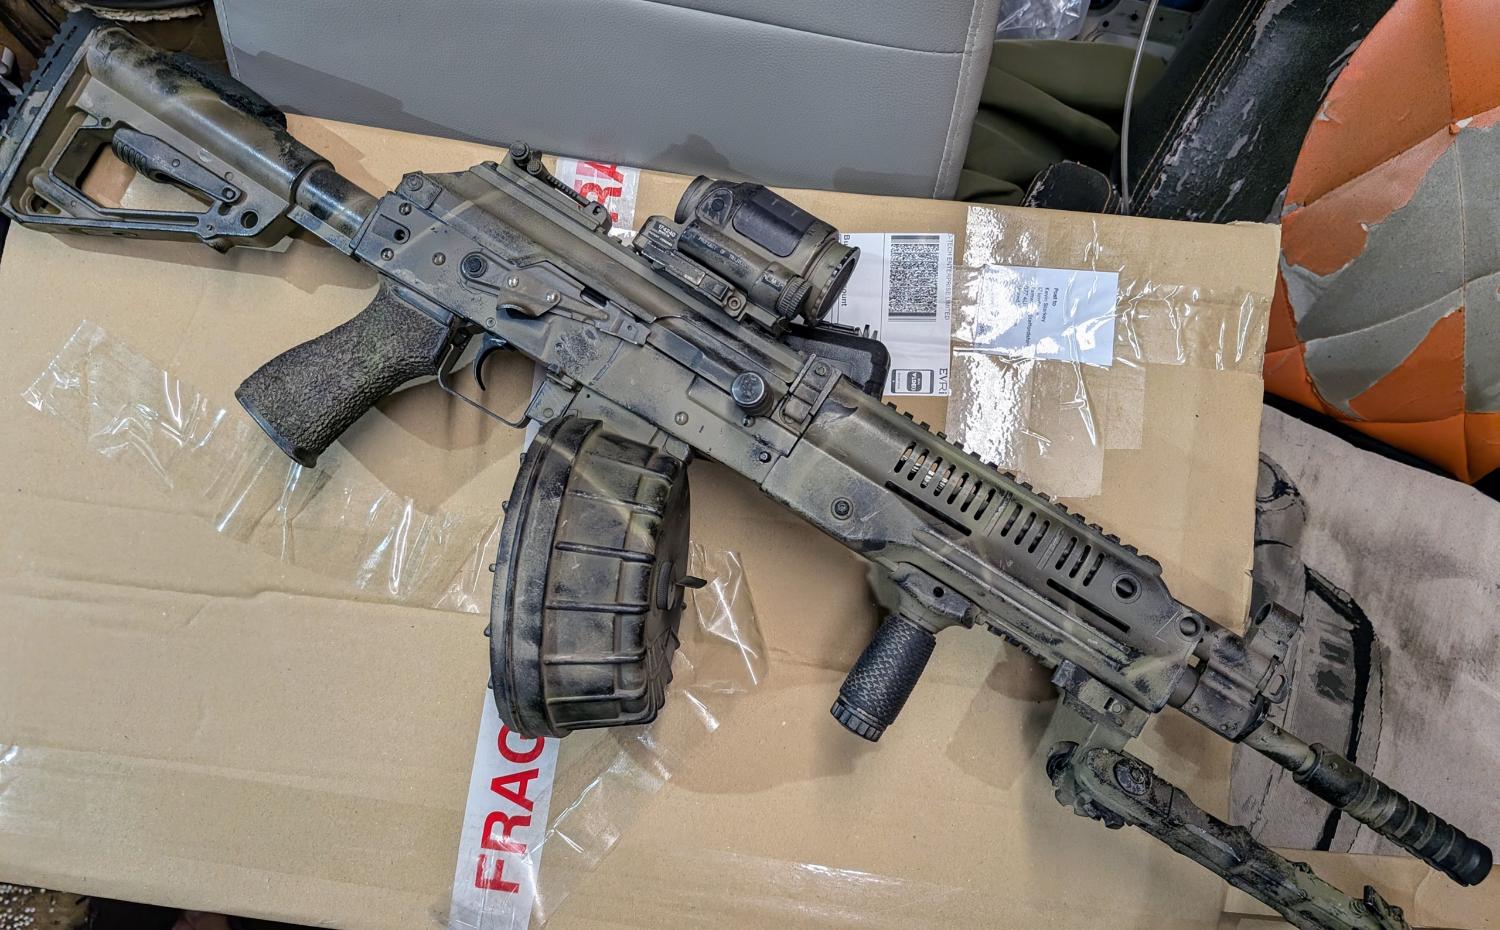
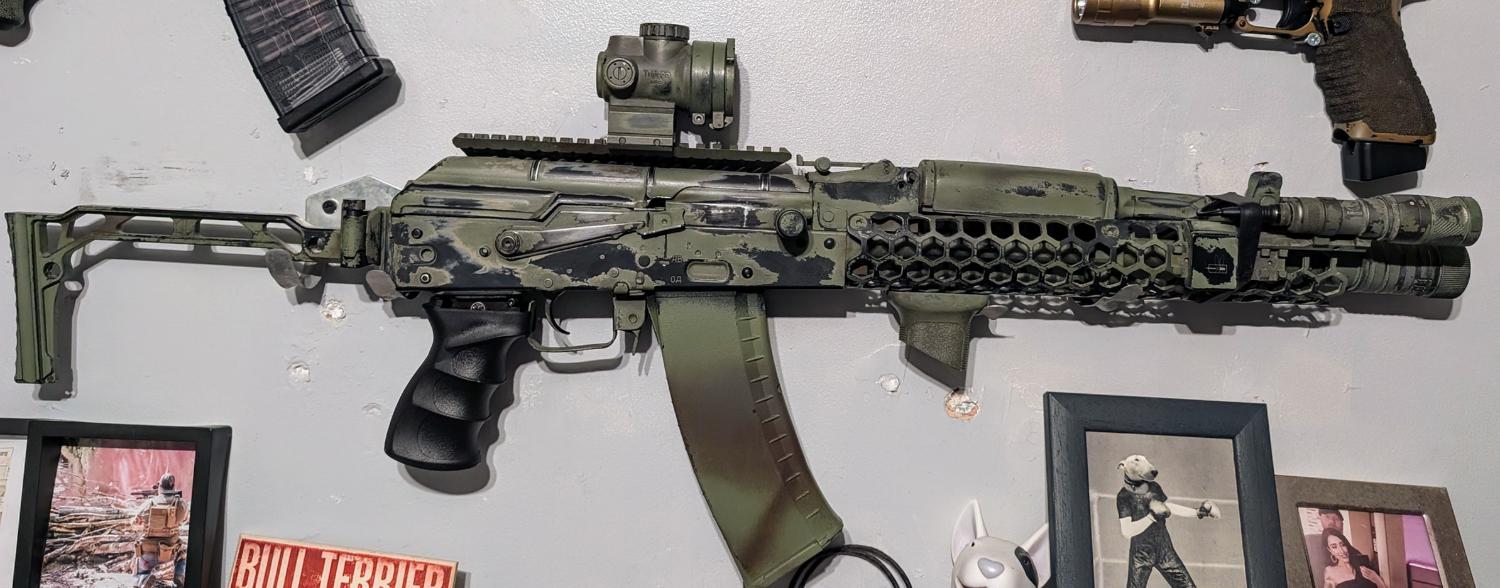
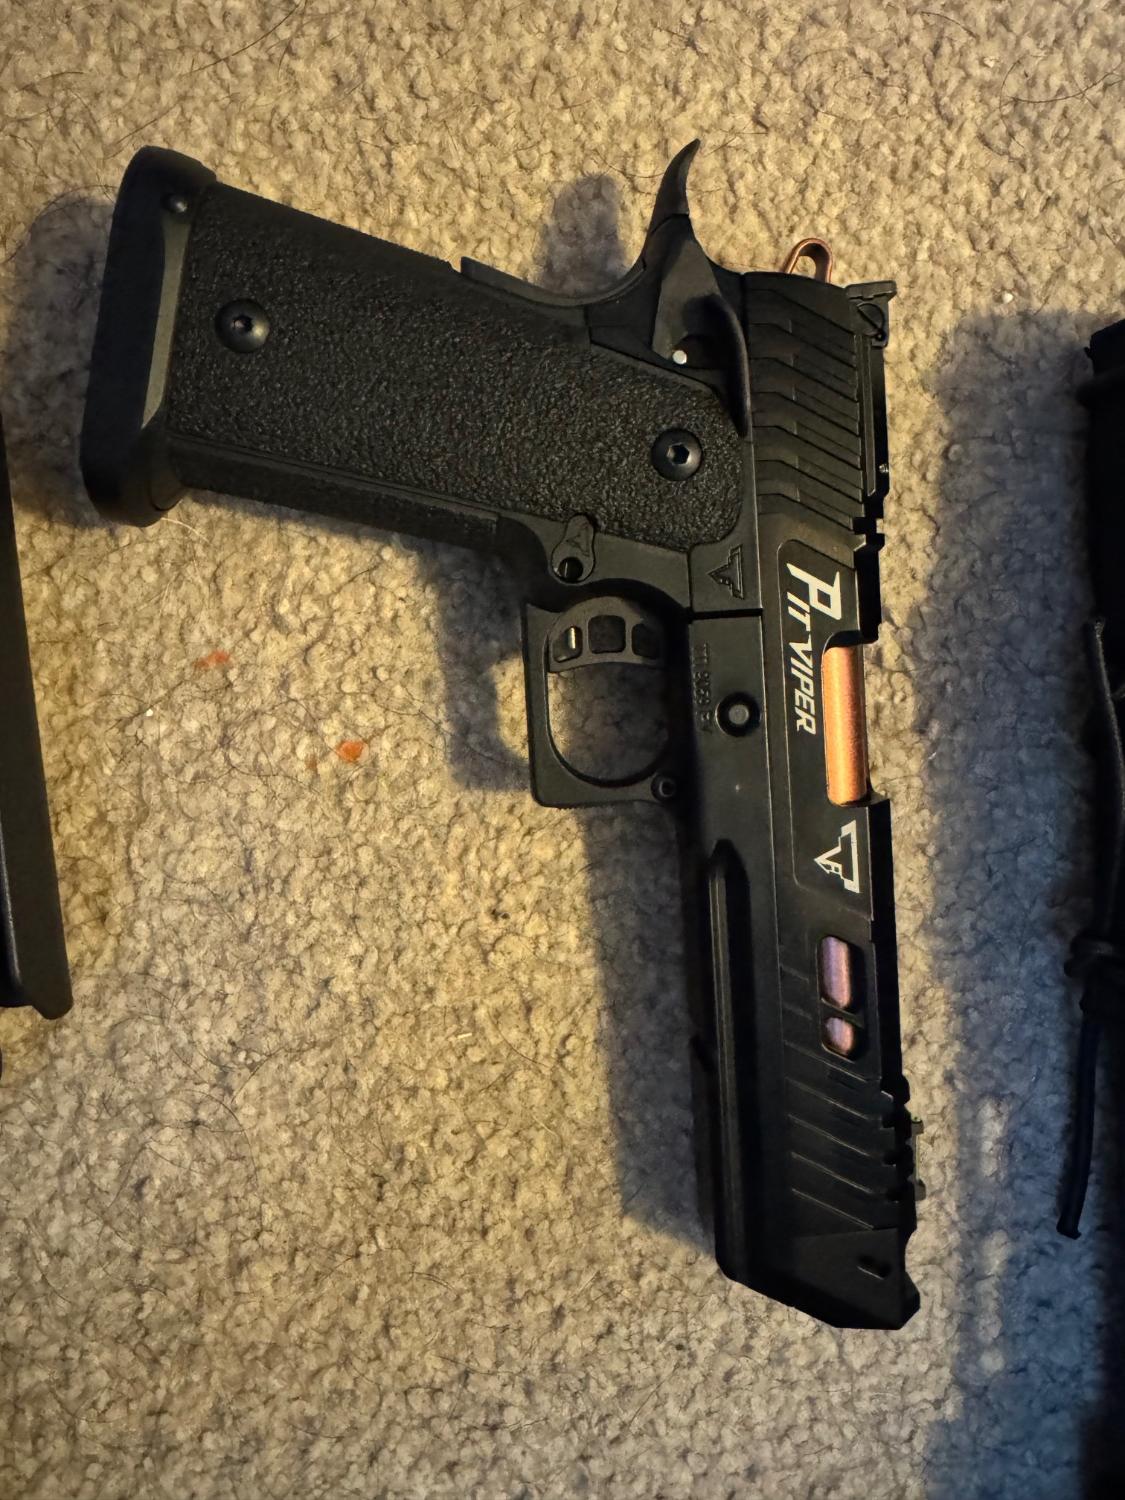
The 'What have you just bought' Thread
ak2m4 and 3 others reacted to Speedbird_666 for a topic
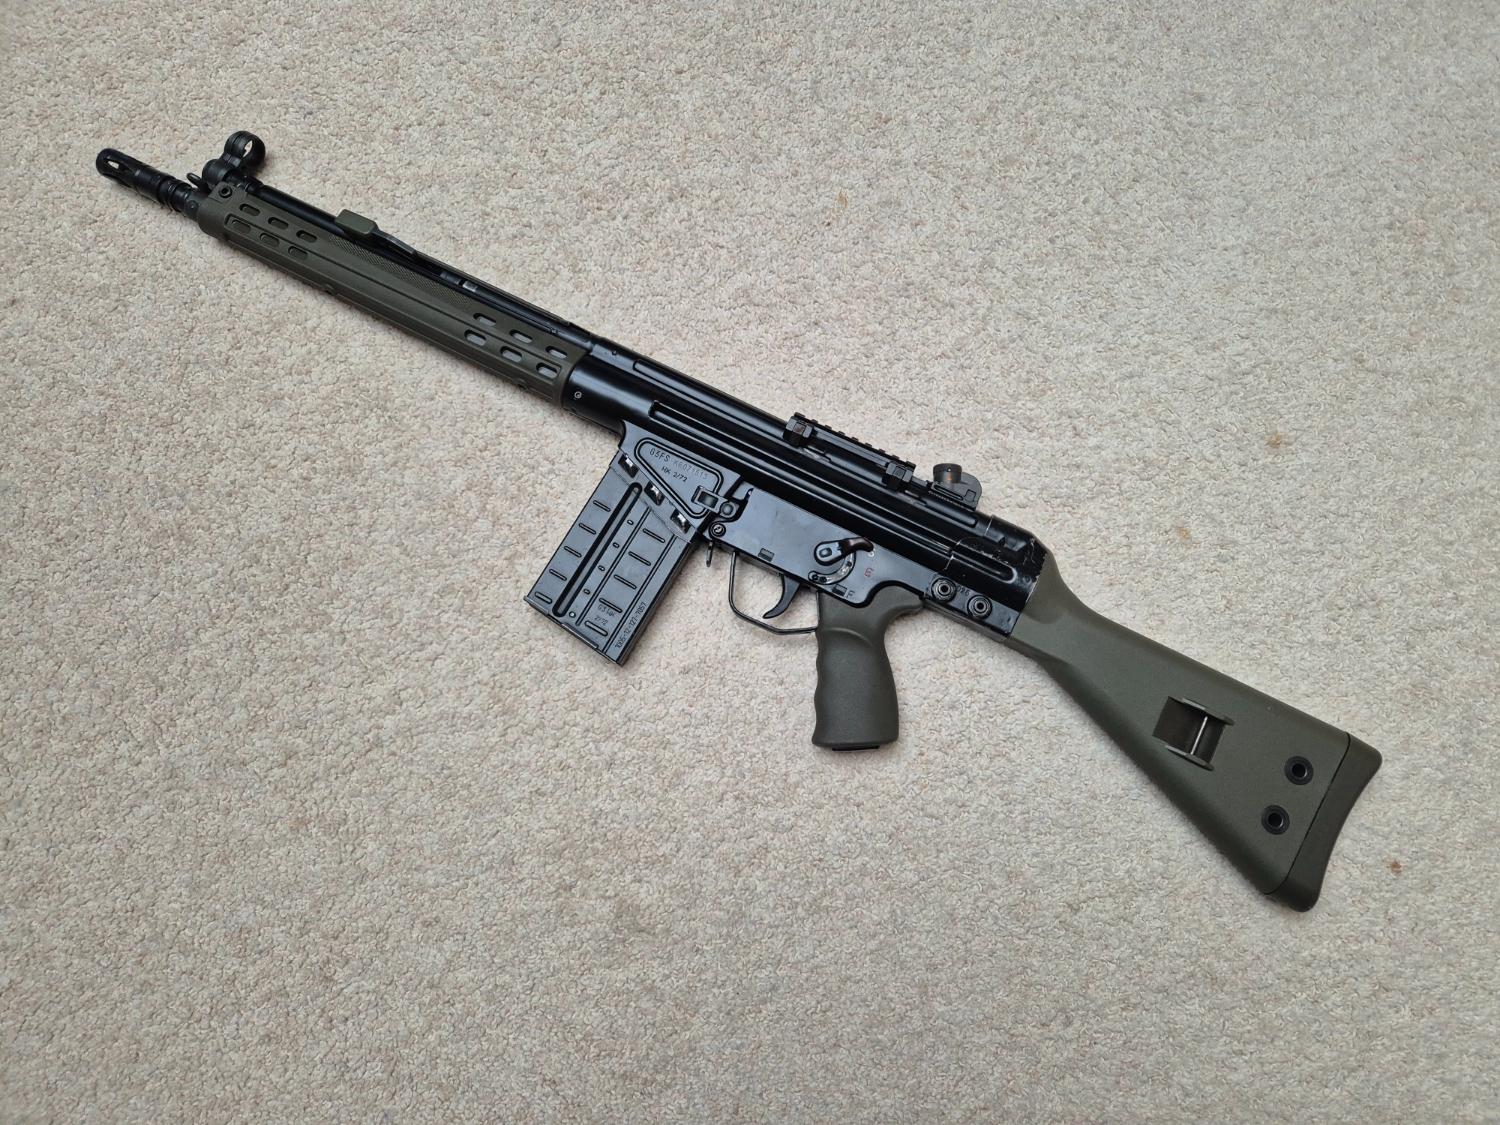
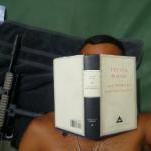
Alright - let's see what all the fuss is about... 4 points
 -

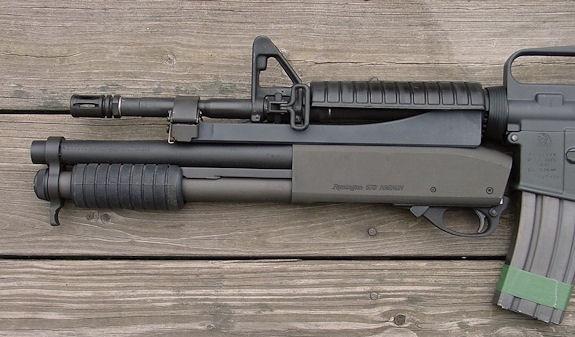
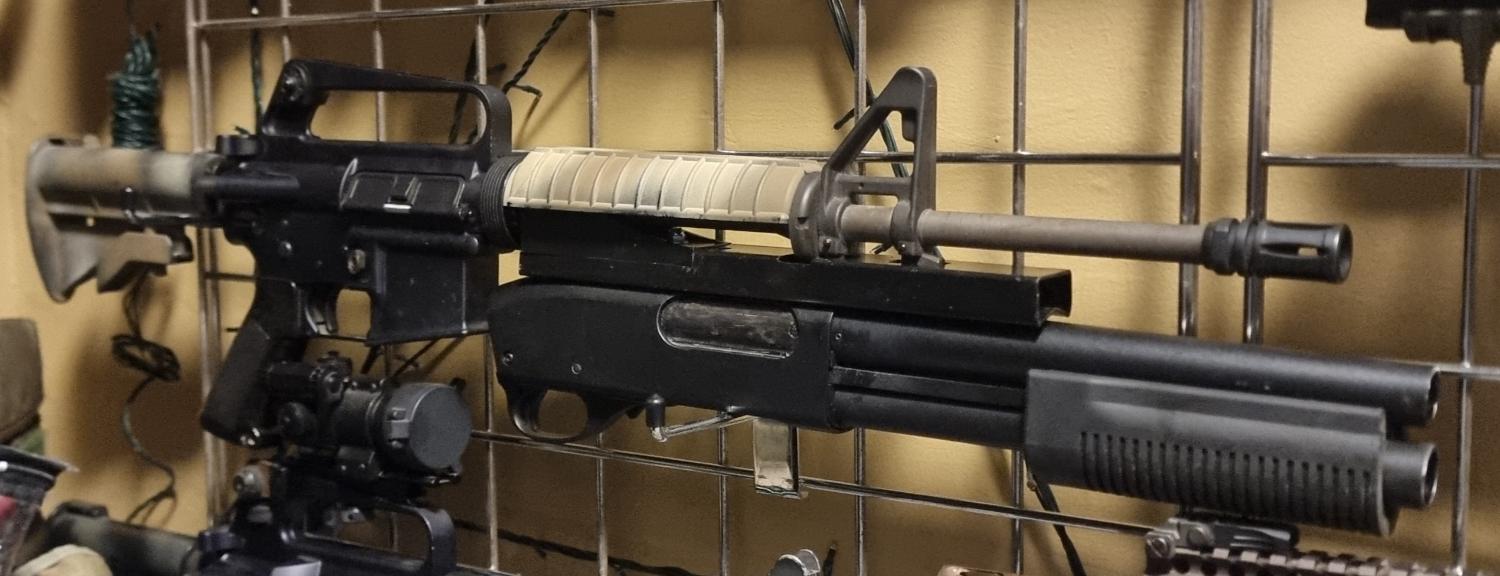
Custom Build : Barrel mounted Masterkey.
Egon_247 and one other reacted to VictorFourTwo for a topic
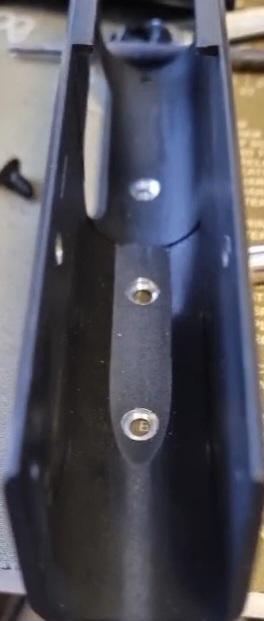
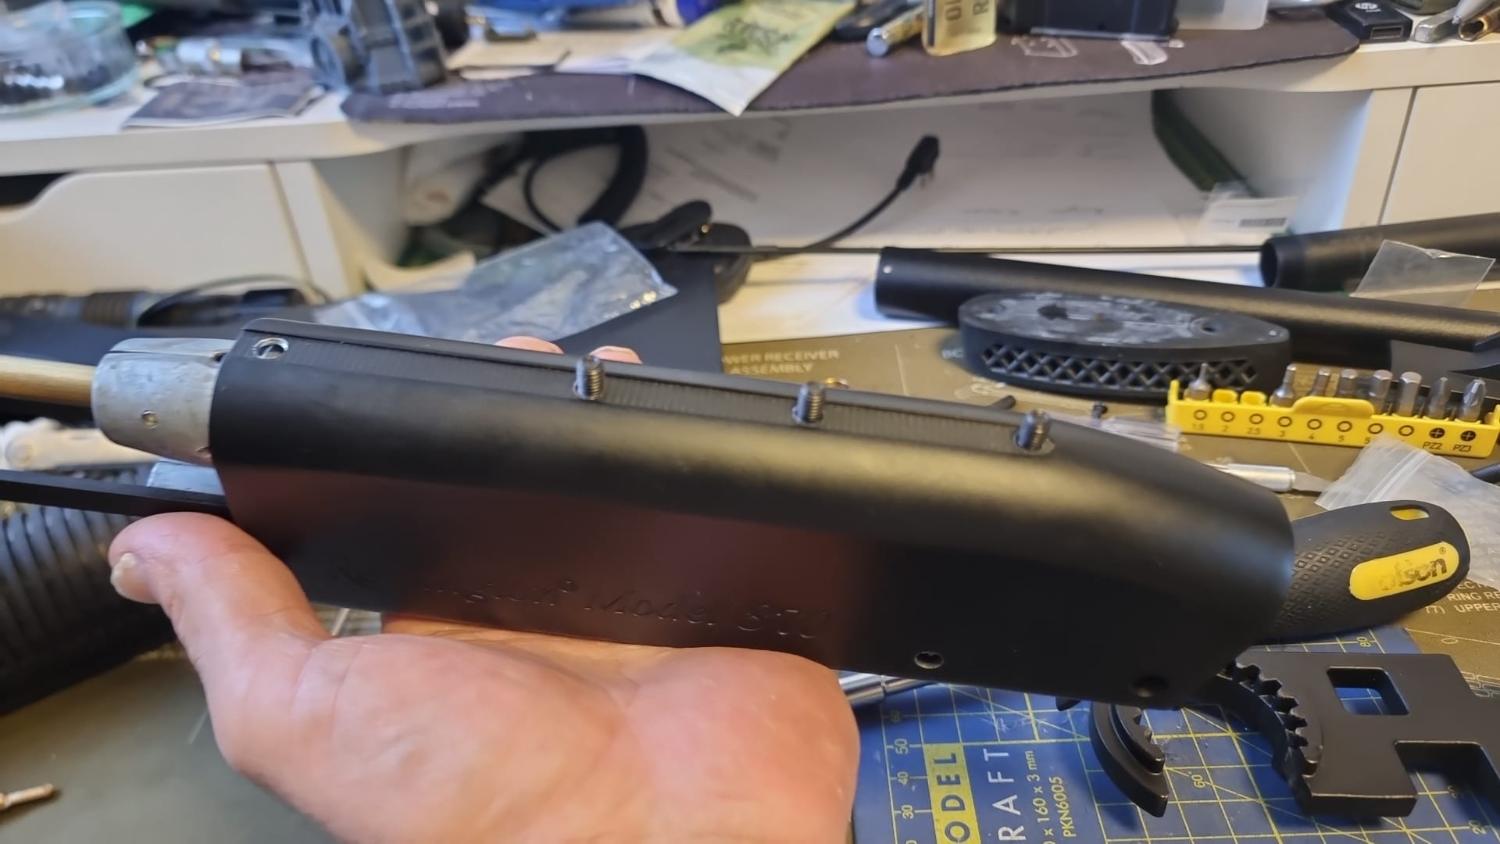
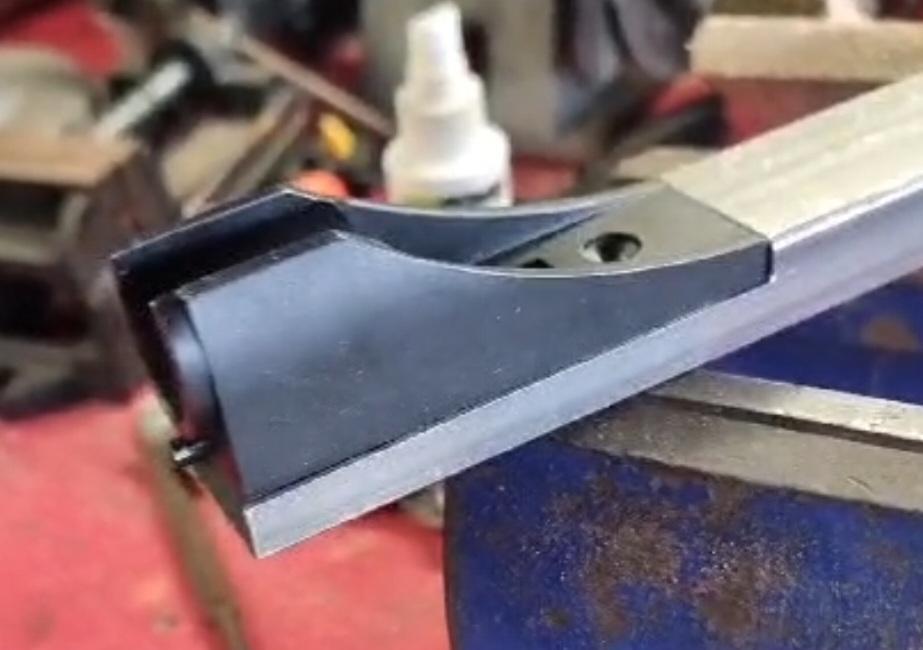
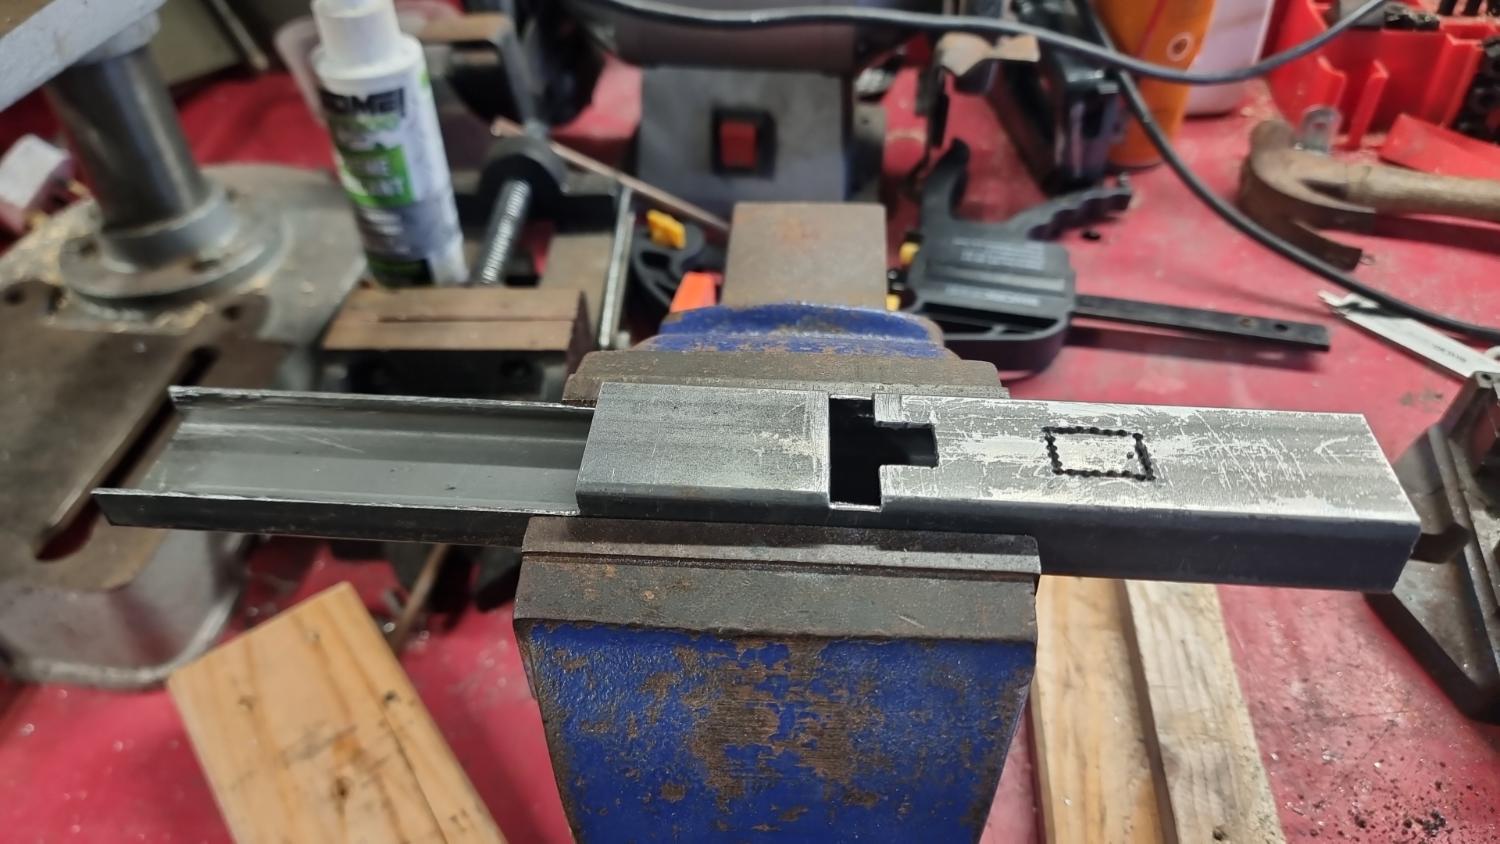
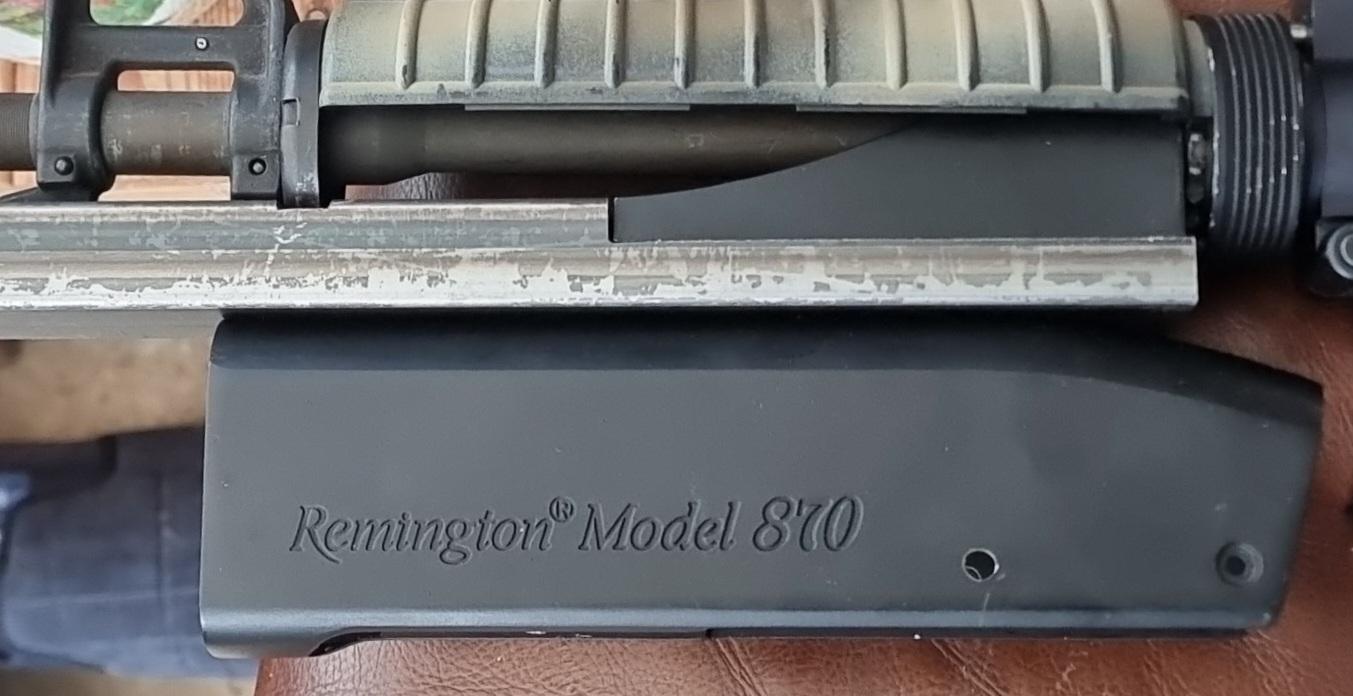
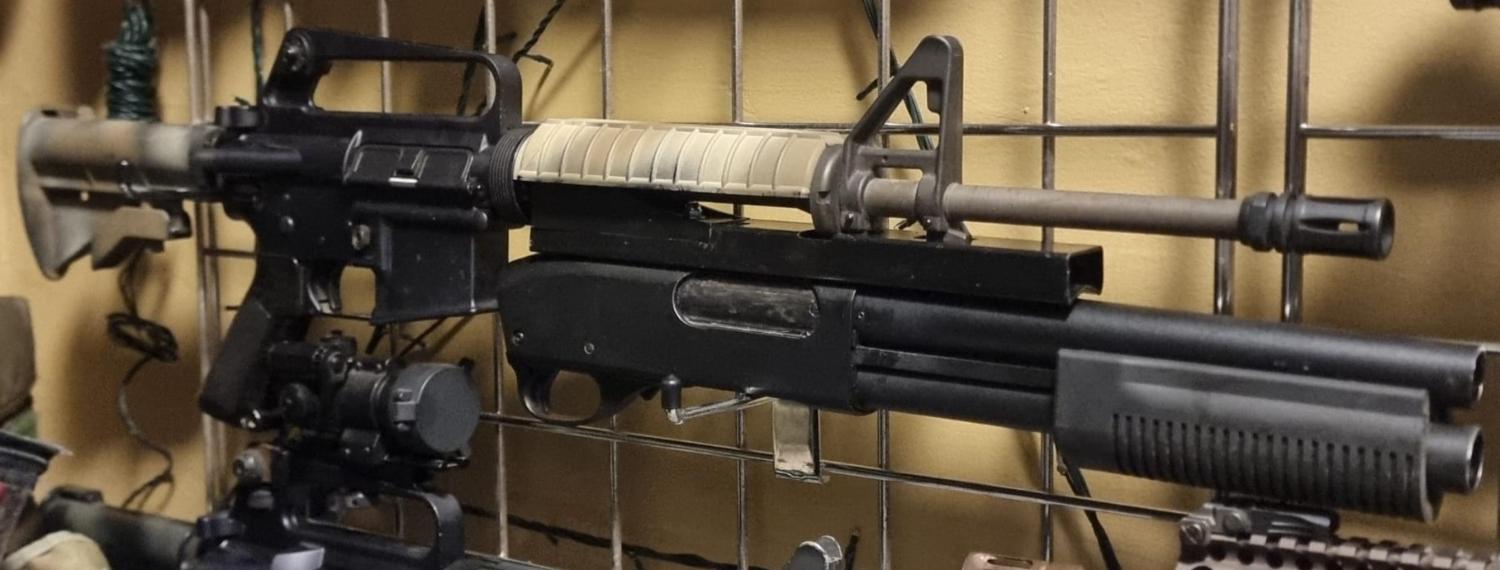
Some folks were curious as to how I did it, so here is a how to :). Materials I used: S&T Spring Remington 870 35mmx20mm steel box section. I used 3mm thick stock. Random barrel mount from an M203 3 M6 x 10 countersunk machine screws 2 M6 x 25 countersunk machine screws 5 x m6 nylon bolt and washers. Tools used : Kentucky Measure (eyes) Pillar Drill, Hand and bench grinder, Various Vices, Vernier Caliper, Dremel, Hand files Tap & Die, Permanent marker, Club hammer, 45mm diameter steel pipe, Ignorance. 3ml of my own blood. Tools I should of also used : Centre punch, Tape measure, THE RULER ON MY VERNIER CALIPERS. Firstly, I obtained some source material from the Google. and then placed my rifle, barrel mount, steel box section, and destocked shotgun on the bench. After about 20 minutes of staring at it, making thoughtful noises, looking at the source material, I decided to make a start. Let's start with the big issue. The shotgun. The S&T 870s are single shot pump actions based on the Maruzen CA870, much like the G&P Wingmaster line... so much like it's identical. I mean, carbon copy identical. However, the S&T is not a smooth action out of the box. It's got sticky points and notches everywhere, the action over-extends causing the right side pump arm to disengage and jam, and lubricant was clearly lacking. Dealing with the action was a simple strip and clean, cleaning up any burrs on edges, or casting lines (of which, there were many!) in the areas where friction is a thing, cleaning up the edges of both pump arms with a file, and finally a polish of the metal surfaces where the pump arms slide in the rails of the cast chassis. I also took the time to modify the inner barrel and hop chamber, it now runs a VSR bucking. After reassembling, it's as silky smooth and easy to rack as my old G&P, and can lift a .32 with ease. So it's definitely suitable to mount. Action still over extending though - we will come back to this. The receiver shell ended up straight on the Pillar Drill for mounting holes. I ended up drilling and countersinking a total of 5 holes. 2 for the barrel mount, and 3 to spread the rest of the shotguns mass along the chassis. All 5 holes and fittings are not pictured as it was done at the end of the process. The rearward machine screw corrospondes to the barrel mounts rear screw orifice. Front hole countersink was done with an unusual but required approach. Onto the receiver chassis! more marker pen followed by using the Vernier calipers to edge my 'measurement', and off to the vice and grinder! First, off with stock fitment followed by material from the top of the chassis to make space for the machine screw heads. Despite the countersinking in the reciever shell, I also wanted to fit a steel insert between the chassis and shell with holes and countersinks to mate to the reciever shells, again to spread the load as evenly as possible. So accounted for this during loud grindy times with a medium grit bench grinder. Always wear eye protection!! Due to how the chassis fits into the reciever shell, the 'bump' at the rear needed to be ground down further towards the back end than i had initially done. So a bit of trial and fit and trial and fit was in order, made worse by my choice to reinforce the fitment with the steel insert. Minor adjustments made with more permanent marker and a dremel. Once enough material had been removed the chassis snugly slides in and out of the shell as it should, with no excess play, with the steel plate and machine screws in place. (This was the point the 5th fitment was decided upon, but this was a 20 second job and worth doing!). Now, those who are still with us - the mounting rail!! Let's start with cutting out material for the barrel mount. Permanent marker and Verniers to action, marked and etched, followed by a disgustingly convenient find of a jig from an old project that needed zero adjustment to achieve both cuts - it was meant to be! A quick clean up of the edges with a file followed by some tappy taps with the hammer to profile those edges in toward the mount slightly. After offering up the mounts chassis I marked the locations of handgaurd cap, bayonet lug, and sling swivel, and transfered those marks using a square, making sure to account for the rearward fitting motion of the mount as I wasn't bothering cutting out the top of the chassis on my first attempt making one. mock fitting prior to the Great Ignorant Beating, as wecan see, shotgun reciever has a curve. My box section does not. Long story short, dismantled the assembly, made a holding jig, and a spacing /centering jig, placed the rail in the holding jig, then on goes the centering jig, filled with a steel pipe with a 45mm diameter. I proceeded to smash the b***ocks out of it with a club hammer until I had achieved the desired profile. - this is something I'll do differently come the MK2 version ? Finally, drilling the holes in the chassis rail to corrospond with the shotguns reciever holes. Chassis fitments holes were tapped, and then everything cleaned in prep for a good application of hammering in a can. Once dry , the reciever shell was fitted to the rail and barrel mount. Washers and nylon thread nuts applied. Cutting down the barrel and ammo tube is pretty self explanatory. But the pump needed cutting down and a new recess cut out at the front for the ammo tube support ring. By combining my brain and my hands I was able to feel out the exact moment the action was at full forward extension without over extending. I marked the required location of the ammo tube support on the outer barrel, drilled and tapped fitment holes I then modified the pump handle accordingly, removing just right amount of material to allow the action to be tighter then a really tight thing with a tight schedule on a busy day. No more over extension of the action as its not physically possible without smashing the ammo tube support off (or proper dismantling procedure). I will soon begin a mk 2 chassis, where I actually use a tape measure, get the internal curvature done in a proper manner, and open the chassis rails top surface up to make it lighter, as well as get access to the shotguns hop unit ? In my defence I was excited and impatient. Thanks for reading. Enjoy. G&P Prime M653 GBB G&P M4A1 Prime GBB
2 points -

The 'What have you just bought' Thread
Galvatron and one other reacted to Barry Sayer for a topic
2 points -
DE Noveske N4 in FDE , 'cos the wife insisted I have a new gun for Chrismas ? It arrived today, but after a quick check over it was whisked away and wrapped , so got to wait now ! Still , that gives me time to collect a few bits for it , M/L barrel etc2 points
-
Some of mine
2 points
-
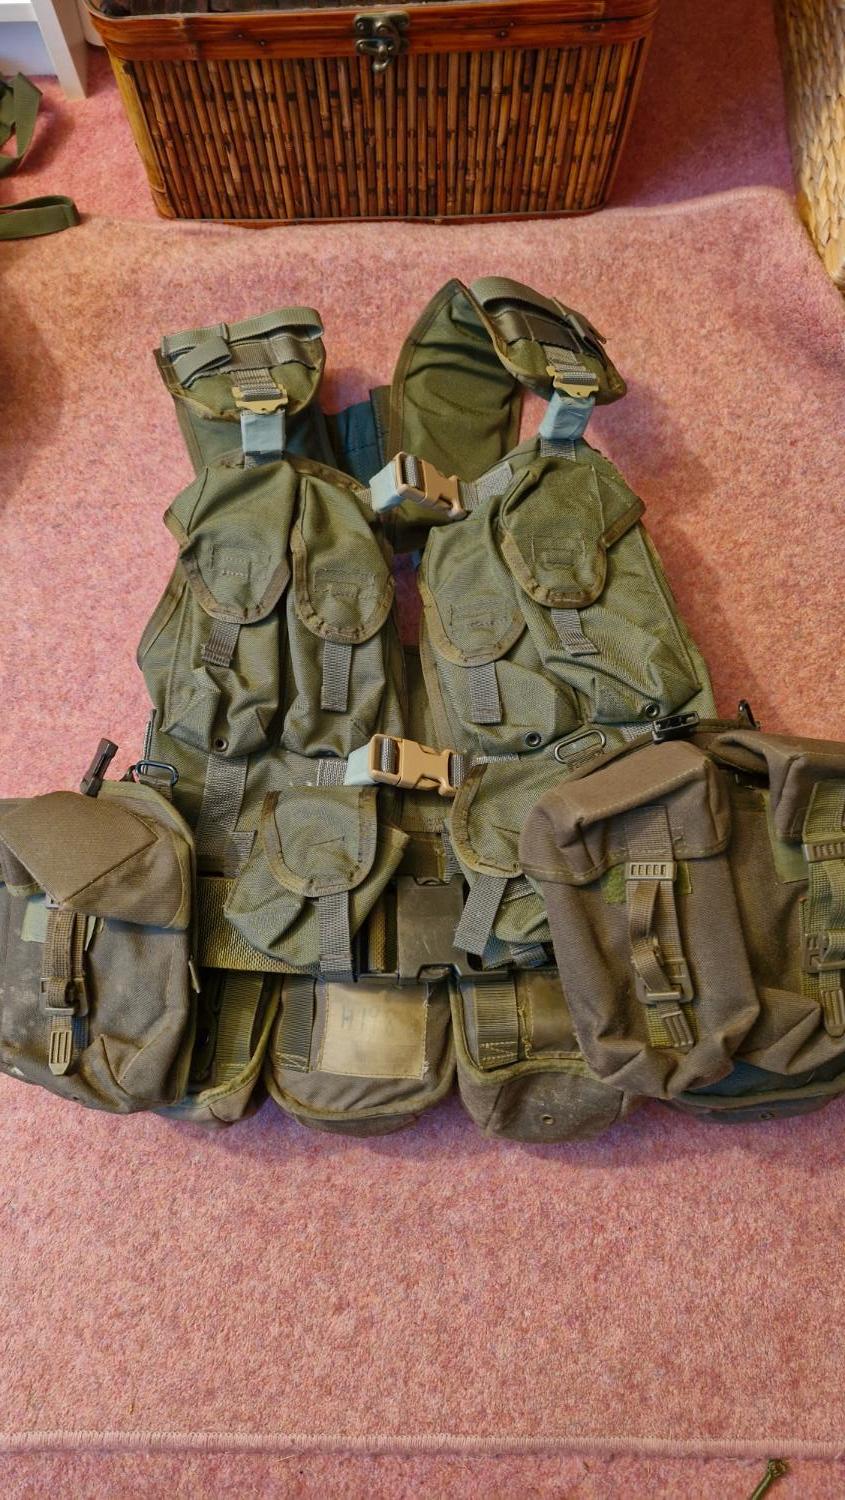
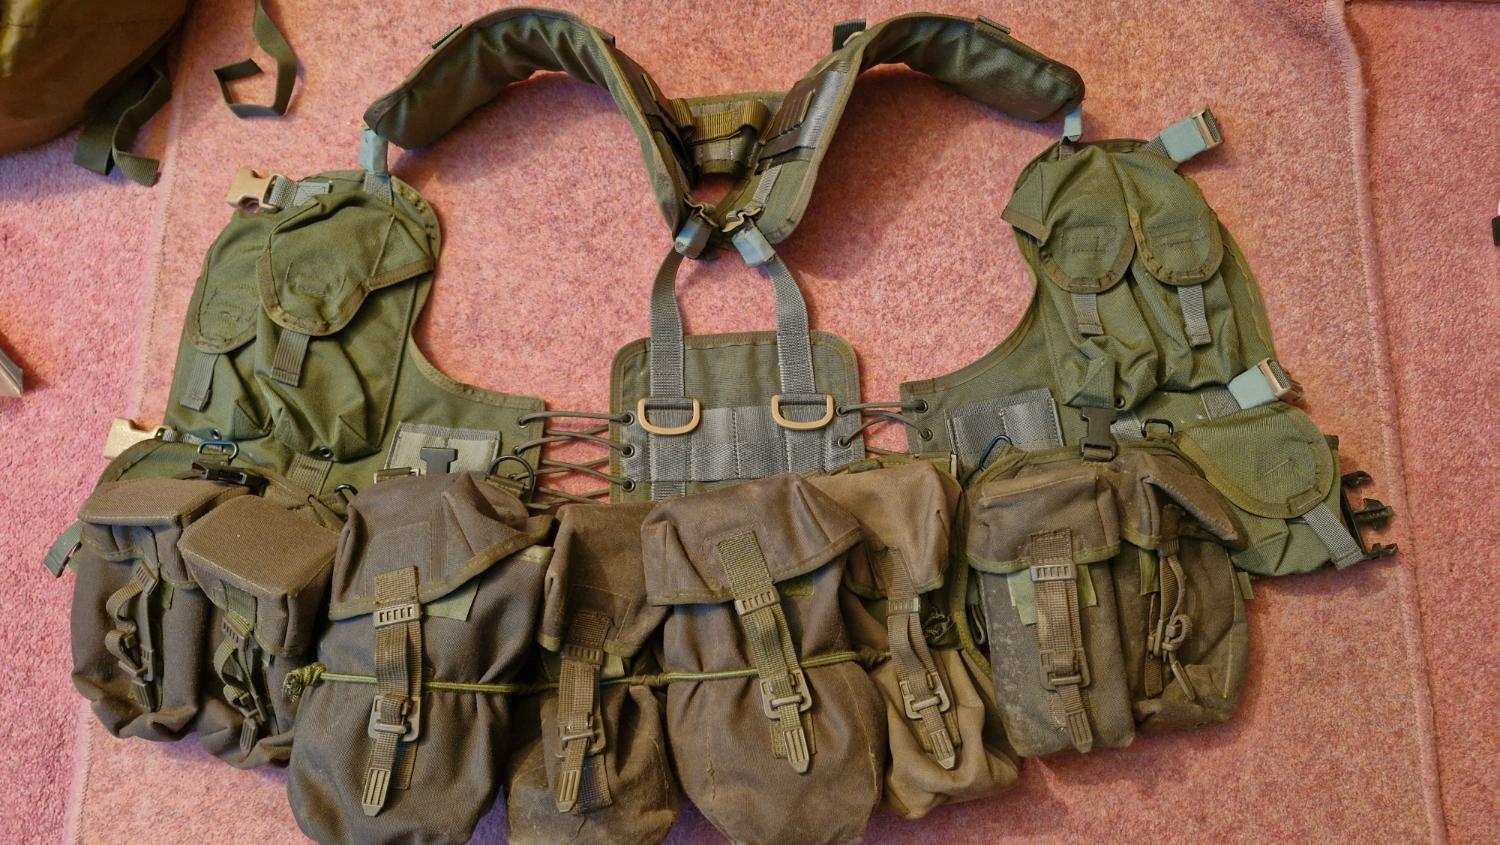
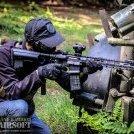
Load-Out / Loadout Picture topic
KermitTheFud and one other reacted to The_Roach for a topic
Back when I was shooting at things and people for a living, I had the following setup: - a Jayjay's MC belt kit - a mesh vest with slanted MOLLE loops on the torso rather than the H-yoke. I had picked that config for field work when we were not issued the Osprey, and before being issued Virtus. And I had taken inspiration from former instructors who also had an airborne background and had attached a US woodland LBV-88 to their DPM PLCE belt kit. I've come full circle now.
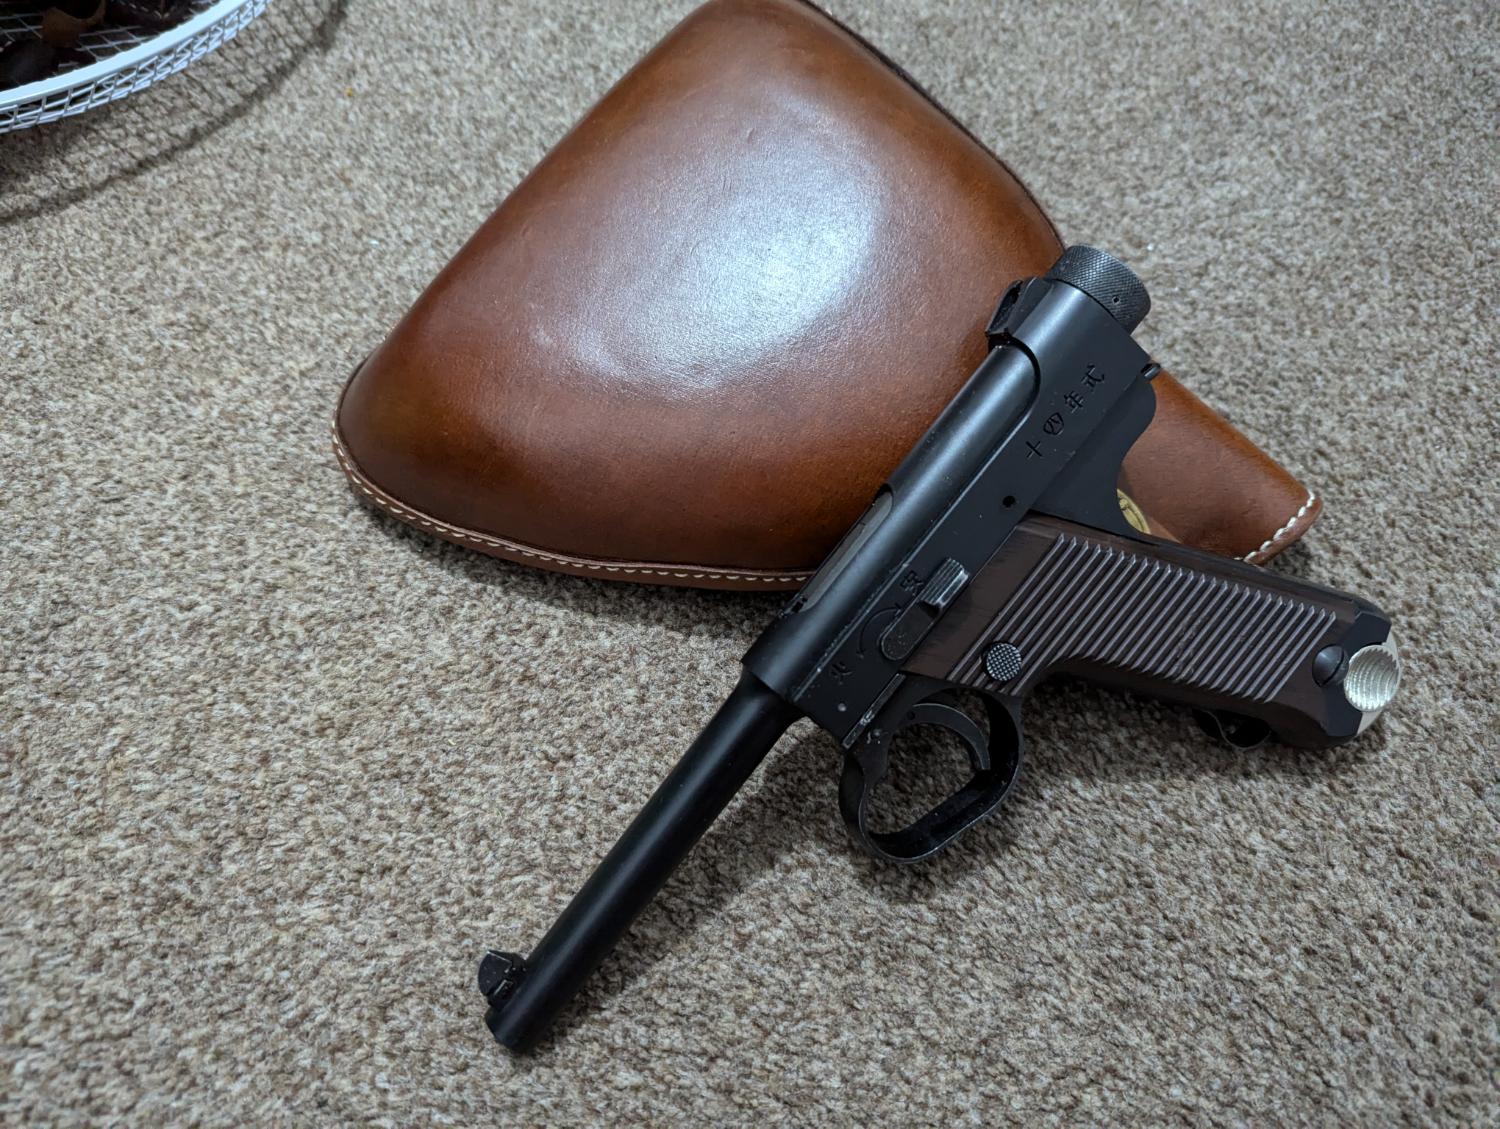
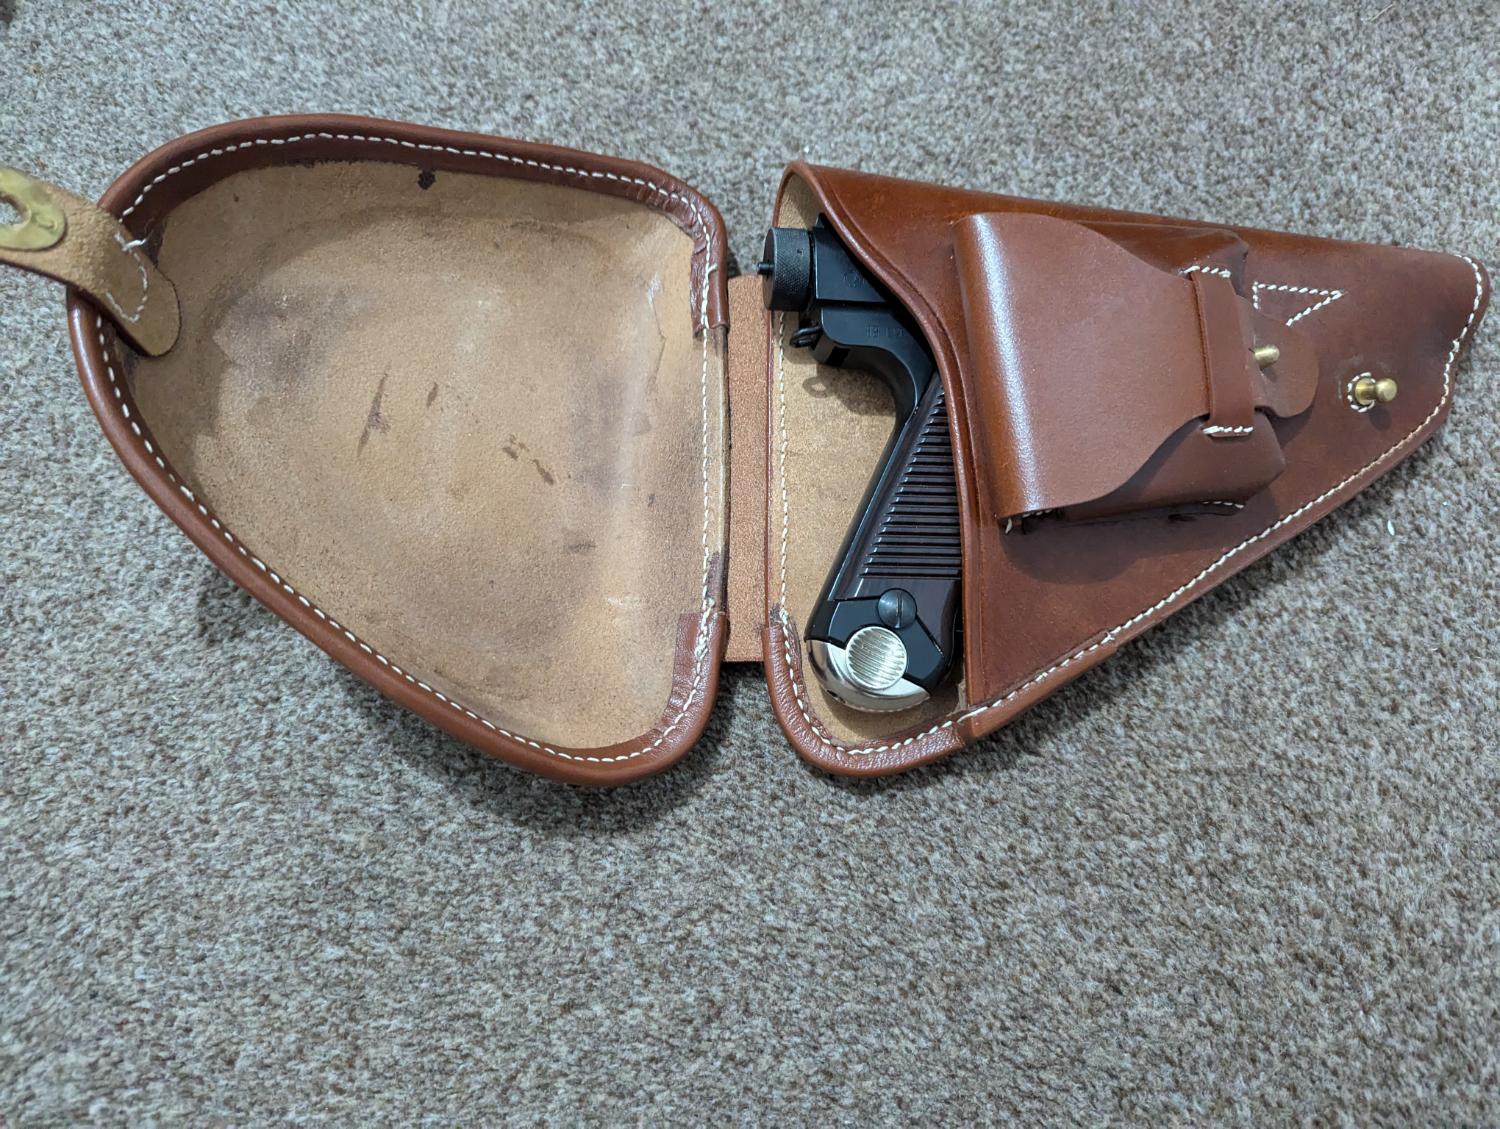
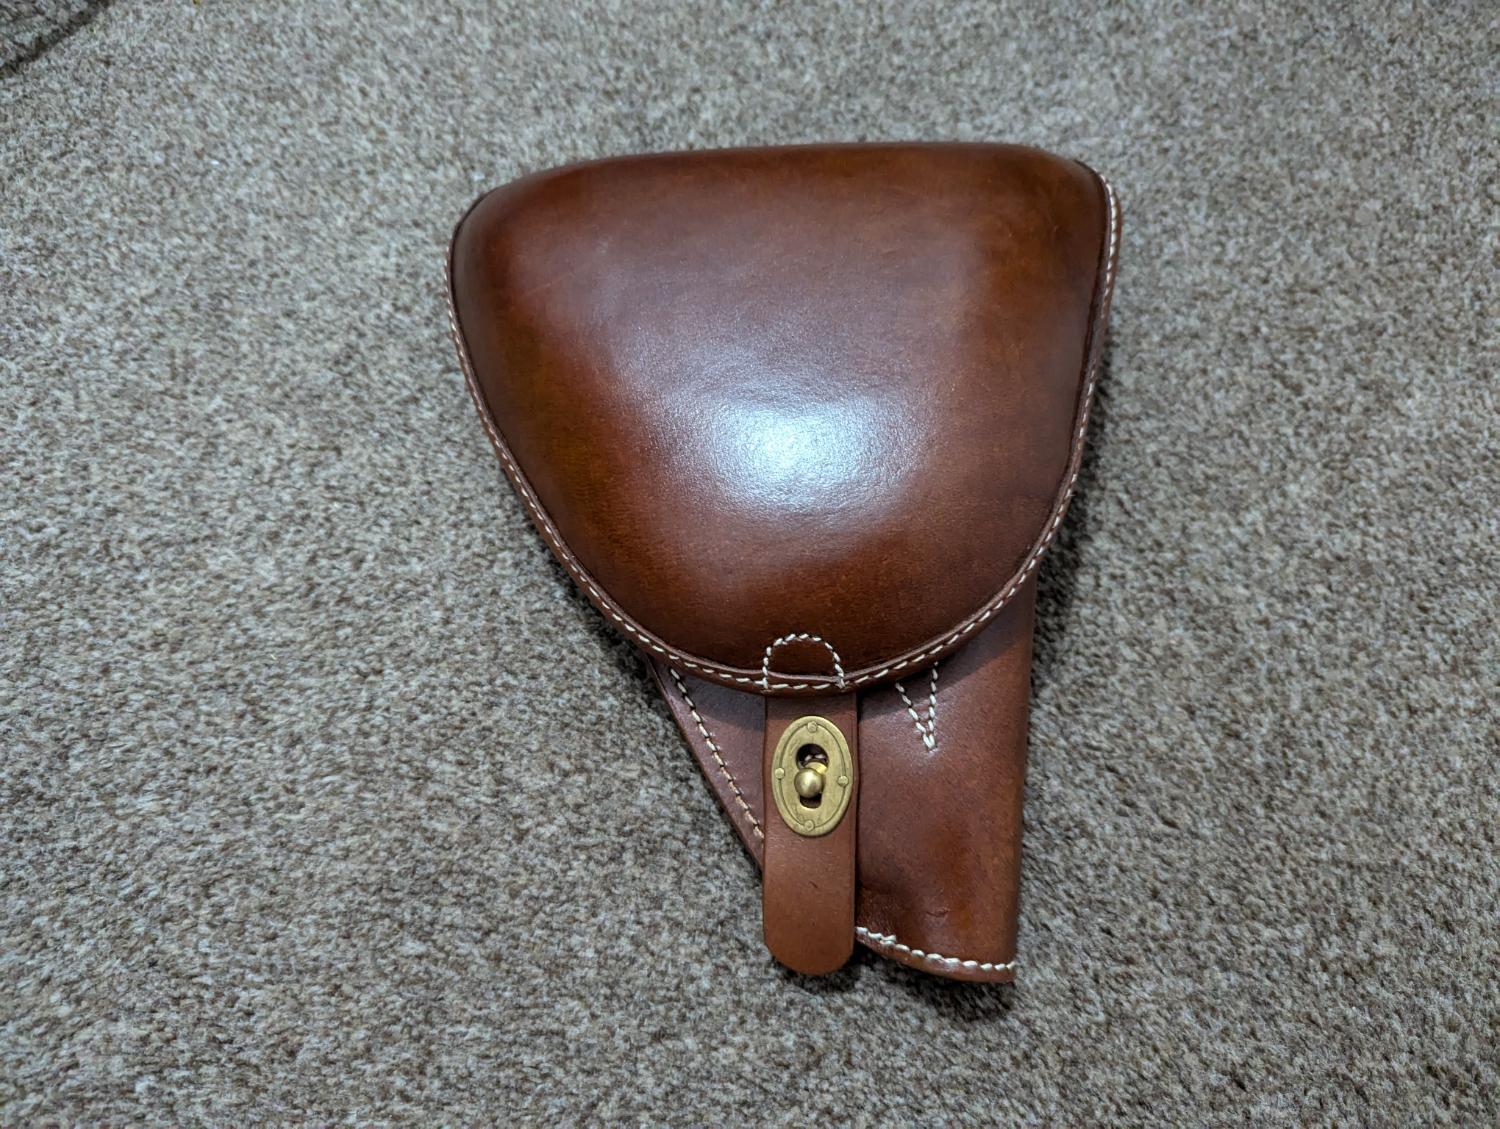
2 points -
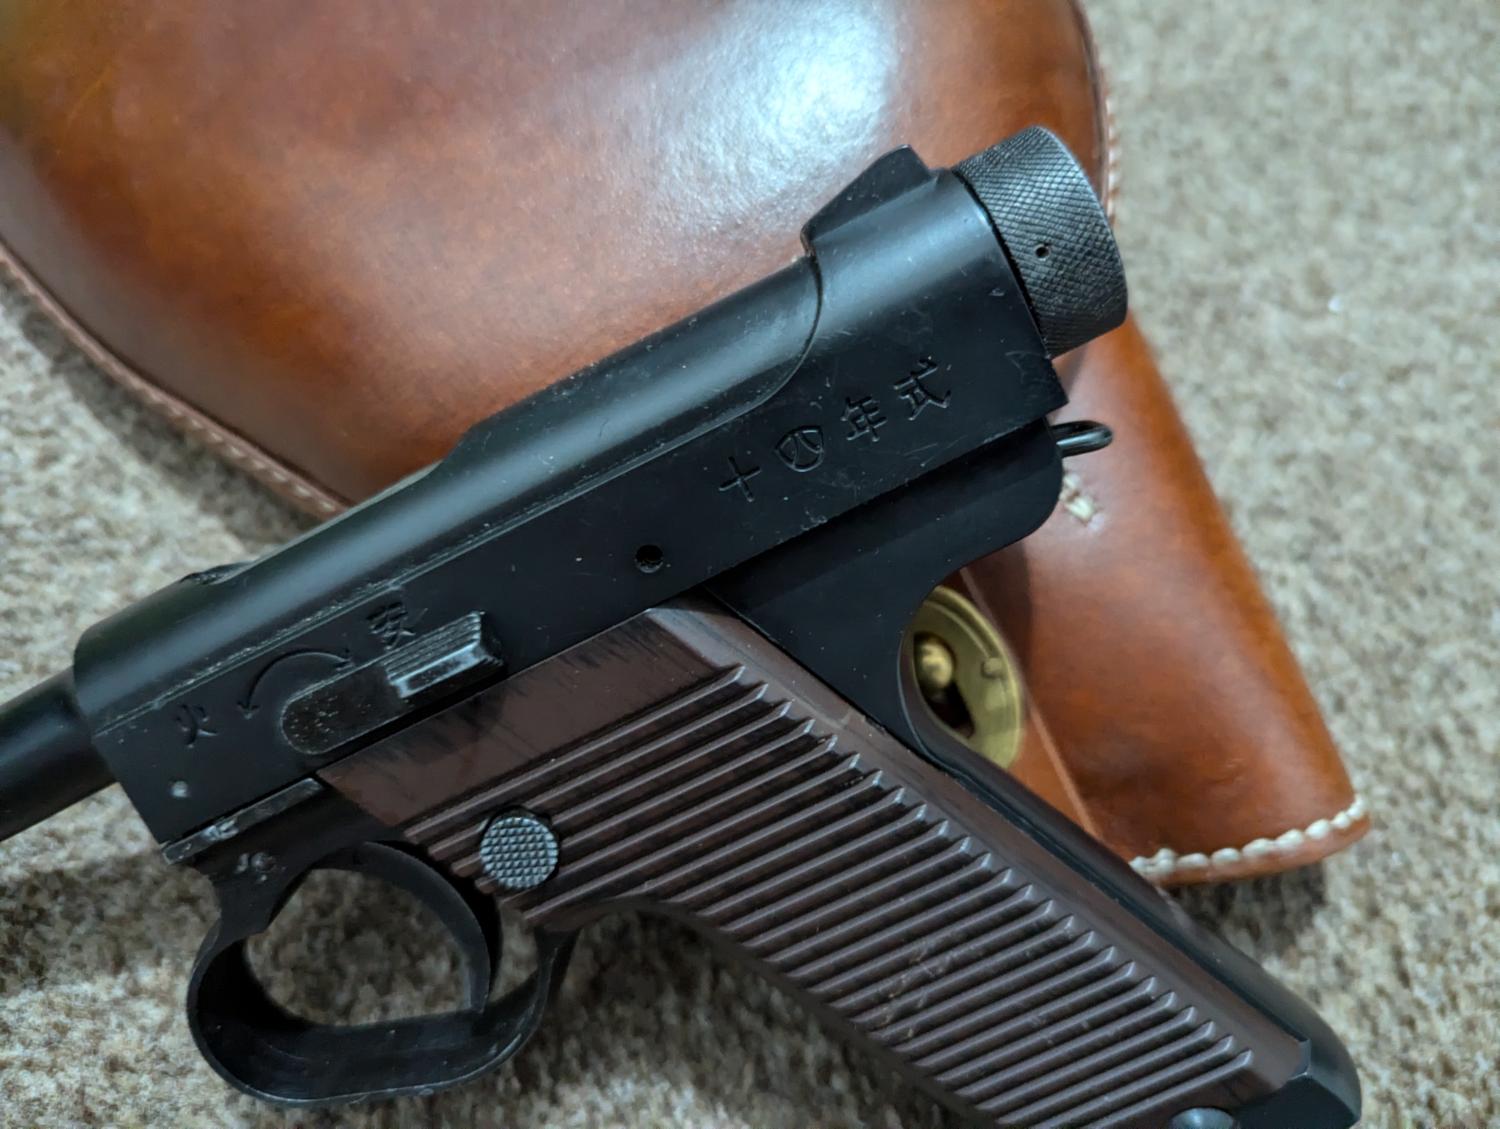
Marushin Nambu Type 14
1 point
-
Ok folks following this I’d like to report that spring from hi cap mag on g36 does fit and does the job. All tested and shooting. How long will it last …? thanks for the tip.1 point
-
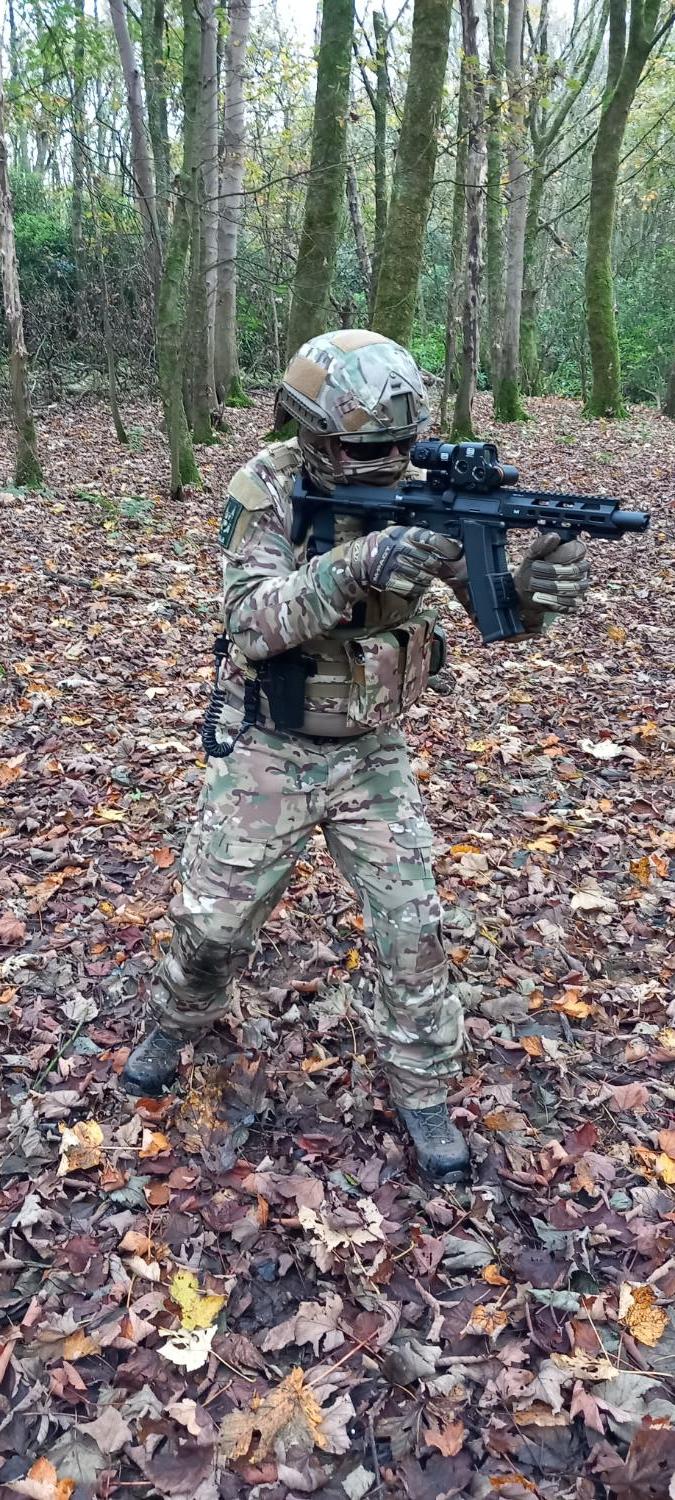
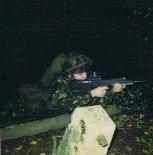
Load-Out / Loadout Picture topic
ButcherBill reacted to Barry Sayer for a topic
Testing my new KWA qrf mod 1 smg & helmet the other weekend.
1 point -

MOA ‘24 videos
DerDer reacted to Enid_Puceflange for a topic
King Arms goodies (still no FAL )1 point -
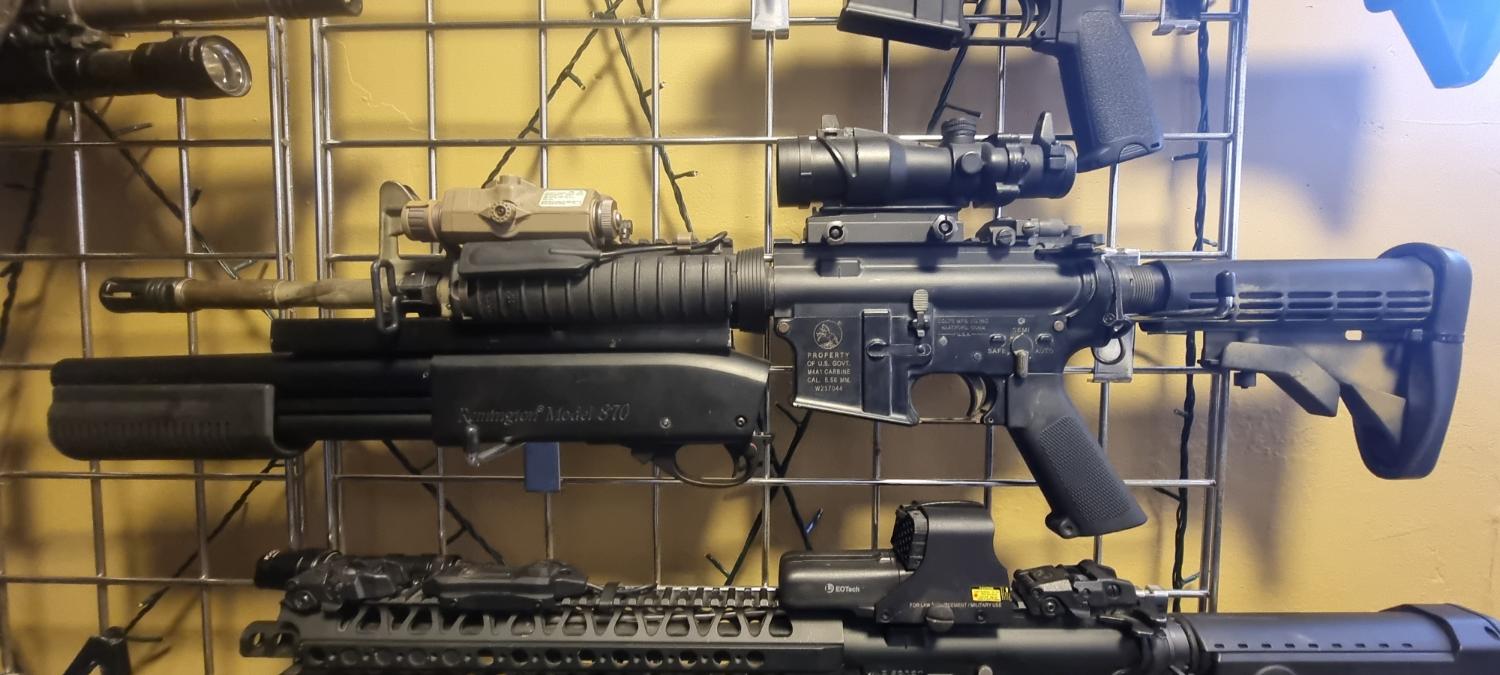
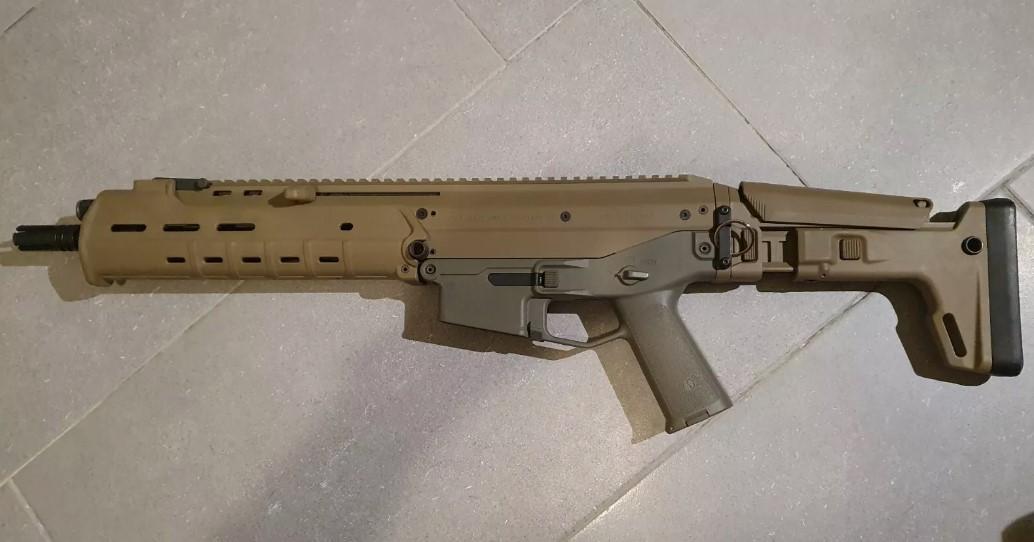
AR15/M4 Photo Thread
JimFromHorsham reacted to VictorFourTwo for a topic
That was actually my source material! I'll post a thread in the appropriate area once I've retrieved photos1 point -
I’ll have a look in an hour and report got g36 and m4 hi cap mags busted1 point
-
AR15/M4 Photo Thread
JimFromHorsham reacted to ButcherBill for a topic
Great minds... sure I have an M4 spare1 point -

AR15/M4 Photo Thread
ButcherBill reacted to JimFromHorsham for a topic
a cheap m203 , a shotgun and some creative juices shouldn’t make it too difficult a project and look pretty legit ??
1 point -
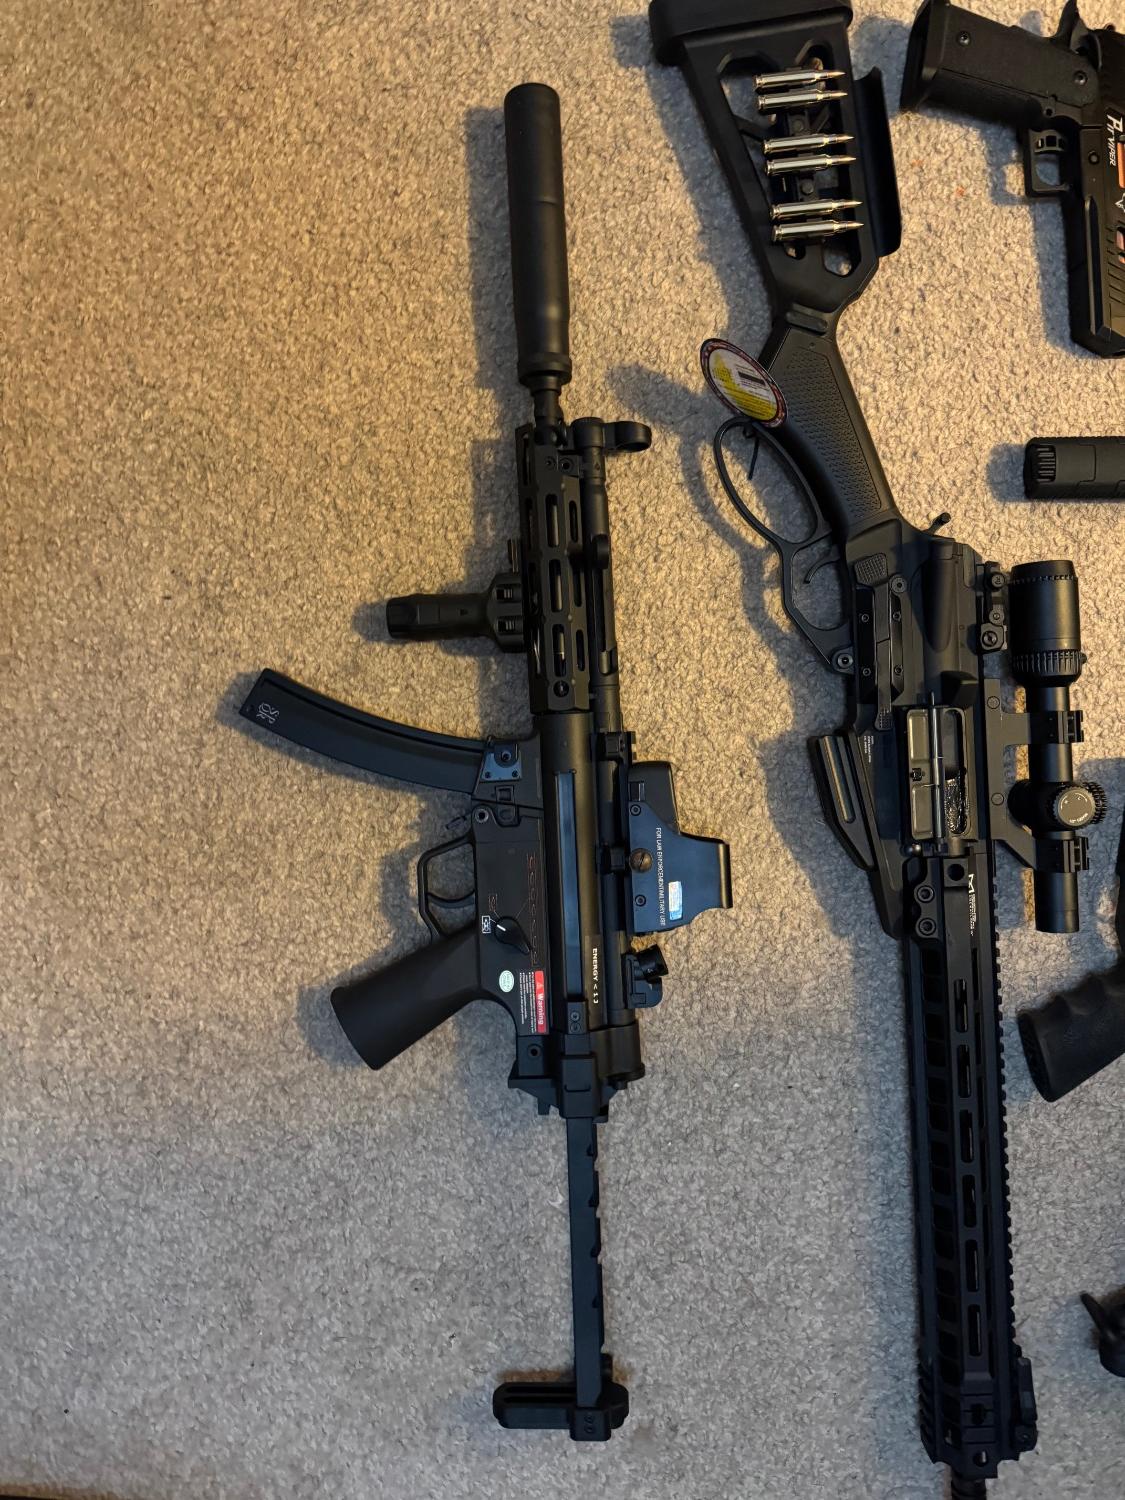
The 'What have you just bought' Thread
Speedbird_666 reacted to Fatboy40 for a topic
Regarding battery it's great when you suddenly find that your battery lasts twice as long as it did on a full charge. Also, as the torque is so incredible, you then start to think about lower gear ratios and just using 7.4v!1 point -
The 'What have you just bought' Thread
ak2m4 reacted to Speedbird_666 for a topic
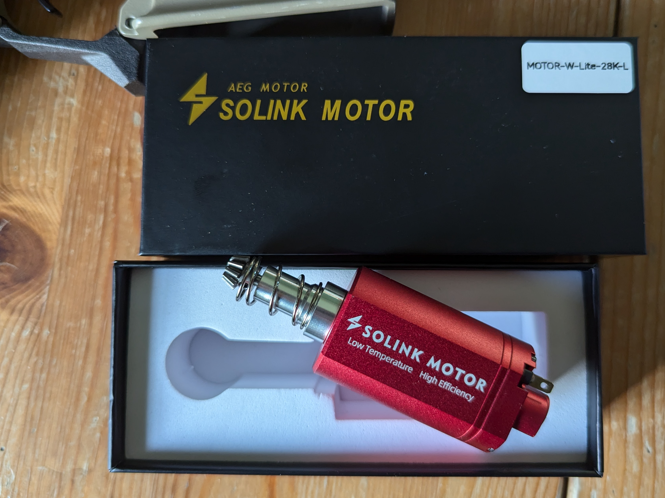
Ok - I get it now. Slapped into one of my guns (ICS M4, Stock 18:1 gears, Perun Hybrid with AB disabled). No modifications needed - straight drop-in. Impressive. Most Impressive. Been spamming the trigger fairly hard on an 11.1v for giggles and the motor is cold, as is the wiring and the battery. Performance on 7.4 and 11.1 is fairly similar in Semi. Can't comment on long term reliability (obvs), but as a drop-in upgrade for a bone stock gun, it certainly seems to give a trigger responsiveness and ROF performance that will keep 95% of players very happy.1 point -
AR15/M4 Photo Thread
TheFull9 reacted to VictorFourTwo for a topic
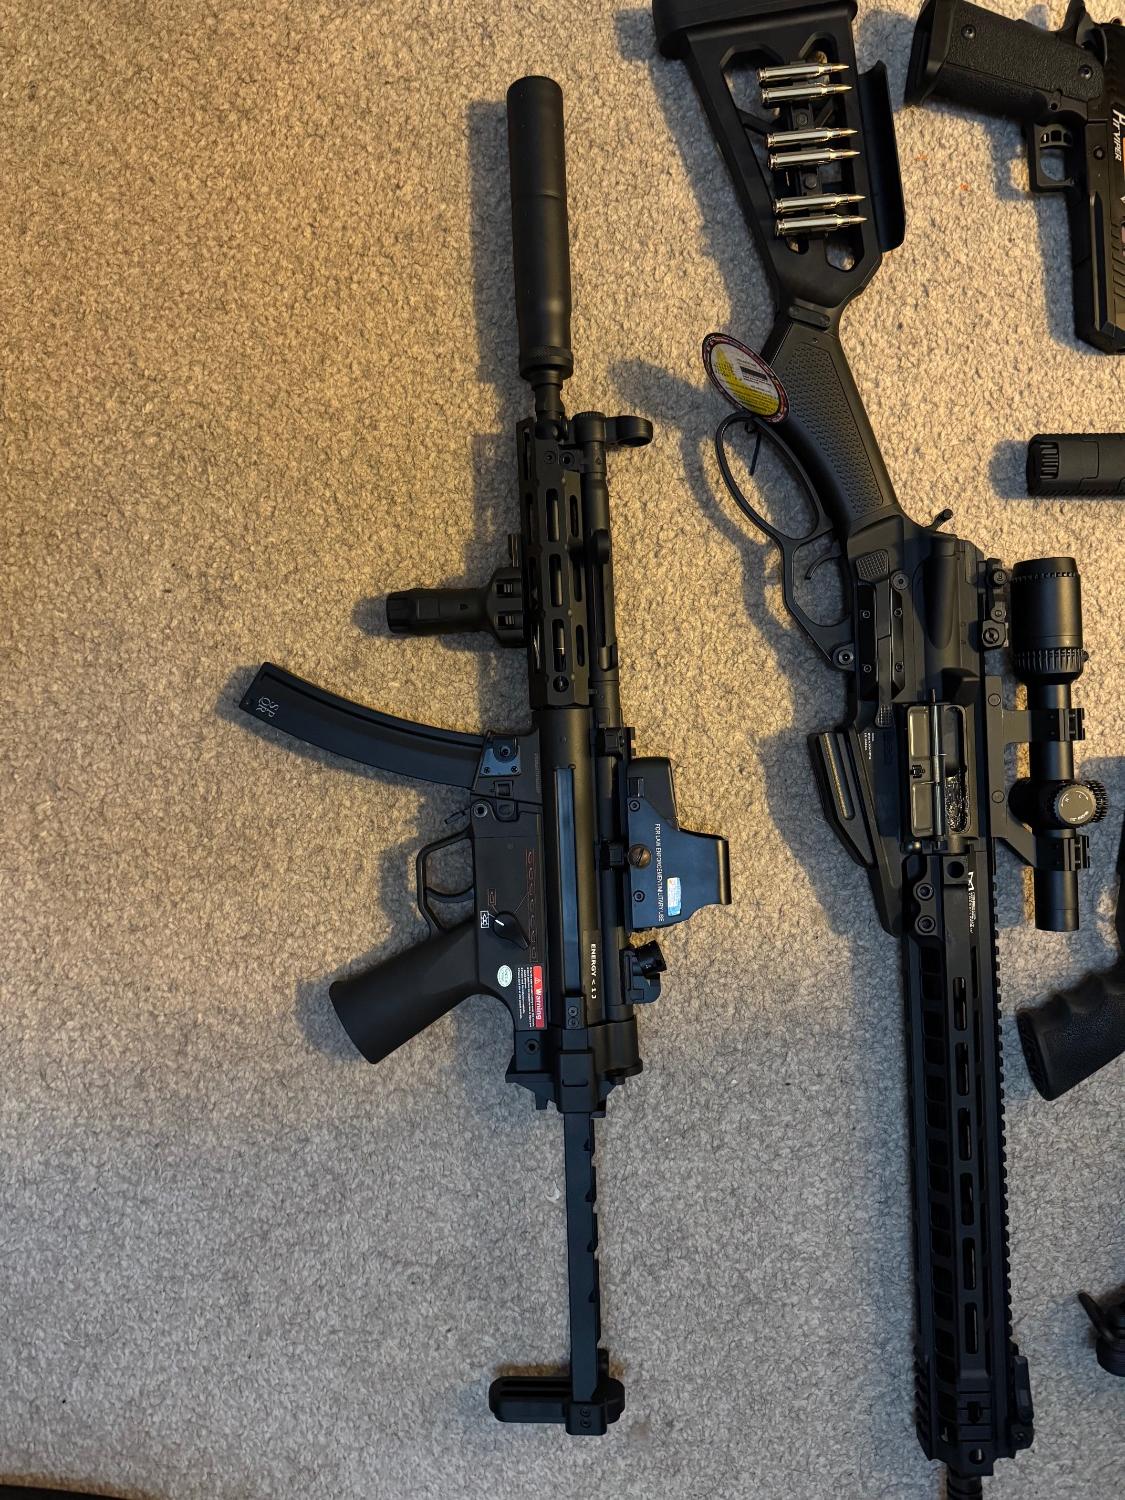
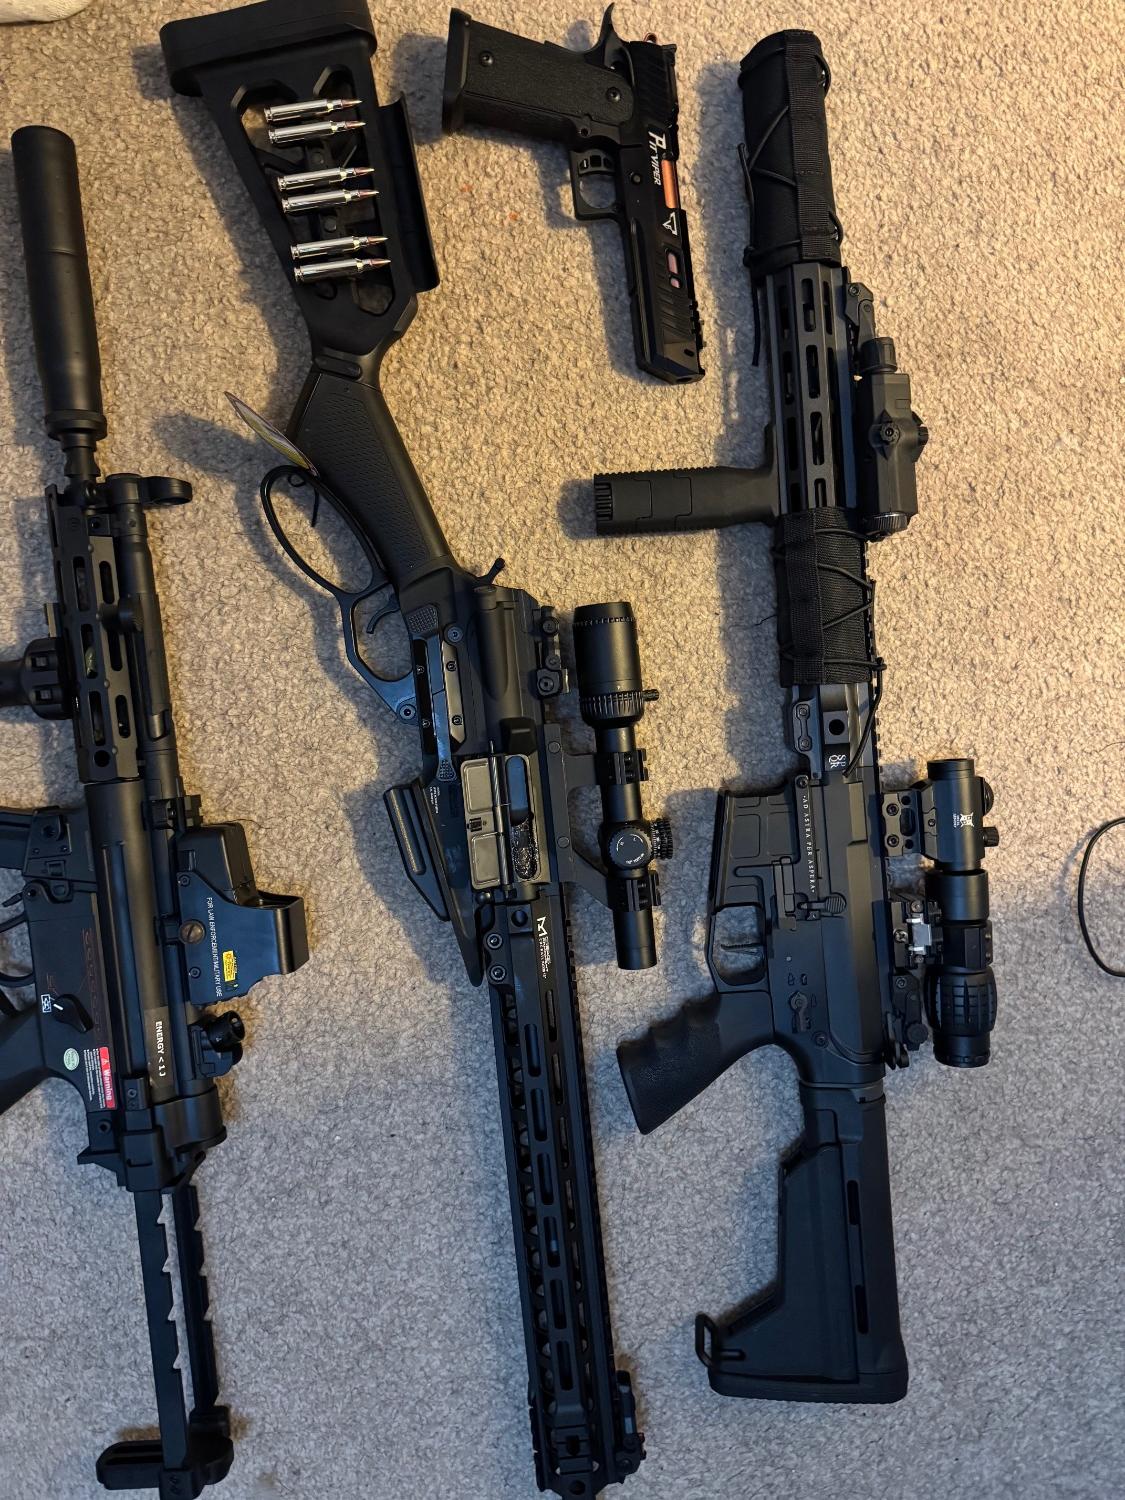
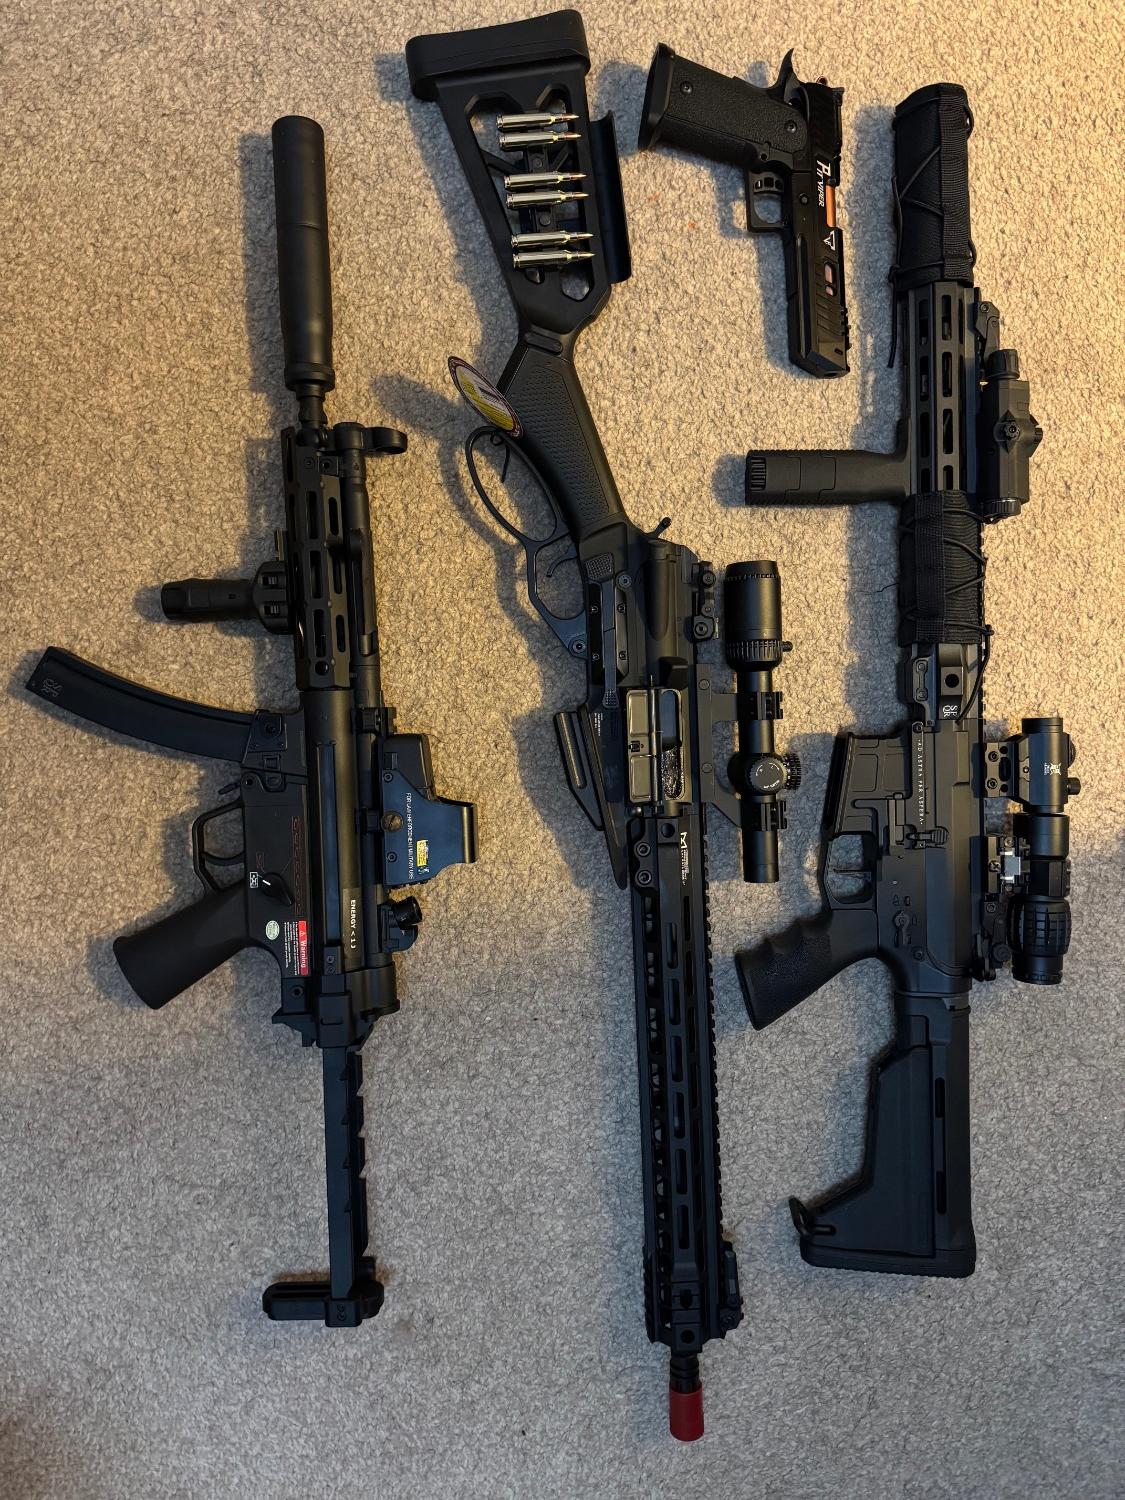
Same homebrew masterkey on an M4A1
1 point -
Tokyo marui 1851 navy
BigAl reacted to AK47frizzle for a topic
Oooh but the sg553 later in the video....1 point -
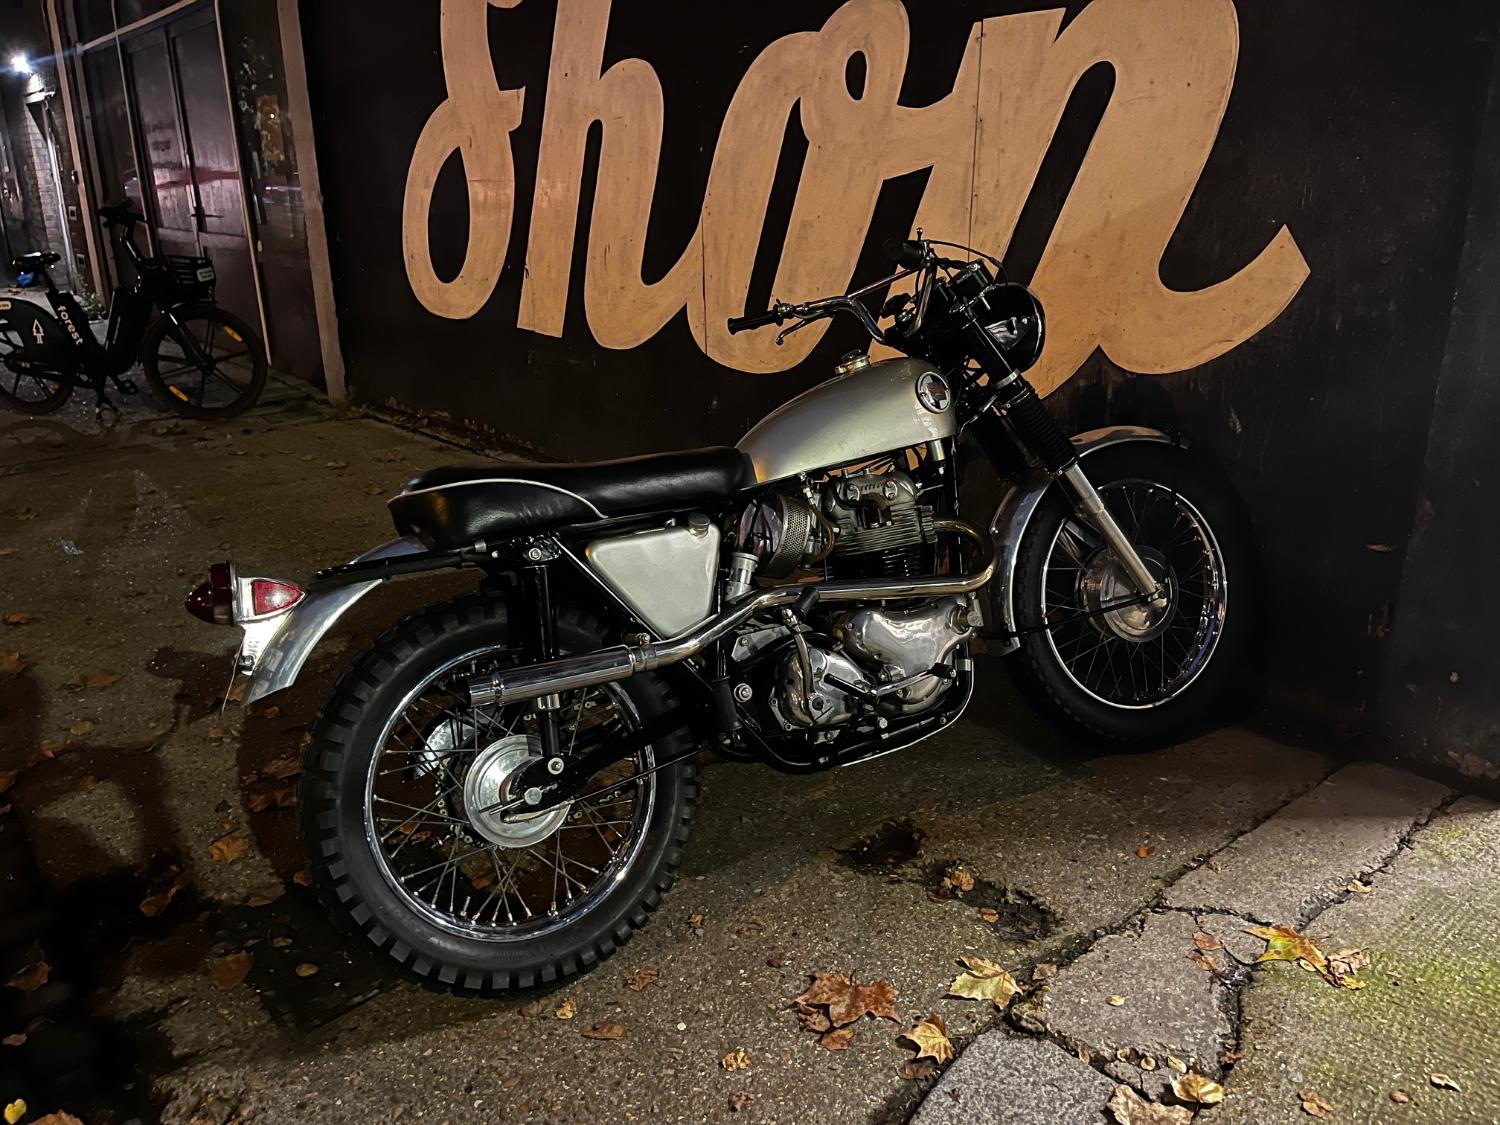
Just bought myself something new that's old - a 1968 Norton P11. Because I've basically always wanted to be Clint Eastwood.
1 point
-
AR15/M4 Photo Thread
TheFull9 reacted to VictorFourTwo for a topic
M653 with masterkey.
1 point -

The 'What have you just bought' Thread
Nick G reacted to Anonymoose for a topic
1 point -

The 'What have you just bought' Thread
seanieglasgow reacted to Cocha for a topic
Bought a bare bones Magpul PTS Masada for a super fair price, always loved it.
1 point -
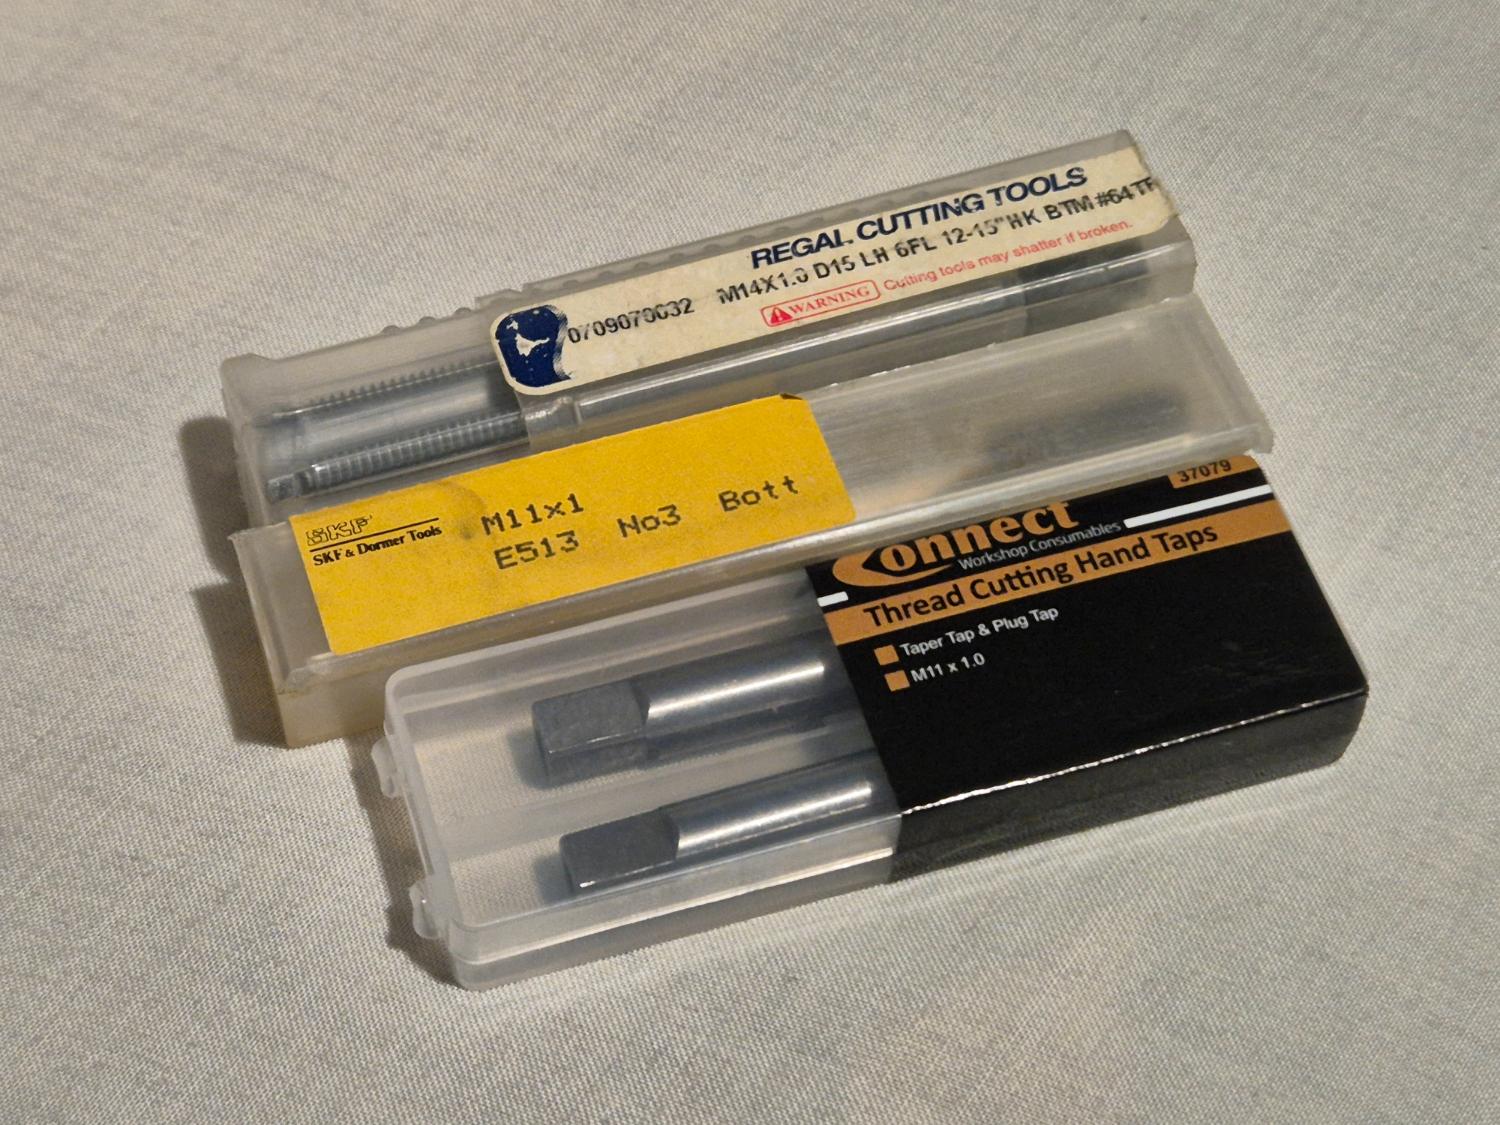
The 'What have you just bought' Thread
Nick G reacted to Anonymoose for a topic
Some thread taps. Can make my own muzzle devices now.
1 point -
Payday so brought my wish list well part of it
1 point
-

CZ P10c CO2 magazine venting.
Anotsu reacted to Cr0-Magnon for a topic
Awesome! Yeah, quite often they get stuck in just enough to release gas. This should be anyone's first process, if their mag is venting from the top. Applies to green gas mags too (although they suffer from it less, if kept gassed).1 point -

The "Share A Bargain" Thread
Cooperman26 reacted to Cannonfodder for a topic
If anyone is after ammo boxes preppers shop have a clearance sale on with up to 78% off https://preppersshop.co.uk/ammo-box-clearance-623-c.asp1 point -
CZ P10c CO2 magazine venting.
Anotsu reacted to Cr0-Magnon for a topic
Have you sprayed silicone on the knocker valve while pushing it in several times?1 point