


paradoxum
-
Posts
523 -
Joined
-
Last visited
-
Feedback
100%
Content Type
Profiles
Forums
Buy a Patch
Classifieds
Posts posted by paradoxum
-
-
On 21/04/2022 at 16:19, lucaslu1709 said:
sexy af mate I'd personally remove the grip tape from the wml and respray the tracer unit, then it'd be perfect at a glance imo. If we were being really picky maybe redo the grip tape cut outs on the stock, the one on the bottom looks a teeny bit wonky but that's coming from someone who spends 5 minutes putting the stickers on my legos 😛
thanks:D
I'm codenaming it the 'Falken'. grip tape on the wml? if you mean the torch, it's on there because the rubber pad covering the button worn away and I needed some way to cover it. I might move it to the top rail though it'll look better.
I just traced the lines from everywhere I put grip tap with paper, scanned it, then edited the file in mspaint to make it perfect, gonna print that out, tape it on top of my grip tape sheet, and cut them out nice and clean and redo it all - it's gonna look swag.
-
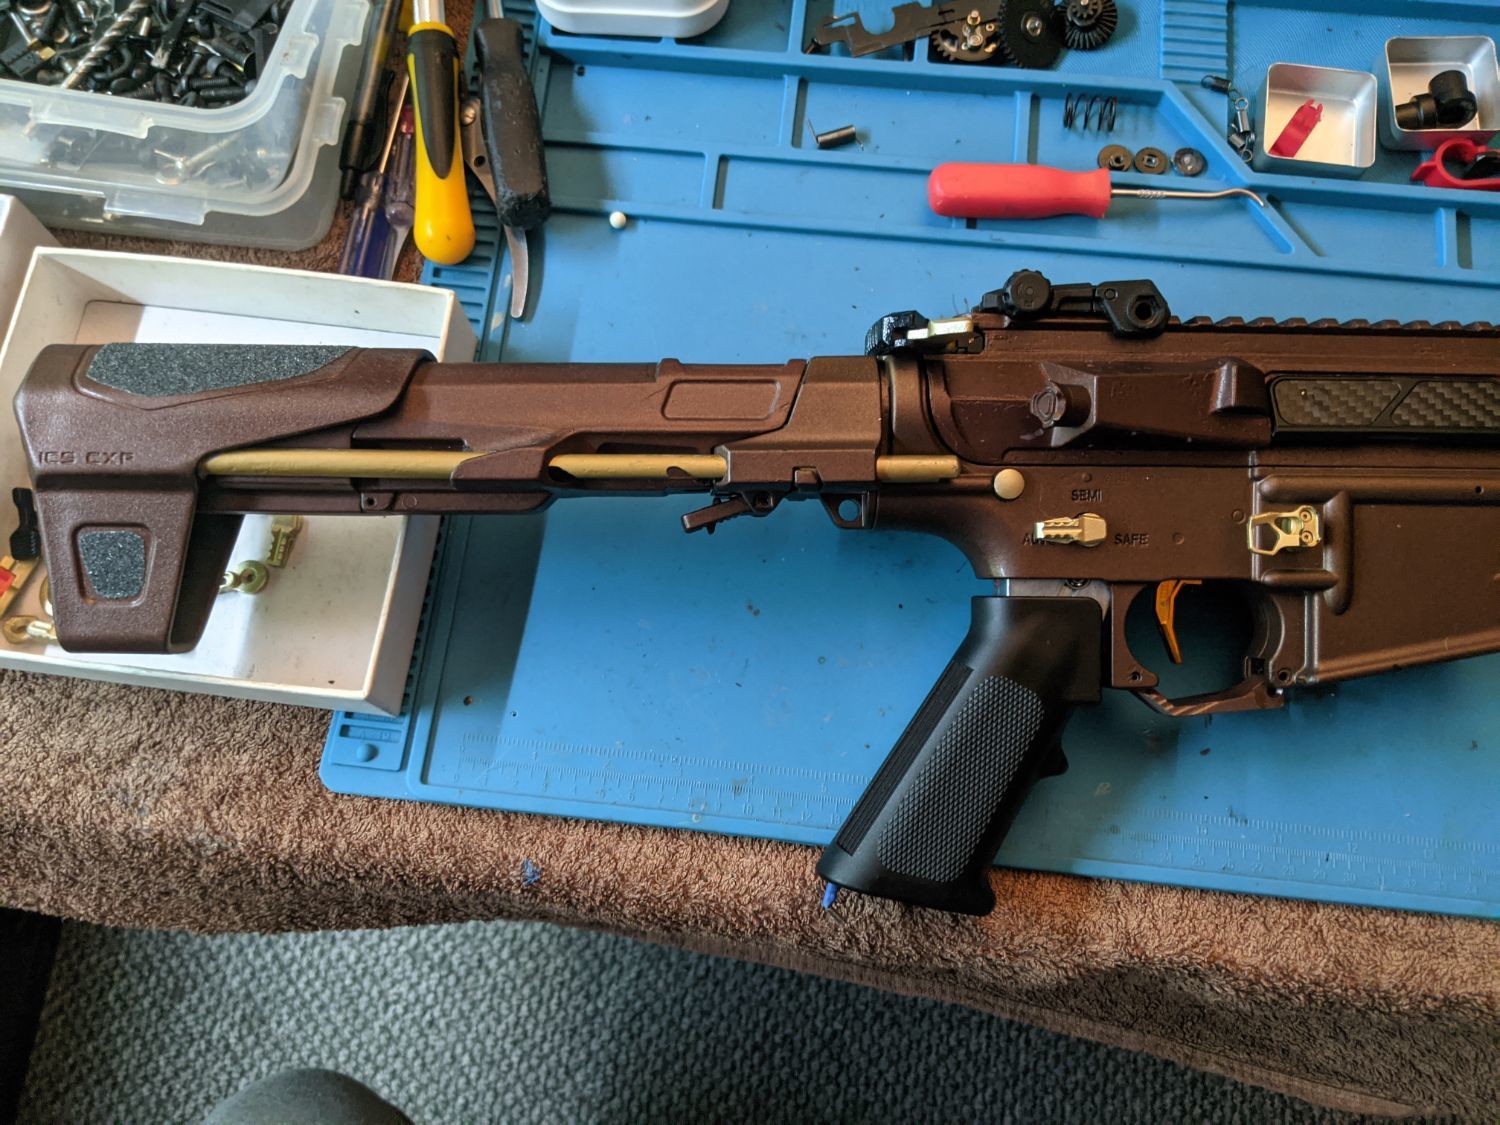
Sprayed a grip and some touch ups;

should I keep that long outer barrel? I was gonna get a short 6" one so the suppressor is just poking out the front. I'm thinking so, has a short inner barrel anyway and I want it compact.
Edit: Did a bit more on the stock;
I think I'm gonna carefully cut proper griptape bits for all the sections so it looks nice and neat, really dig the look.
- Nick G and lucaslu1709
-
 2
2
-
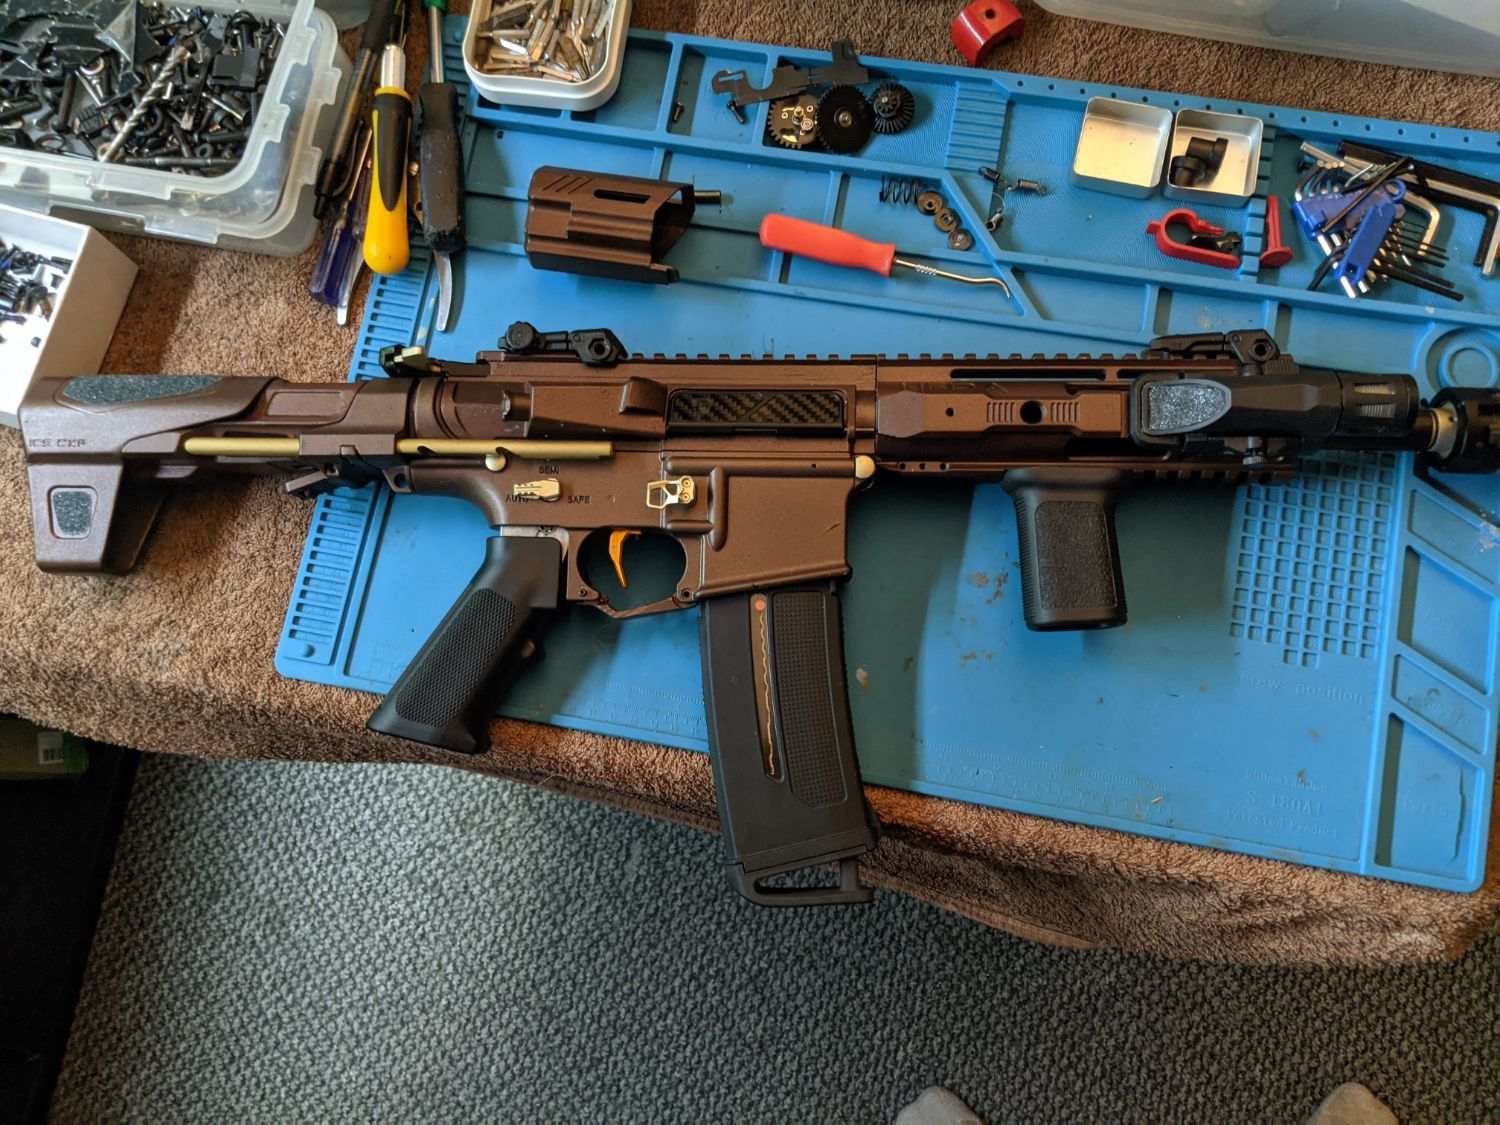
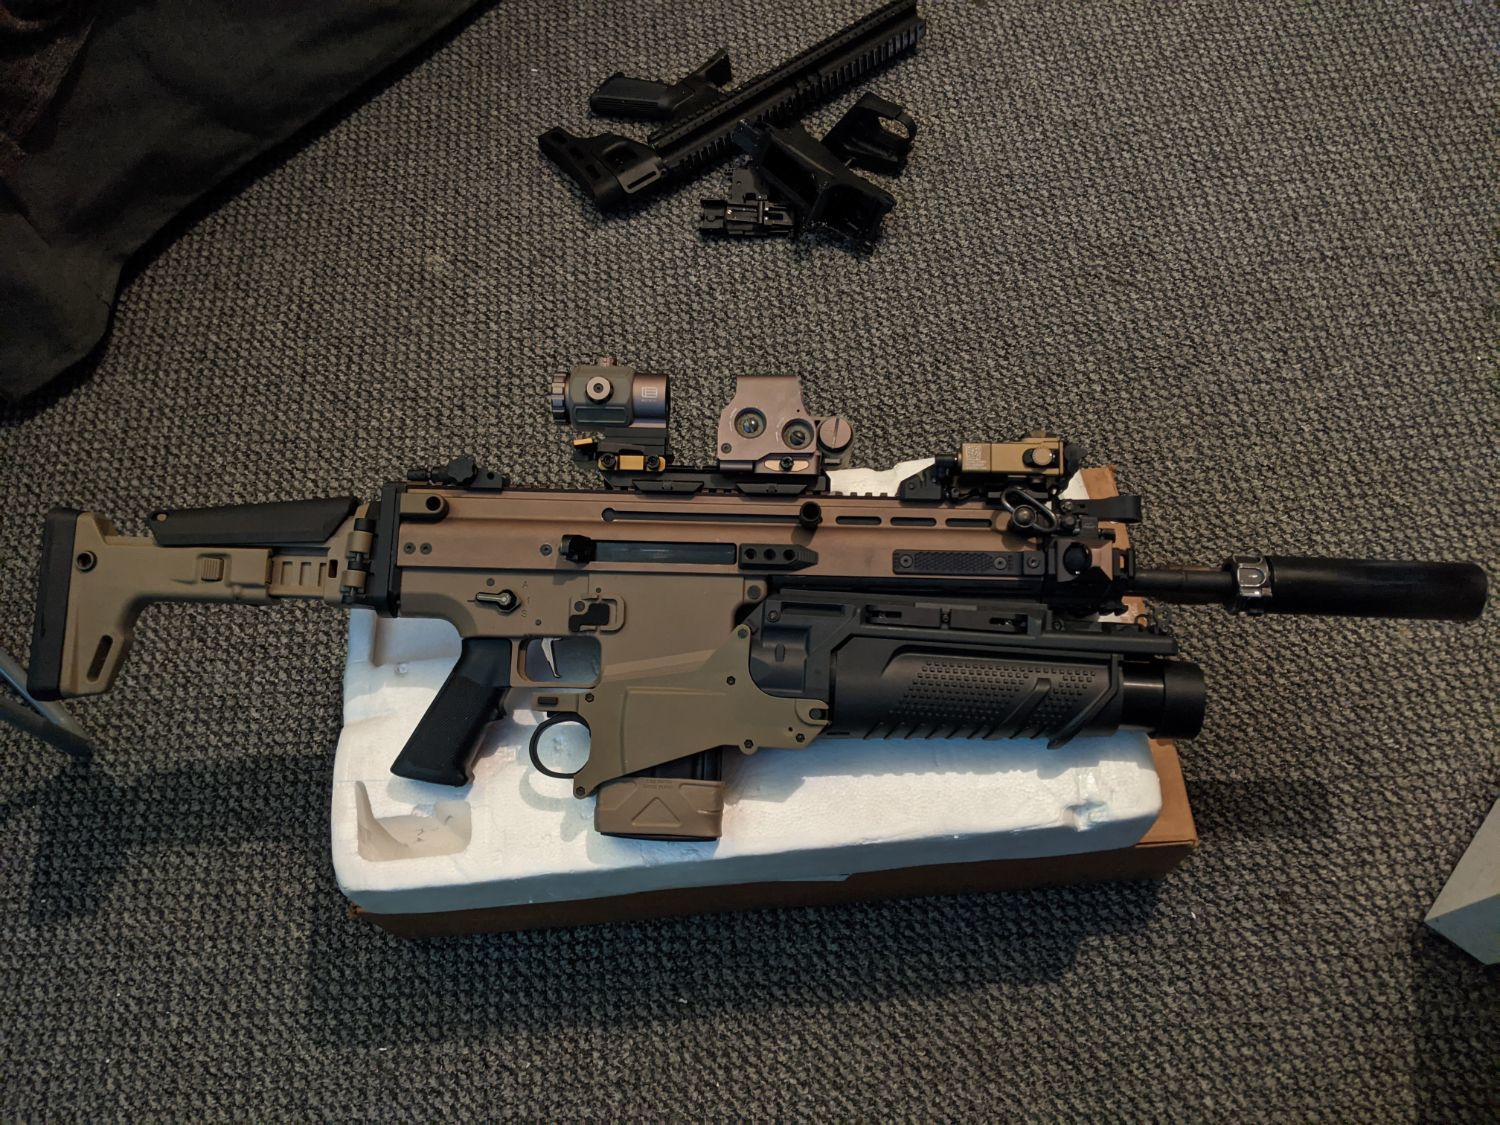
Finished painting new build so slapped the parts together for a picture.
Need a new grip that fits, shorter outer barrel, and to put more grip tape on the recessed parts of the stock, and probably a grey/silver titan trigger.
Any suggestions for grips that might look good on it?
with battery extension:
-
8 minutes ago, Alimcd said:
Been fiddling with something a bit unusual. GHK G5 in an SRU kit with an internal AEG mid cap HPA adaptor
Giving a steady 1.1J and making all the noise doing it
That is some awesome looking blowback. is it because it's HPA'd up?
-
I give my guns/projects codenames, and I call my SCAR-H the 'Broadsword' - it is a heavy fucker for sure!
-
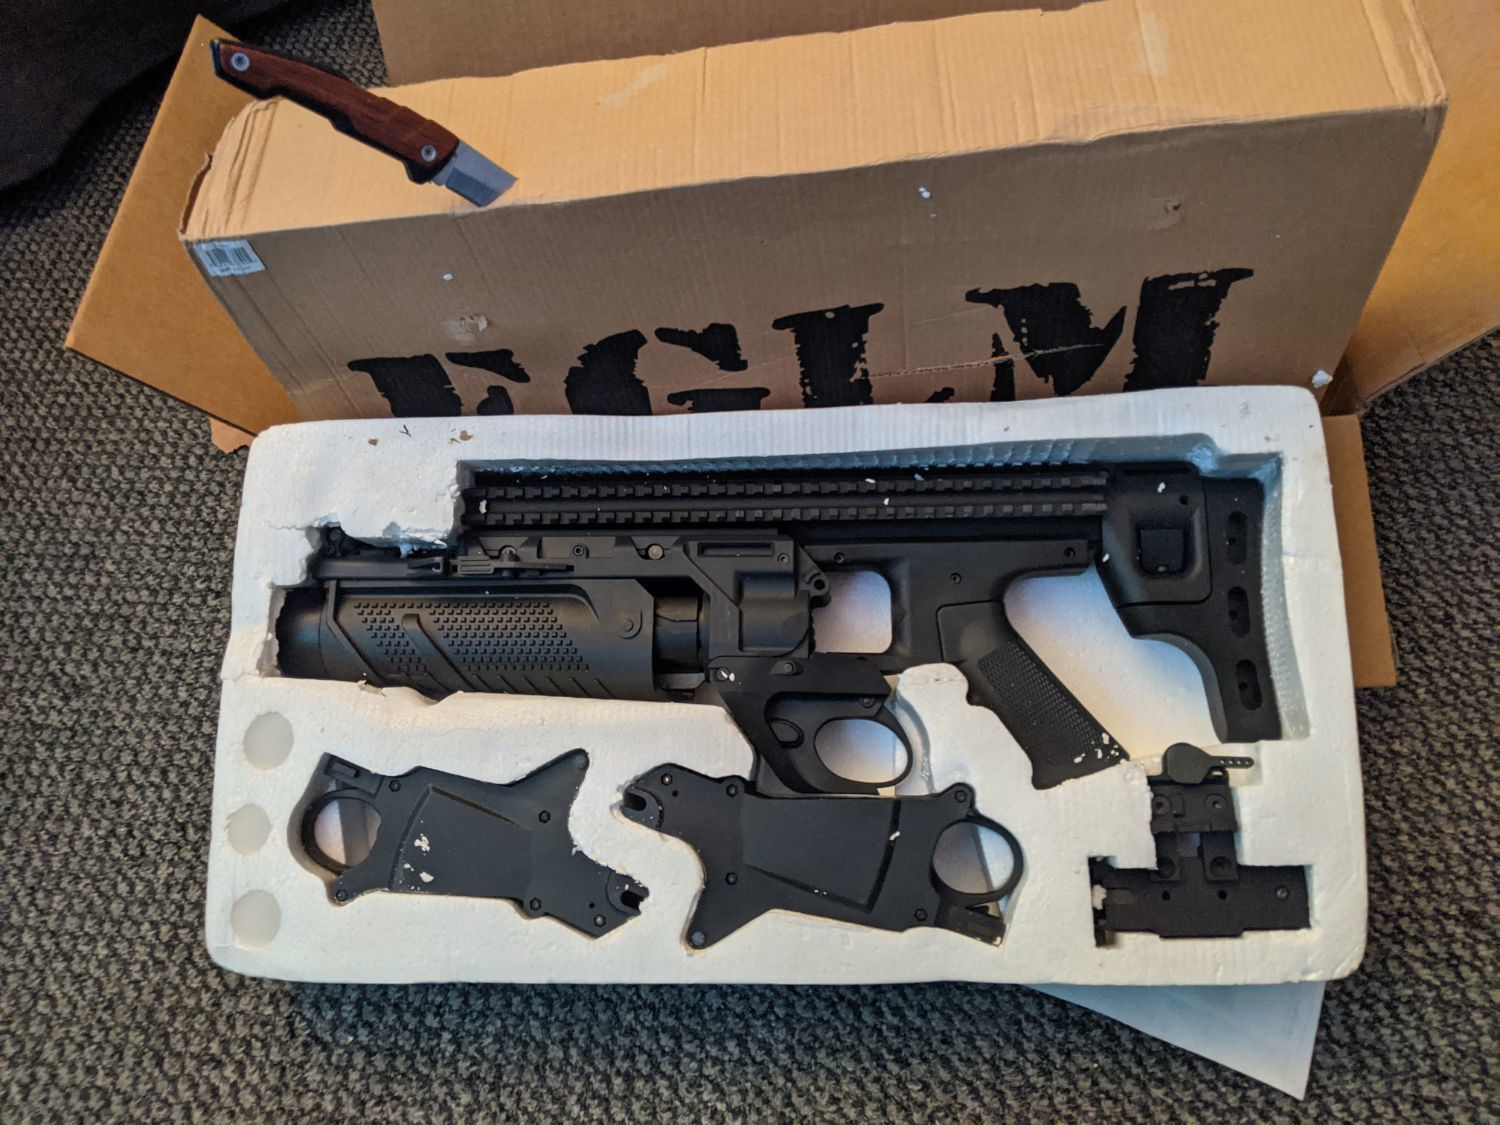
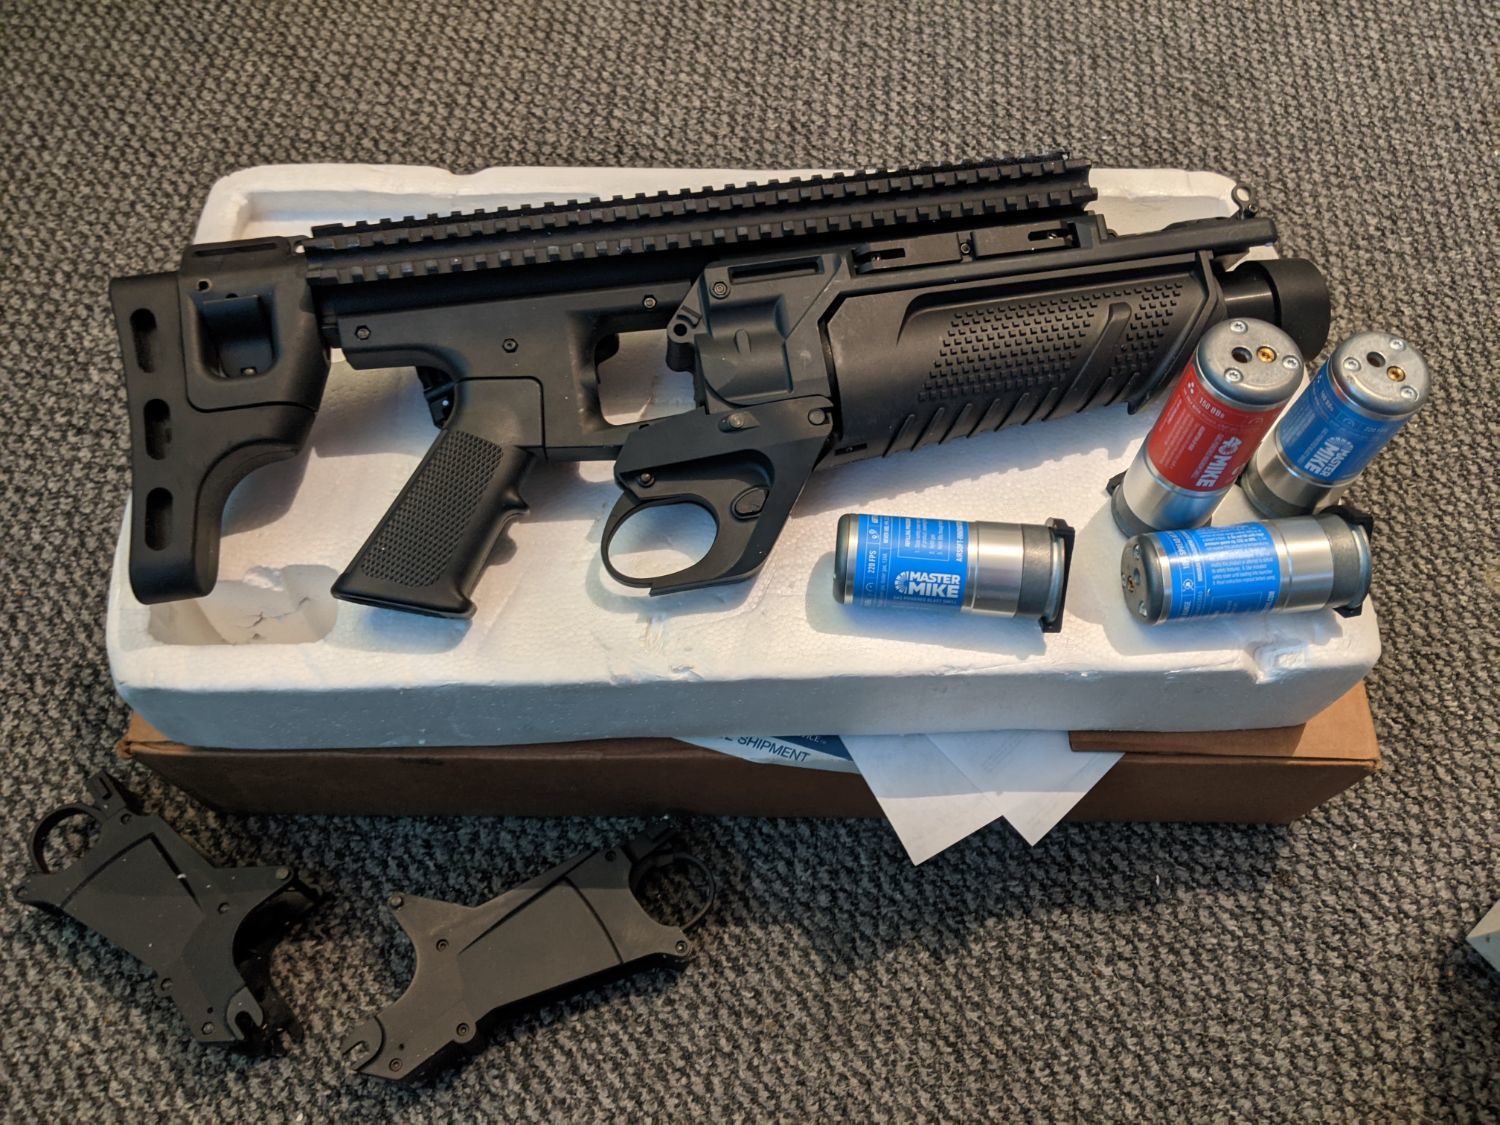
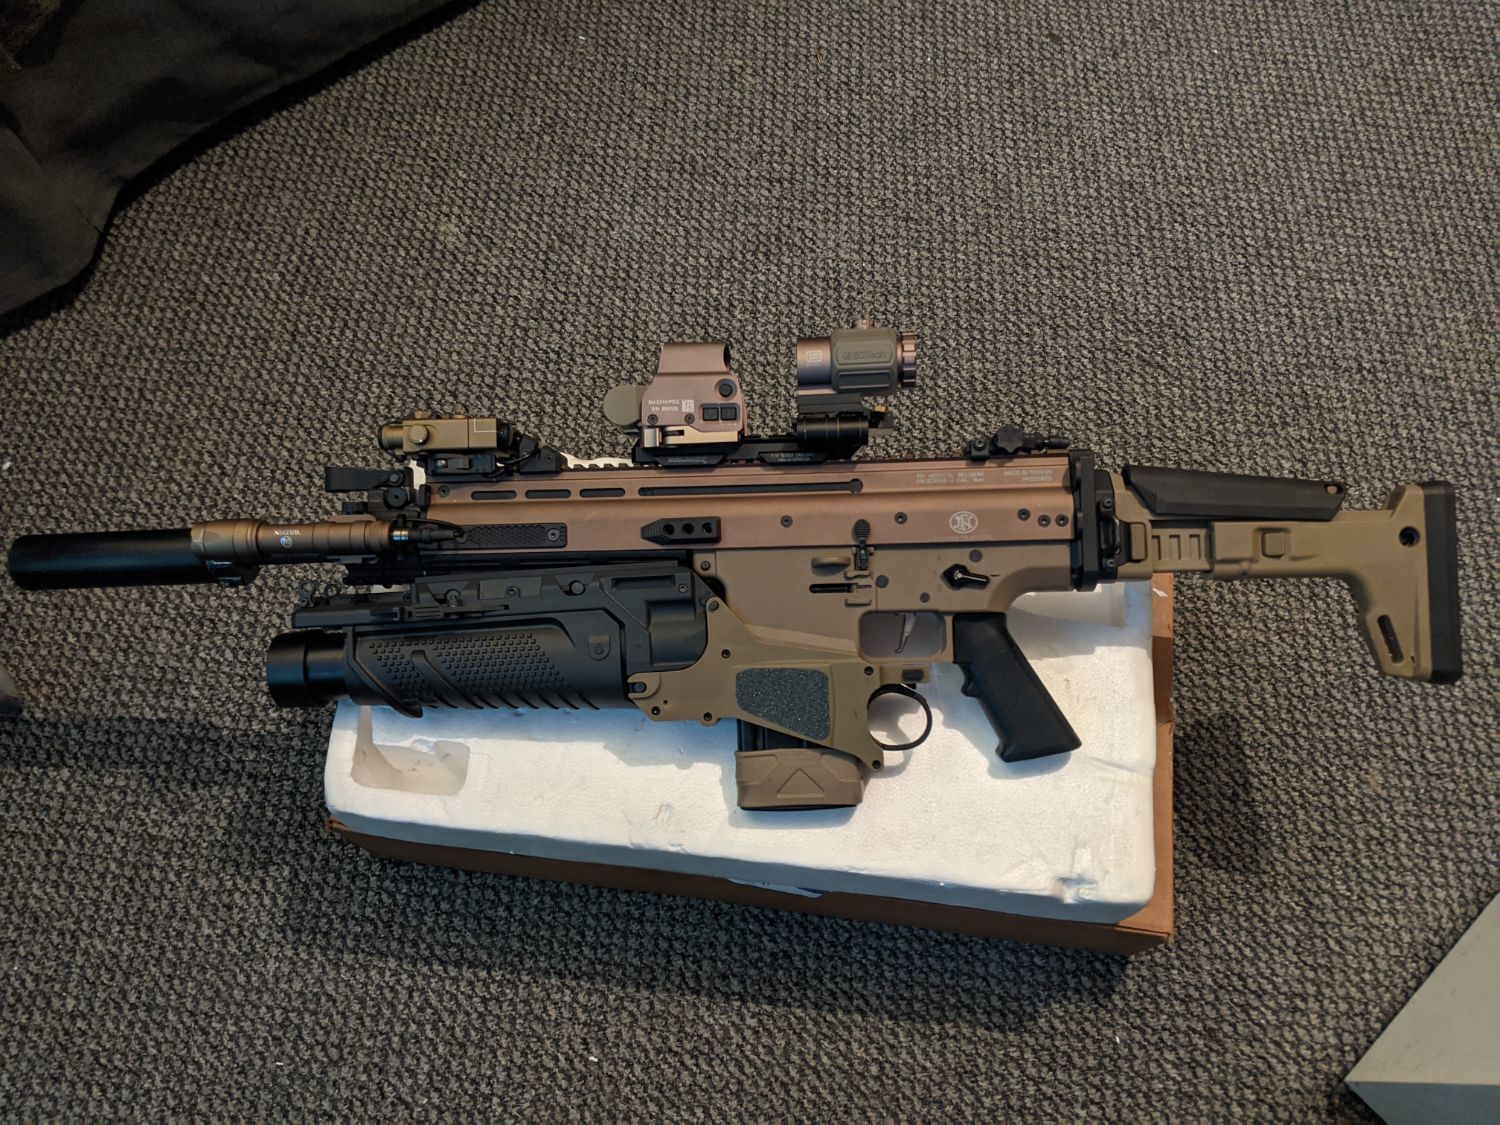
My EGLM finally arrived from a buddy in america, got through customs without issue and no import fees!
Gonna have to dremel the front of it so it'll fit on with my PMM rail extension, but i'm really happy with how the whole two-tone look has come together. Just how I imagined it.
- Skullchewer, PopRocket123 and Alimcd
-
 3
3
-
- Popular Post
- Popular Post
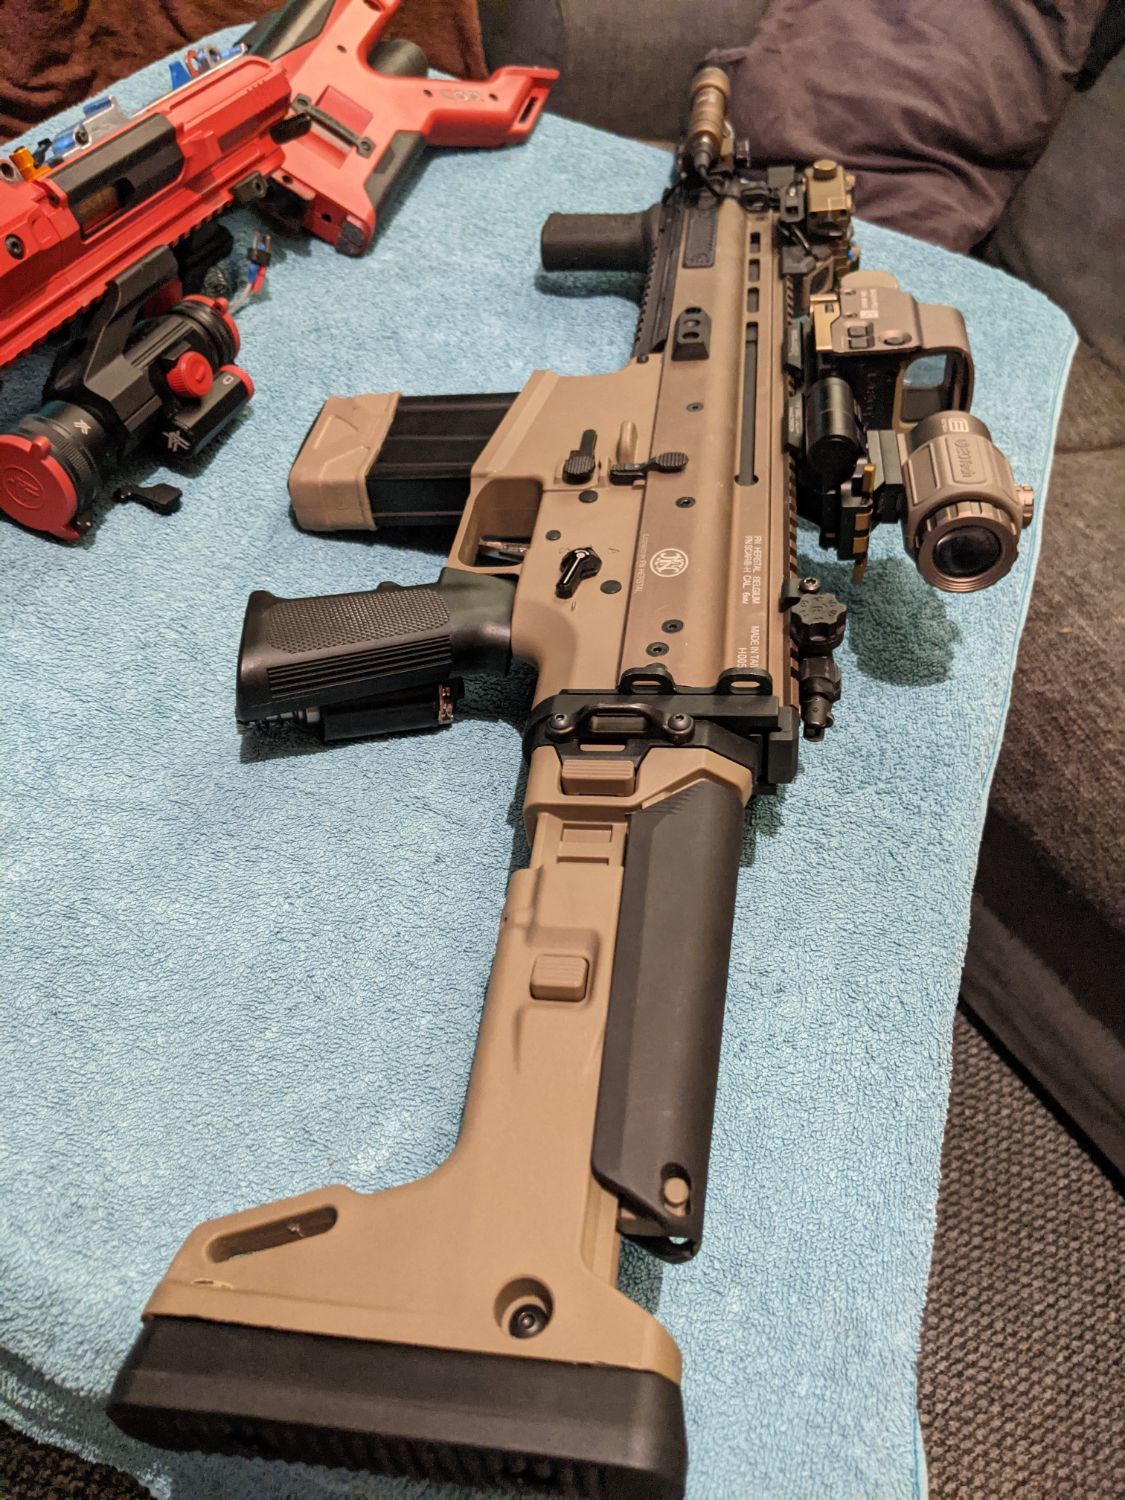
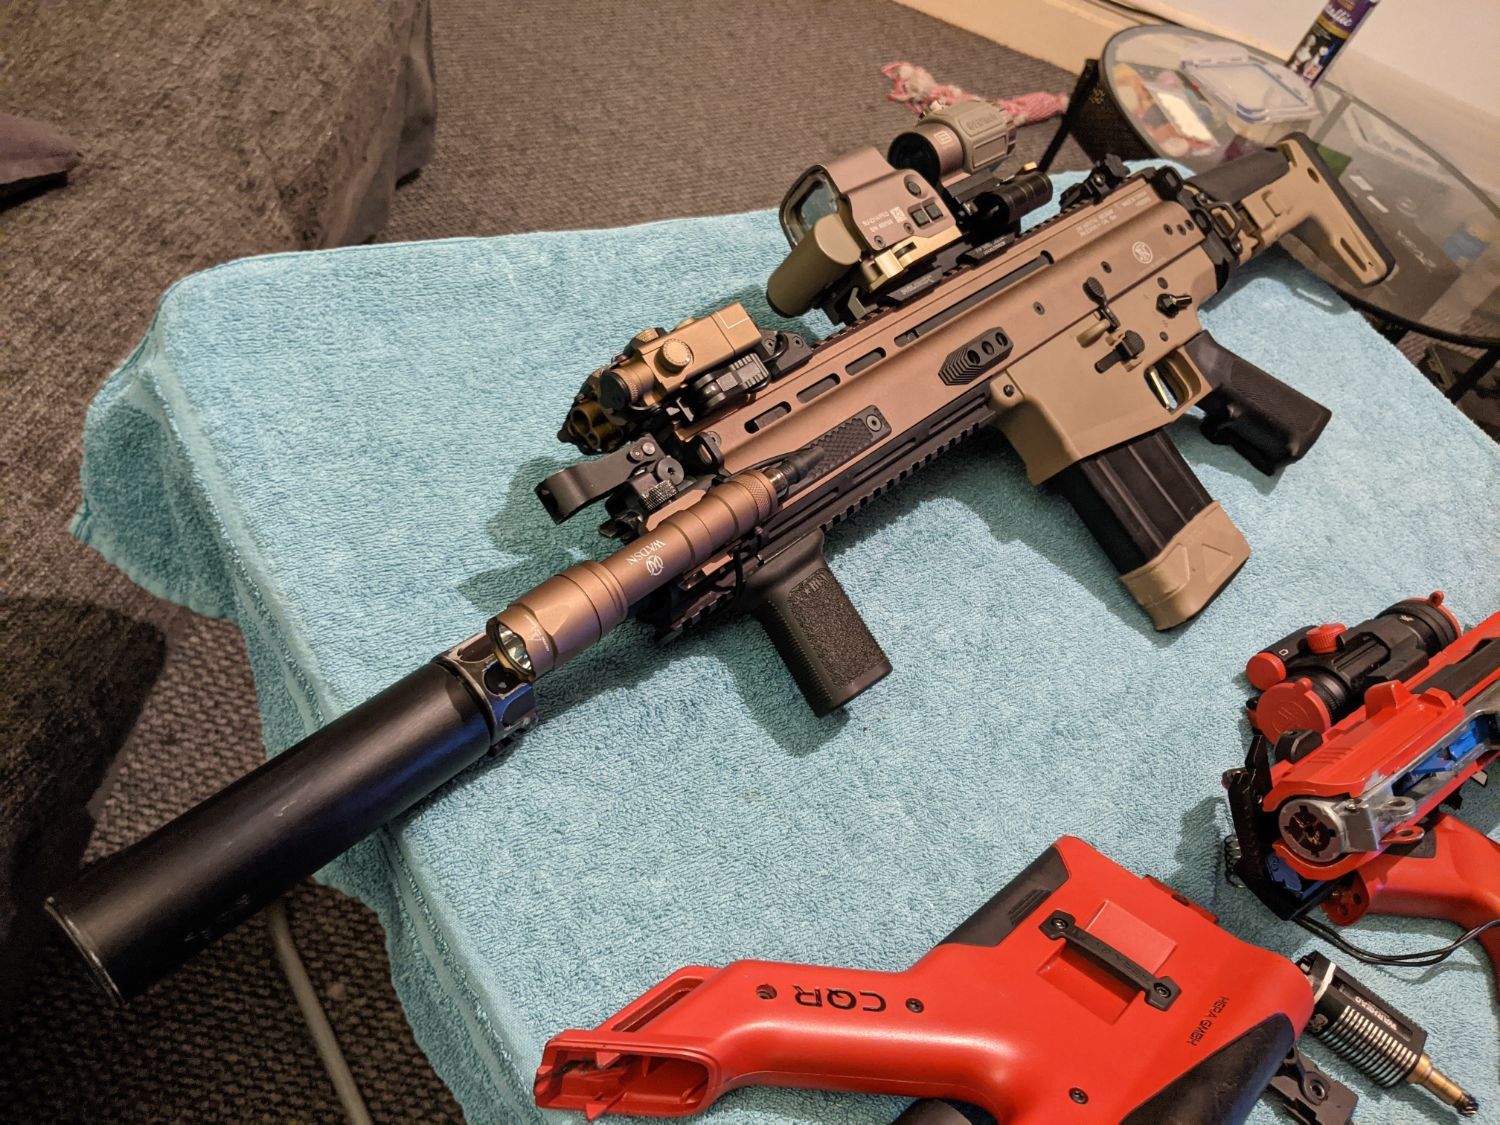
I'm waiting for warhead to get my motor back to me and I think I can finally call my SCAR-H 'Broadsword' complete. Real happy with how the two-toned stock came out, I had the cheekrest cerakoted black. (shout to Supreme Coatings)
Just slapped the parts together because I wanted an up to date pic, grip is resting on a motor there..
-
Finished the stock mod for my ICS CQR 'Orion'
Fits battery size H21.5 L115 W34mm
https://www.modelsport.co.uk/product/spektrum-2200mah-3s-11.1v-100c-smart-lipo-battery-ic3-443852
What I forgot to take a picture of is that you need to chop about 3 inches off the buffer tube. The stock is still completely stable without it. I had to get my black n' decker out for that.
-
A mighty haul.
-
-
On 04/02/2022 at 19:22, andrey said:
Dang man. I just got around to watching this and I guess you missed the rest of the thread where I've determined that the balance connector board is perfectly fine
 (It even has balance error when you try to charge a lipo with no balance I was sitting there like "oh nice an easy fix - it's turned on and not apart!" hehe.
Edit: Okay holy shit. I tried it anyway, and it works. I don't know how, I mean there's a video of me right there checking all the traces and it's fine. But it works. Thanks for that, one less thing I need to re-buy now.
I suppose my idea about trying those 'balance connector boards' would have actually indeed worked, since they plug into the large connector.
-
need to revise.
-
Thanks will check this out later.
-
Not really 'made' anything, but wanted to separate my sector gears and couldn't figure out how after removing the screws and came up with this brilliant idea:
-
I'm really just trying to min-max as much as possible, I could just go with either or and probably never notice a difference, but part of the fun is tweaking stuff and optimizing it as much as possible for me.
I'll go with bushings on bevel and sector like you say and bearings on spur I guess just to start with.
ZCI steel bushings and EZO bearings
-
2 minutes ago, Asomodai said:
Also P90s tend to have a solid oval bushing and can use bearings for the other two gears.
Yeah I did that with my pulse rifle (thompson). Got steel oval bushings and bearings for the others. That was just to upgrade from the plastic ones it had though and I wasn't thinking about performance like now.
-
Does anyone have any data on the stress points in the gearbox? For example, I was thinking, the spur gear for example is bottom heavy and usually not shimmed up much, whereas the top side is just the shaft and opposite the side taking the most stress from the bevel gear, right? So what about putting a bushing on the bottom, and a bearing on the top?
And how about the other gears, bushings on side of bevel gear with the teeth, bearing on the other side? Maybe bearings both sides of the sector?
Has anyone mix/matched before like this, any data out there on whether there would be a benefit? I'd like to try it - I might - someday - even sit down one day and mix/match them in lots of different ways and then check for RPS with each setup and log everything - don't suppose anyone has done that before?
Edit:
I found this on retroarms:
https://www.retroarms.com/news/the-difference-between-bushings-and-bearings
QuoteIn some scenarios, there is possible combination of the bearings and bushings, for example using bearings on the motor gear and using the bushings on the piston and spur gears. It is only individual and these setups depends on every airsoft technicians, where they prefer different kind of solutions. There is of course the need to count with all forces on every bushings or bearings with wanted lifetime.
I think I am going to try:
Bevel - bushing on gear side, bearing other
Spur - as above
Sector - bushing on side that grabs piston, bearing opposite
-
3 minutes ago, Iceni said:
I wouldn't bother with paste solder.
paste flux do you mean?
I didn't know there were different kinds. I'll get that 40g tin then.
Got a liter of 99.9% iso alch already, great for cleaning gears and gearbox when doing a clean start build.
Thanks for the cheaper sponges, but I need something that' gonna hold them, like https://www.amazon.co.uk/Soldering-Cleaner-Wire-Type-Holder-Cleaning/dp/B07MHSTGRW/
-
1 hour ago, Lozart said:
I have a similar gas iron in my arsenal of hot pointy tools, while yes, it's "adjustable" it's not got anywhere near the finesse needed for working on a PCB.
Cards on the table, I used to do this kind of stuff for a living and spent 4 years doing an electronic craft apprenticeship with the MoD/Defence Research Agency (as was, now Qinetiq). There is definitely a knack but better tools always help!
There's an electronic store around the corner that I took my Titan to last week to have him solder new wire to the board, I suppose I could take it to him and see what he says.
At the same time I think I'm going to have him put all new XT60 (prefer to deans) on all my batteries / cabling, because I'm aiming for optimum efficiency and some of my solder jobs look so terrible that they must be causing resistence in the wiring.
26 minutes ago, Iceni said:It's not just the tools, it's the whole system.
I picked up a load of ex MOD gear a few years ago dirt cheap, Among it was a lovely roll of the really thick masking grade 3m kapton tape, and a few full rolls of Omega 63/37 with fast flow flux 2% flux. It blew my mind just how much better these products were than the standard store bought products.
That solder is £40-60 for 500g's compared to £20 for some cheap lead free stuff from amazon. But holy shit it's a night and day difference.
Equally flux. You can't solder without it. Well you can but it looks like shit - See above. A couple of cheap rosin blocks is a couple of £. A few dropper bottles (ask anyone you know who vapes), and some Isopropanol alcohol. Fill the bottles about 50% with IPA then break up one of the rosin pucks and put different amounts in the bottles... Will give you some really good flux for very cheap, and different grades for different work... Thin and low content for clean work, High content thicker for dirty work and wires. Ebay Colophony flux and you should see the little tins, It's a brittle tree sap. You can also just dip the tip in it. Smells divine.I need a new tub of flux, some of that metal cleaning wire stuff, basically all the bits except solder,
SRA Rosin Paste Flux #135 with a Soldering Iron Tip Cleaner with Brass Coils
https://www.amazon.co.uk/gp/product/B098PYNNDP/
Thermaltronics TMT-TC-2 Lead Free Tip Tinner (20g)
https://www.amazon.co.uk/gp/product/B00NS4J6BY
MG Chemicals Desoldering Braid #4 Fine Braid Super Wick with RMA Flux, 5' Length x 0.1" Width, Blue
https://www.amazon.co.uk/gp/product/B008O9VLA2/
Seem like the best 'budget' options available, and even that is more than I can really afford right now.
Edit: Just picked up the braid since I noticed that was cheap and I have prime. will save me from cutting wires shorter and shorter every time I replace a plug or something.
-
Yeah I have like three of them. I've never been able to get them to work. I only even heard about braid recently which is weird because i've been soldering for years, need to get some of that.
And I did have an iron with an adjustable temp knob, but it took forever to heat up and eventually broke, and I just love the lack of the wire getting in the way with the gas one. It is adjustable too, but obviiously it's just analogue adjustment.
-
1 hour ago, Rogerborg said:
No, he does teardowns for fun. People send him dead stuff, or interesting things, to sacrifice on the altar of pop-science.
Oh ok that's what I figured, and yeah might aswell, would be interesting if he figured it out just so I know what it was.
-
34 minutes ago, Lozart said:
It's not so much the means of holding the work, it's more the size of the soldering iron and lack of consistent application of the right amount of heat. I agree that soldering onto PCBs is a bit tricky in trying not to burn the board but the wires are all melted to fuck and I'm astounded you managed to get THAT much solder on just one joint!
Well what happened was I soldered one of the red wires to it, and then when I tried to just stick the other one on to the same blob I had down, the other wire came off, I had to put more solder on to get that solder to melt so I could fix the first wire, and blabla by the time I got both on there was a load of solder, if I had decent helping hands that actually kept things in place it would help - also a magnifying glass setup on it too - but anyway they were on solid and it wasn't touching anything it shouldn't so at that point I just leave it to avoid making it worse.
-
6 hours ago, Lozart said:
Did you solder that with your eyes shut?
I'll be the first to admit I'm terrible at soldering. I can't keep my hands steady at all. Gave up painting WH40k because of it. Shit I hope it's not early parkinsons..
But also those connection points are absolutely tiny and I had to solder tiny wires to them while avoiding all the other solder points and avoiding burning out any more trace with the iron, doesn't help that I need a good pair of Helping Hands too since this adjustable 'spider' one is trash. Any recommendations for a good soldering workstation or something?
I was thinking of this, but it's super expensive, there must be some chinese copy out there:
https://www.amazon.co.uk/gp/product/B08QZ48T28/ref=ox_sc_saved_image_8?smid=A7AHT9N61VJ59&psc=1
14 hours ago, EDcase said:Maybe worth sending to Big Clive then...
How do I do that? Is it just for him to tinker with or does he do repairs for coin?
-
1 hour ago, EDcase said:
If interested:
It's genuine


Can a lipo be too powerful? I can't not-destroy a piston within 10 minutes.
in Electric Guns
Posted · Edited by paradoxum
Since going from a small nuprol stick lipo to this after modifying my stock to hold it, I can't not destroy any piston I use.
Spektrum 2200mAh 3S 11.1V 100C Smart LiPo Battery IC3
I started with DSGs, after breaking a few pistons and knurling the teeth on it and buying like 2 extras to keep trying, I gave up and went to 1:13, but it's the same, I've gone through about 10 pistons now, and this isn't my first build I know how to AoE and shim properly etc.
Oh, I have also tried various strength springs along with spring guide spacers to make it super tight, no matter what configuration it just wrecks pistons.
If it doesn't pull the metal rack off the piston and break the small plastic retainer on the front, it'll just grind down the teeth on both piston and gear. It seems like it's either too strong and pulls the rack off the piston, or the rack stays on and it just pushes the piston up and grinds on the teeth until it doesn't even pull. Yes have tried adjusting height of gear etc. I've honestly tried pretty much everything over like the year I was working on it, and just got fed up until now and since I spent so much money to build it I just want it bloody working.
Have also tried about several differently cut tappet plates;
(I haven't worked on it for like a year so just trying to find old pics now, got a recent desire to finally get it running.)
You may have seen it before, it's the Orion;
I have no idea what the setup was here but here's a clip of shooting at one point;
https://streamable.com/isymmn
It could fire like that for maybe half an hour before the piston breaks.
Unfortunately it's an ICS gearbox.
Parts list from my spreadsheet log;
I was looking at the jager 2 piston; https://airsoftmutation.com/products/the-jaeger-mkii-piston-pre-order but it's expensive and I don't wanna just wreck that in 5 minutes too.
Any real ideas guys?