Darkmikey22
-
Posts
278 -
Joined
-
Last visited
-
Days Won
18 -
Feedback
100%
Content Type
Profiles
Forums
Buy a Patch
Classifieds
Everything posted by Darkmikey22
-
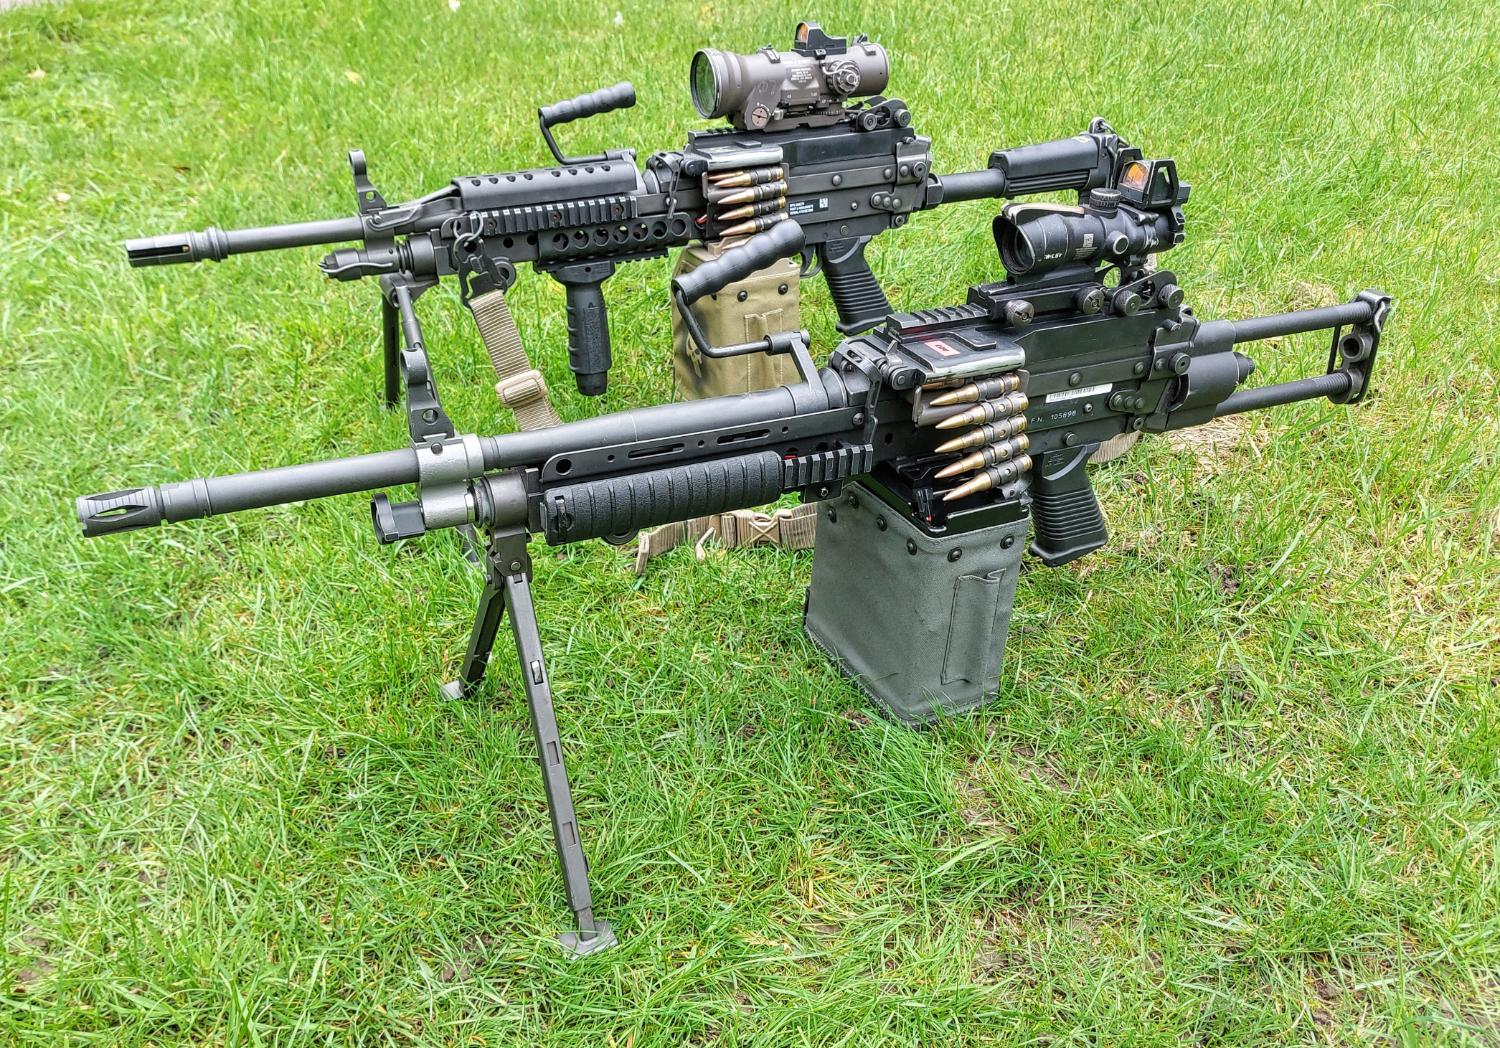
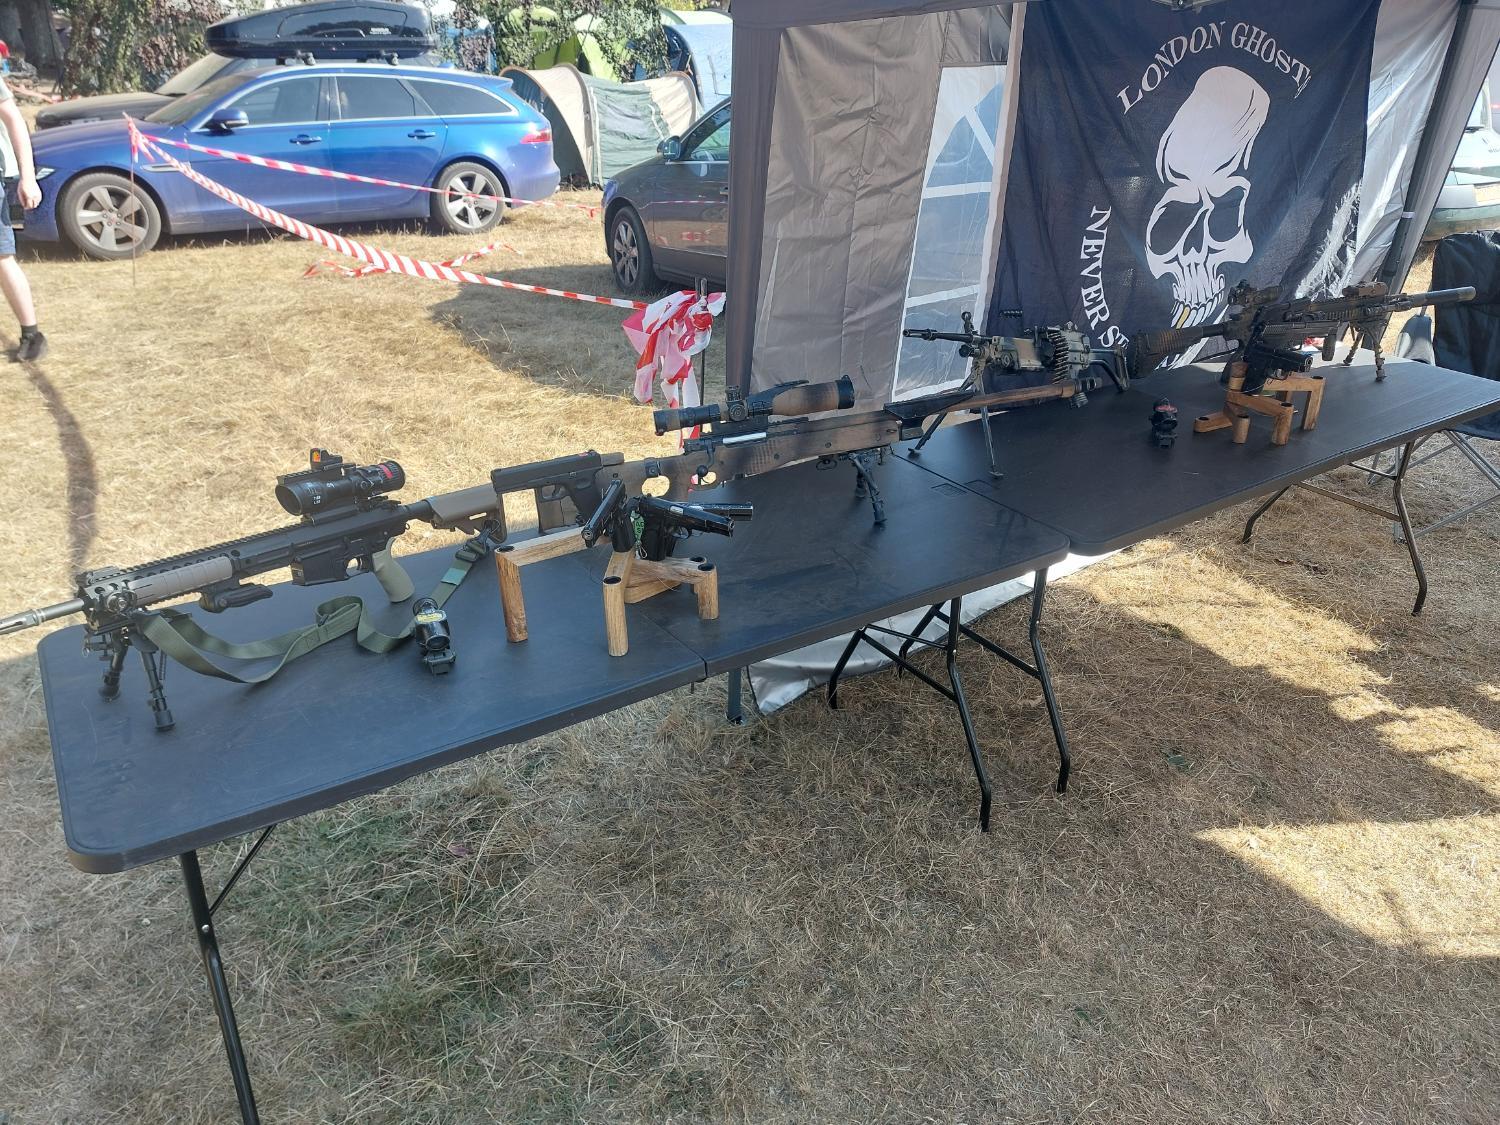
U.S Mk48 and UK L130A1.

-
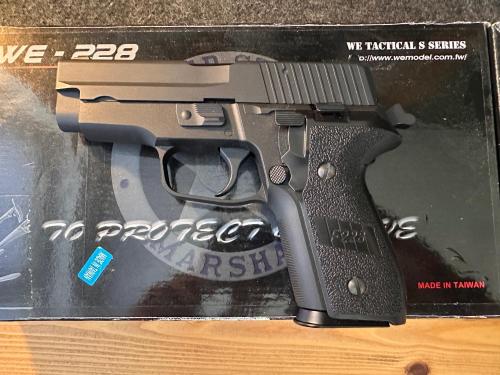
Thanks to a member on here. Now sourced a L107A1 - P228
-
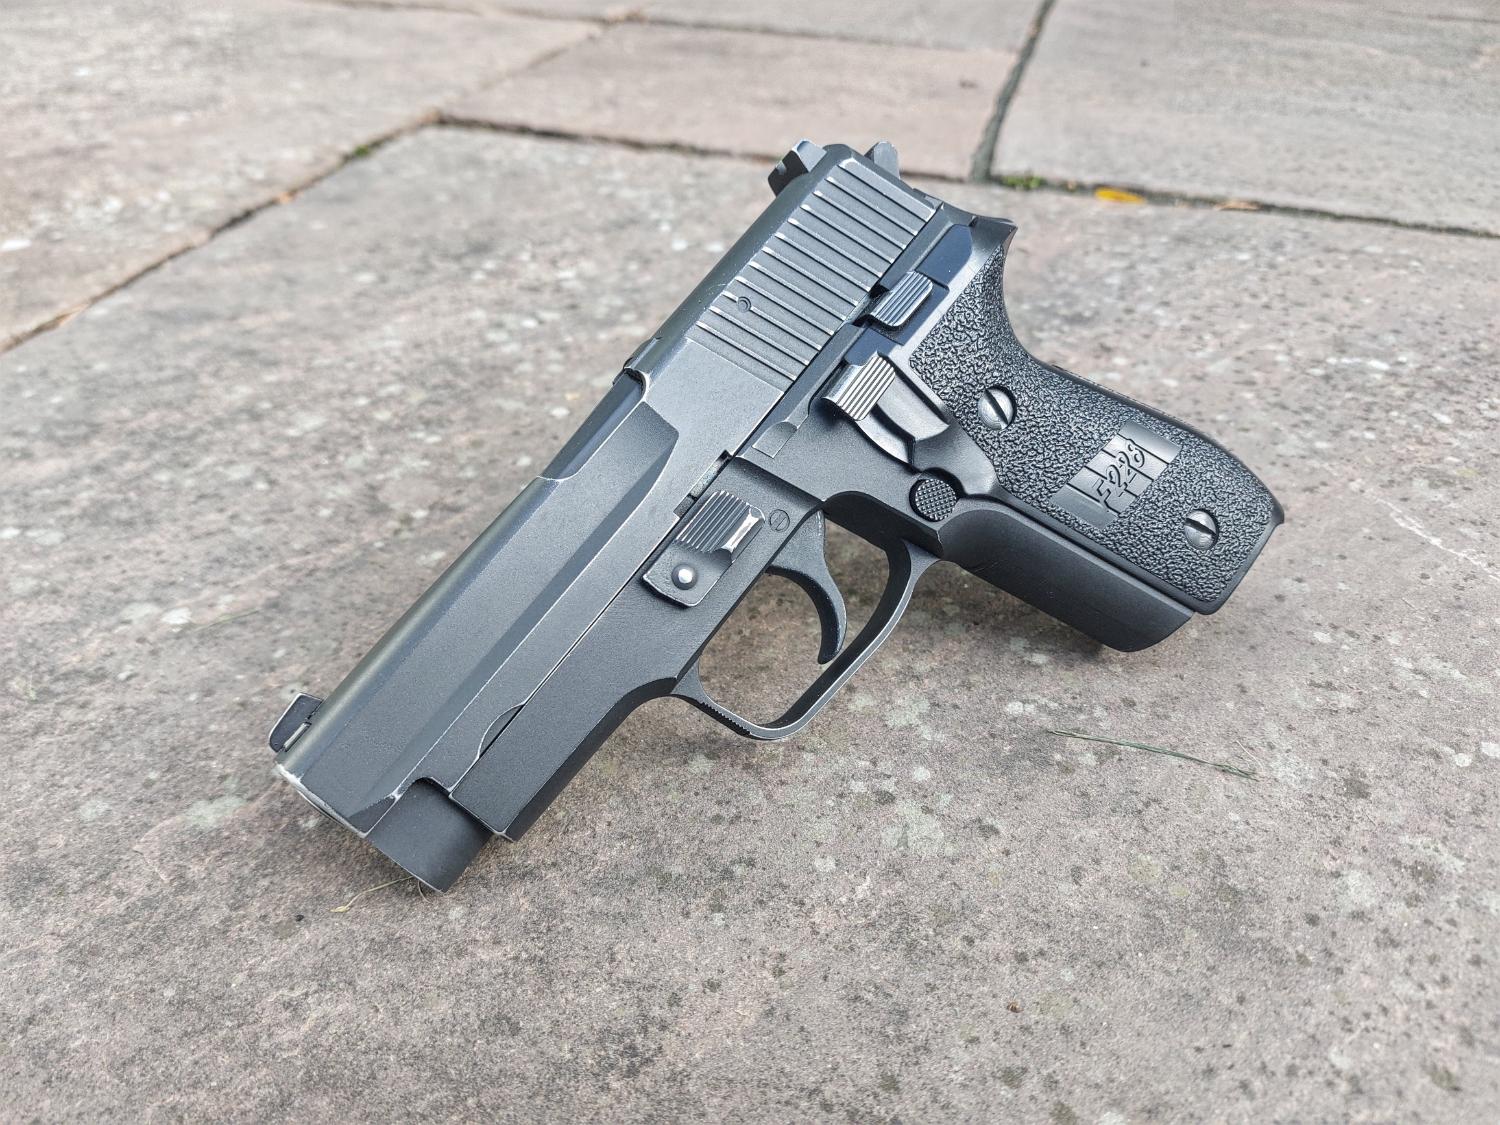
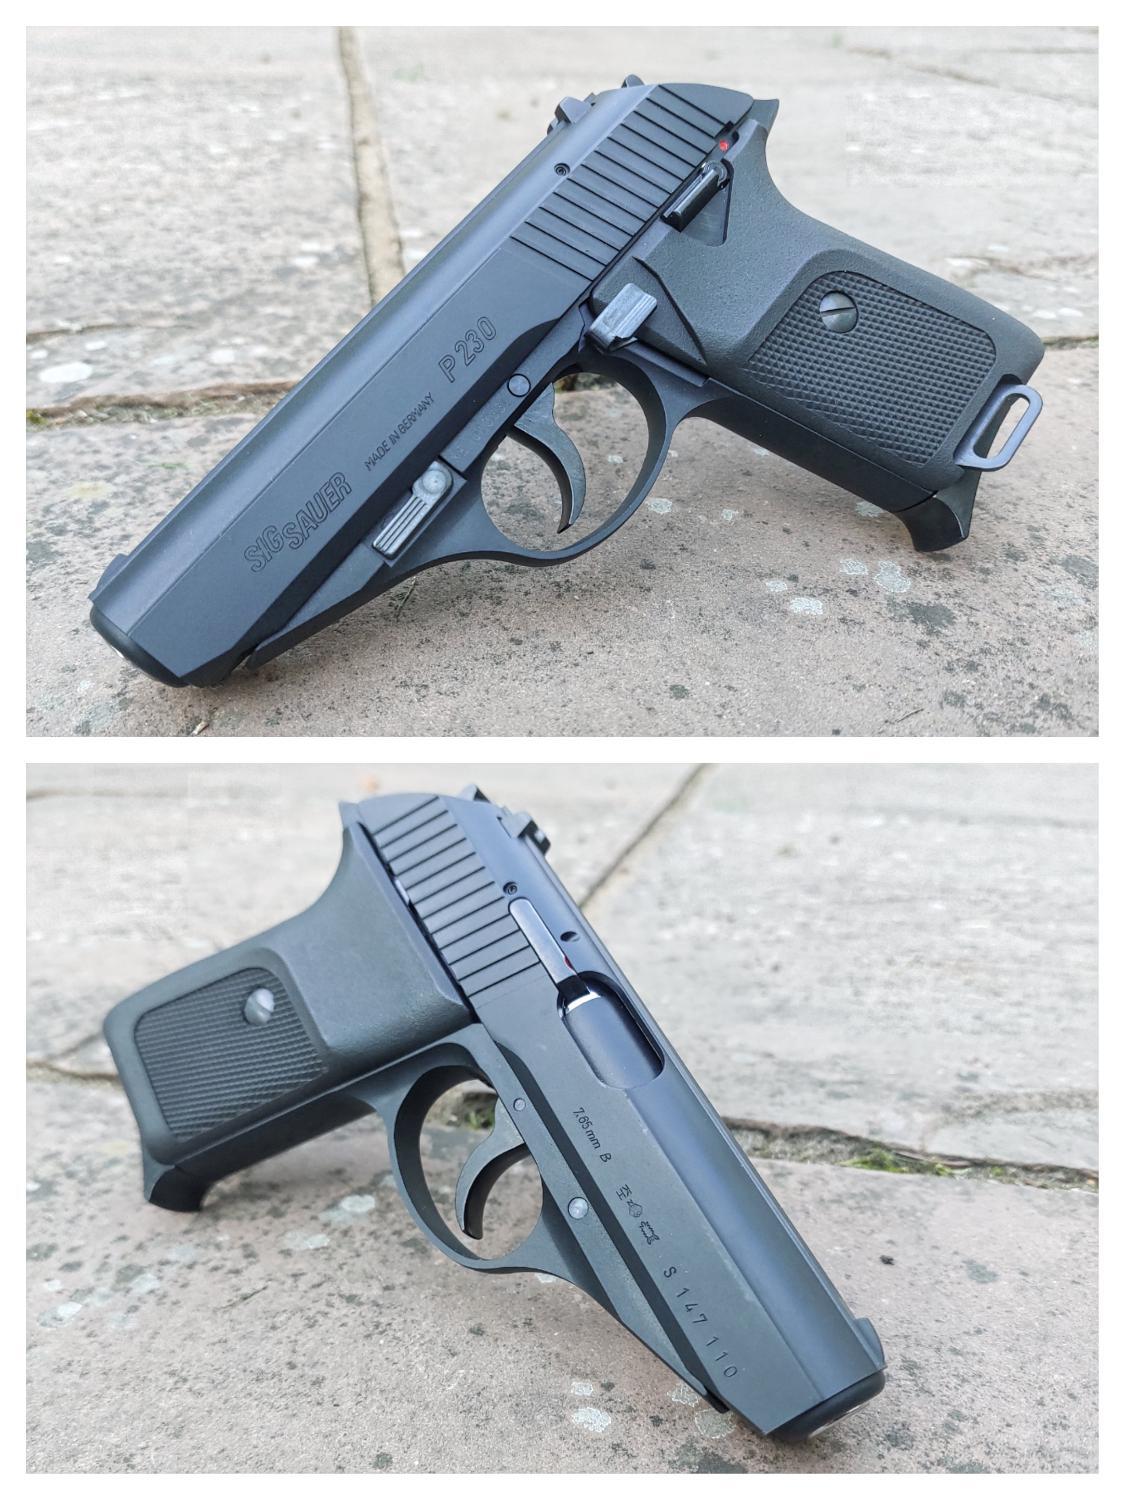
A nice find. A brand new KSC SIG P230
-
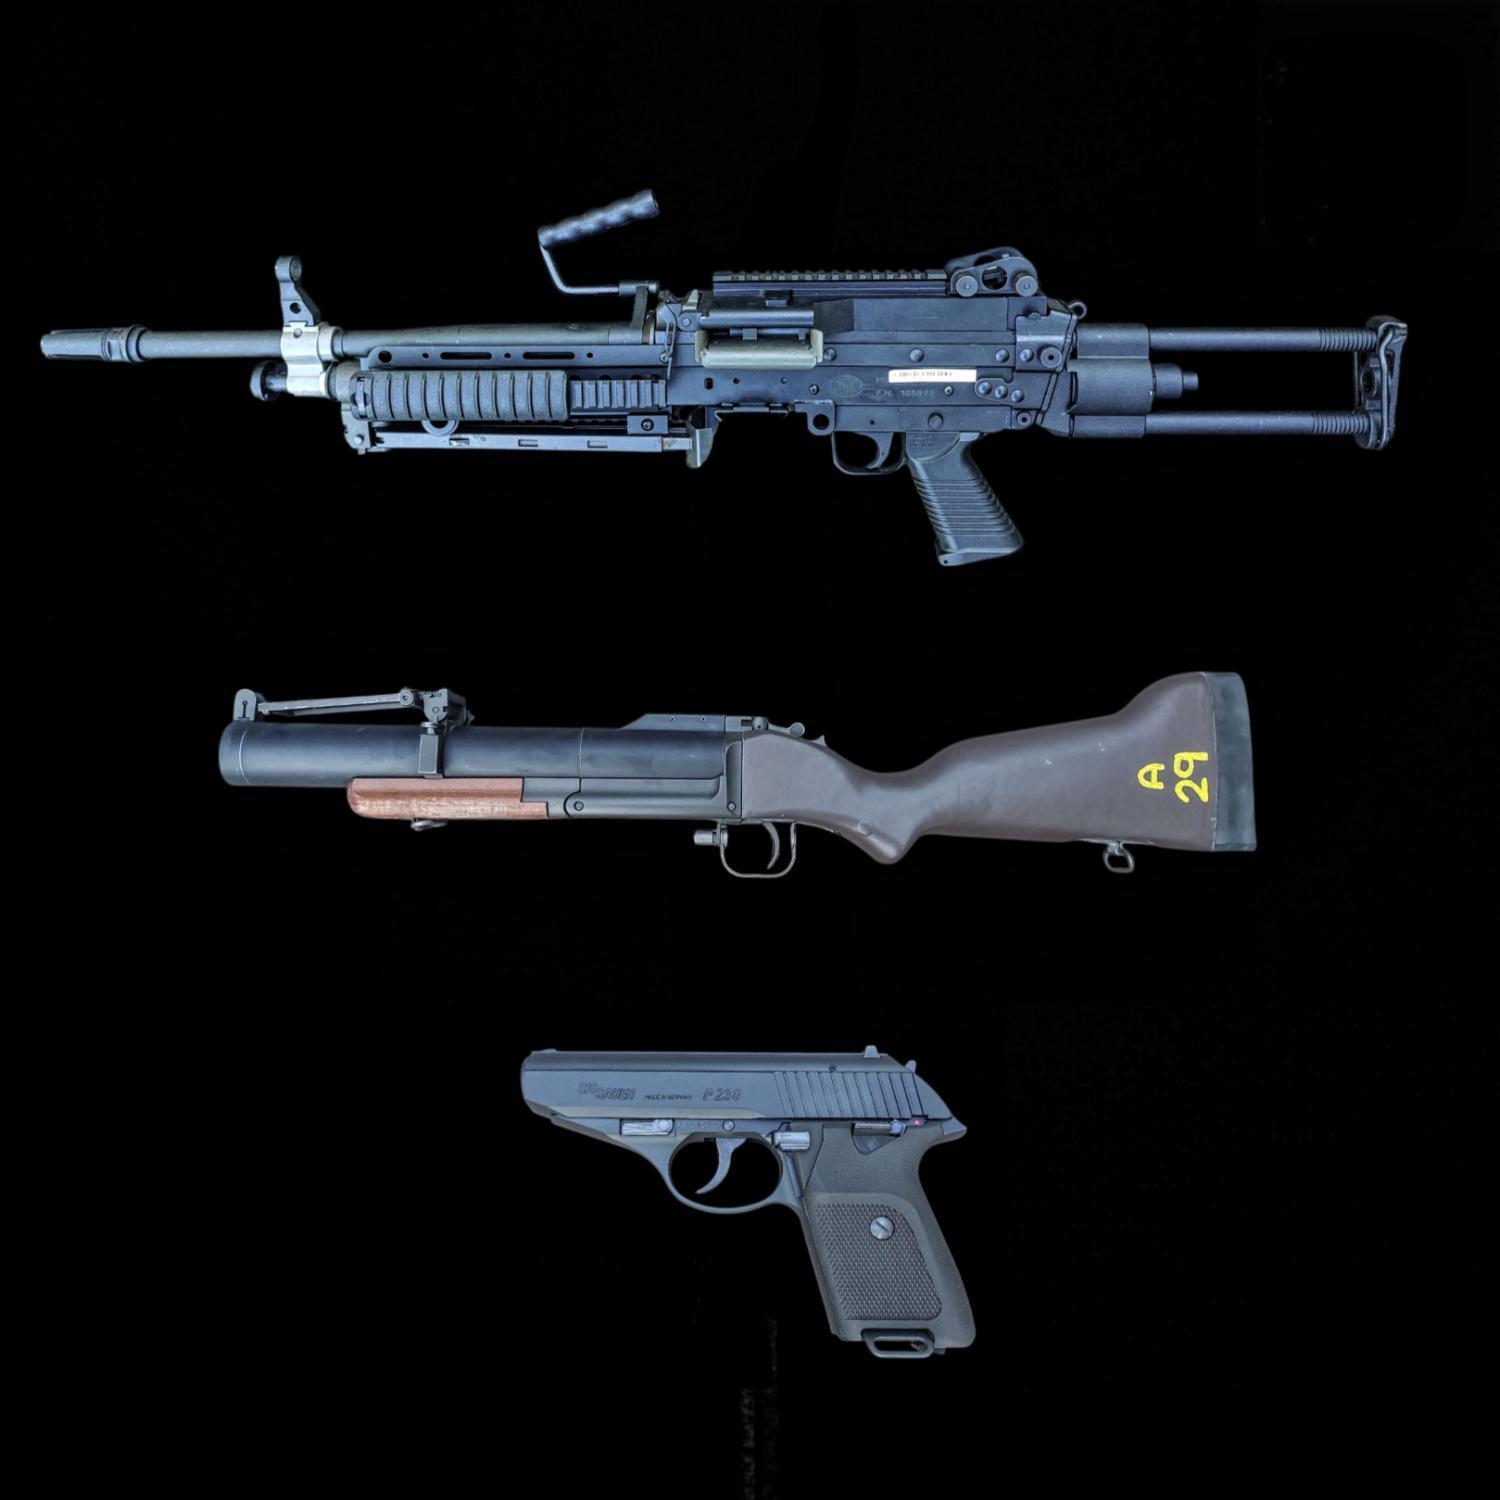
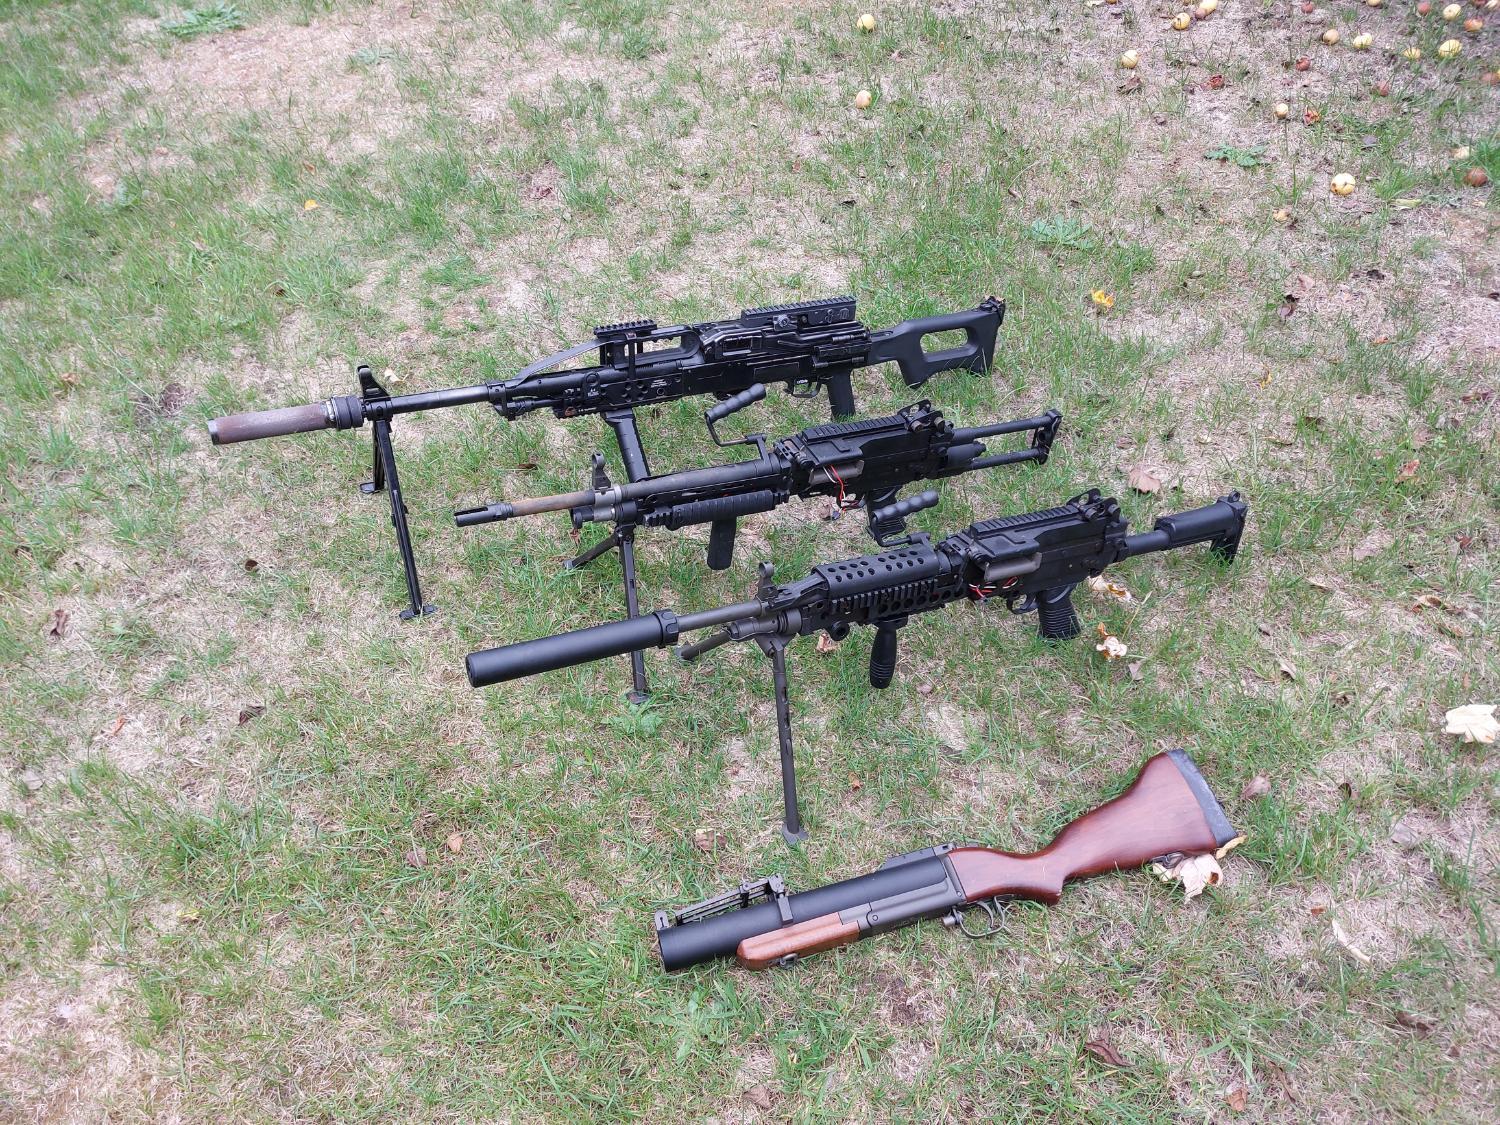
So, just to add. I've since had a few new pieces join the collection. The L130A1 This is the 7.62mm variant of the FN minimi. This system was only ever in use with UKSF/SFSG, and has been used for some time. These are usually seen with a TA01 with RMR, LA5 peq and a green LBT box mag. There are a few differences between the UK version and US version (MK48). GAS BLOCK/REG The US version uses the 7.62 type, while the UK version uses the older Minimi type, with even a MK1 type gas regulator knob. BIPOD US version uses the new improved style, while UK uses older type. RAILED HANDGUARD There are 2 US types. The improved tri rail or the older MK46 style over barrel rail. The UK version is similar to the KAC type tri rail. BOX MAG MOUNT Now I'm not entirely sure what this plate is there for. But the US version has a 2 holed plate, that sits underneath the feed tray. This is not present on the UK version. MARKINGS The US version has MK48 markings on the right sight, just before the stock. The UK version just has the standard minimi type markings, but marked for 7.62. My version is a Lambda defence version. Has a few things that need addressing A few holes left in the receiver from manufacturer. Clean up some of the rusty parts. Spray the receiver a satin black as issued. Try and source a green box mag, or try dying the one I have potentially. And to source a TA01 acog. Next up. M79 Some people don't realise, this particular weapon has been used by the British since the 70s in Northern Ireland, and one or two pictured during the falklands. These were later replace by the HK69 launchers. The British version came with a fibre glass stock. Not the wooden one issued to US forces. Most were seen using SLR slings too. Lastly. The L109A1. It's a SIG P230. This was sigs answer to the Walther PP/PPK & P5. This was issued to SAS as a concealed carry both on covert ops and for personal protection when in plain clothes. Other than that, not alot is known about this little pistol. There were also rumours this was issued to helicopter crews along with the Walther P5's. But the guys I know, who were in the RAF, only ever saw the walther P5's issued at the time. Mine is the old KSC P230JP version. Only down side, is that it's plastic bodied. But for a small pistol, is extremely comfortable. I'm really not sure what to do with this, other than leave it stock. As haven't seen any pics of issued ones to getting it looking authentic.
-
Hahaha. I would love to do an EM2 and the later sa80 prototype (as pictured). But time and funds aren't as free anymore. Struggling to keep up with issued kit. Let alone prototype stuff, haha. And yes.... the plastic definitely looks mouldy. Maybe they should give to me to look after...
-
Just seen that in the classified. Came straight here.... didn't disappoint... haha. £800?.... I think he's looking for his next fix of what ever the hell he's been sniffing.... Then trying to justify it's a classic. Well I've still got my original TM XM177 springer...... To you, a mere $1m dollars. It has a sleek design. That old classic TM creak, that gets all the old players sweaty with dread. Was that creak or crack, my back or the gun. It's features more plastic than cher. It even features a drop down handle, which has you biting your lip, not in excitement. But in stiffness and the thought of breaking it if pulling too hard....
-
Lambda MK48. Weathered best I could back to the grey underneath, as per the real thing. Not sure I'm a fan of the suppressor.... But hey ho.
-

Time Left: 11 hours and 36 minutes
- WANTED
- USED
Looking for either the airsoft artisan or raptor PT-2 stock for a pkm.Ask for price
-

Can someone help with rough guide to these?
Darkmikey22 replied to Jonathan7787's topic in Appraisals
I'd be interested in the sa80... As for the m249. It's an A&K mk2 with a para stock fitted. Gas block gives that away. Classic army are a weird grey colour. A&K is bright. Like a realy odd light yellow/gold colour. -
The 'What have you just bought' Thread
Darkmikey22 replied to Cameron364's topic in Guns, Gear & Loadouts
Bought back my old LCT PKP, along with a Lambda mk48 Lambda L130A1 (7.62 EU version) M79
-
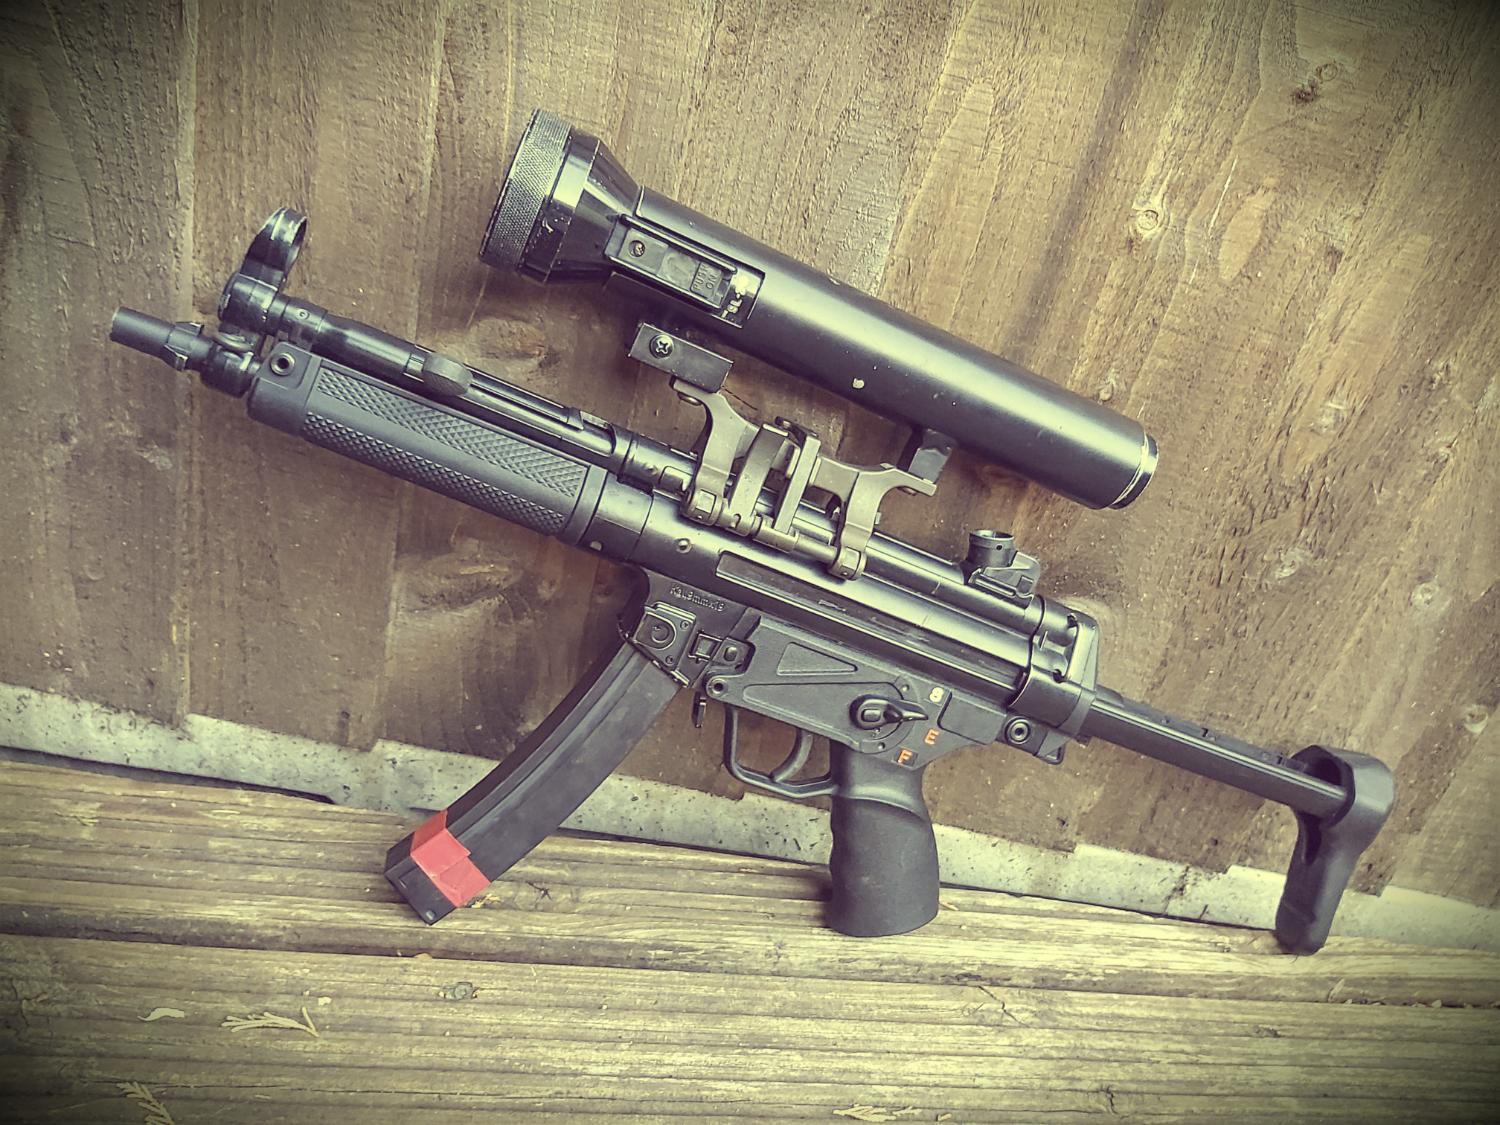
As far as I'm aware, yes a real handguard will fit a vfc gbb. All other makes and AEGs need an adaptor, as receivers are too short. If you can find one, vfc do the correct claw mount. As for the torch and torch holder. The real torch used is a Streamlite SL20. And the holder, there is a guy on Facebook called steve leggett. How makes and sells a very close replica to the real thing. Obviously it's down to your finances and how accurate you would like to go. But a suggestion if I may!.... if that's your MP5 in the pic, I would suggest finding the older style A3 type trigger group too.
-
 Have pm'd you a fee times, no reply.
 -
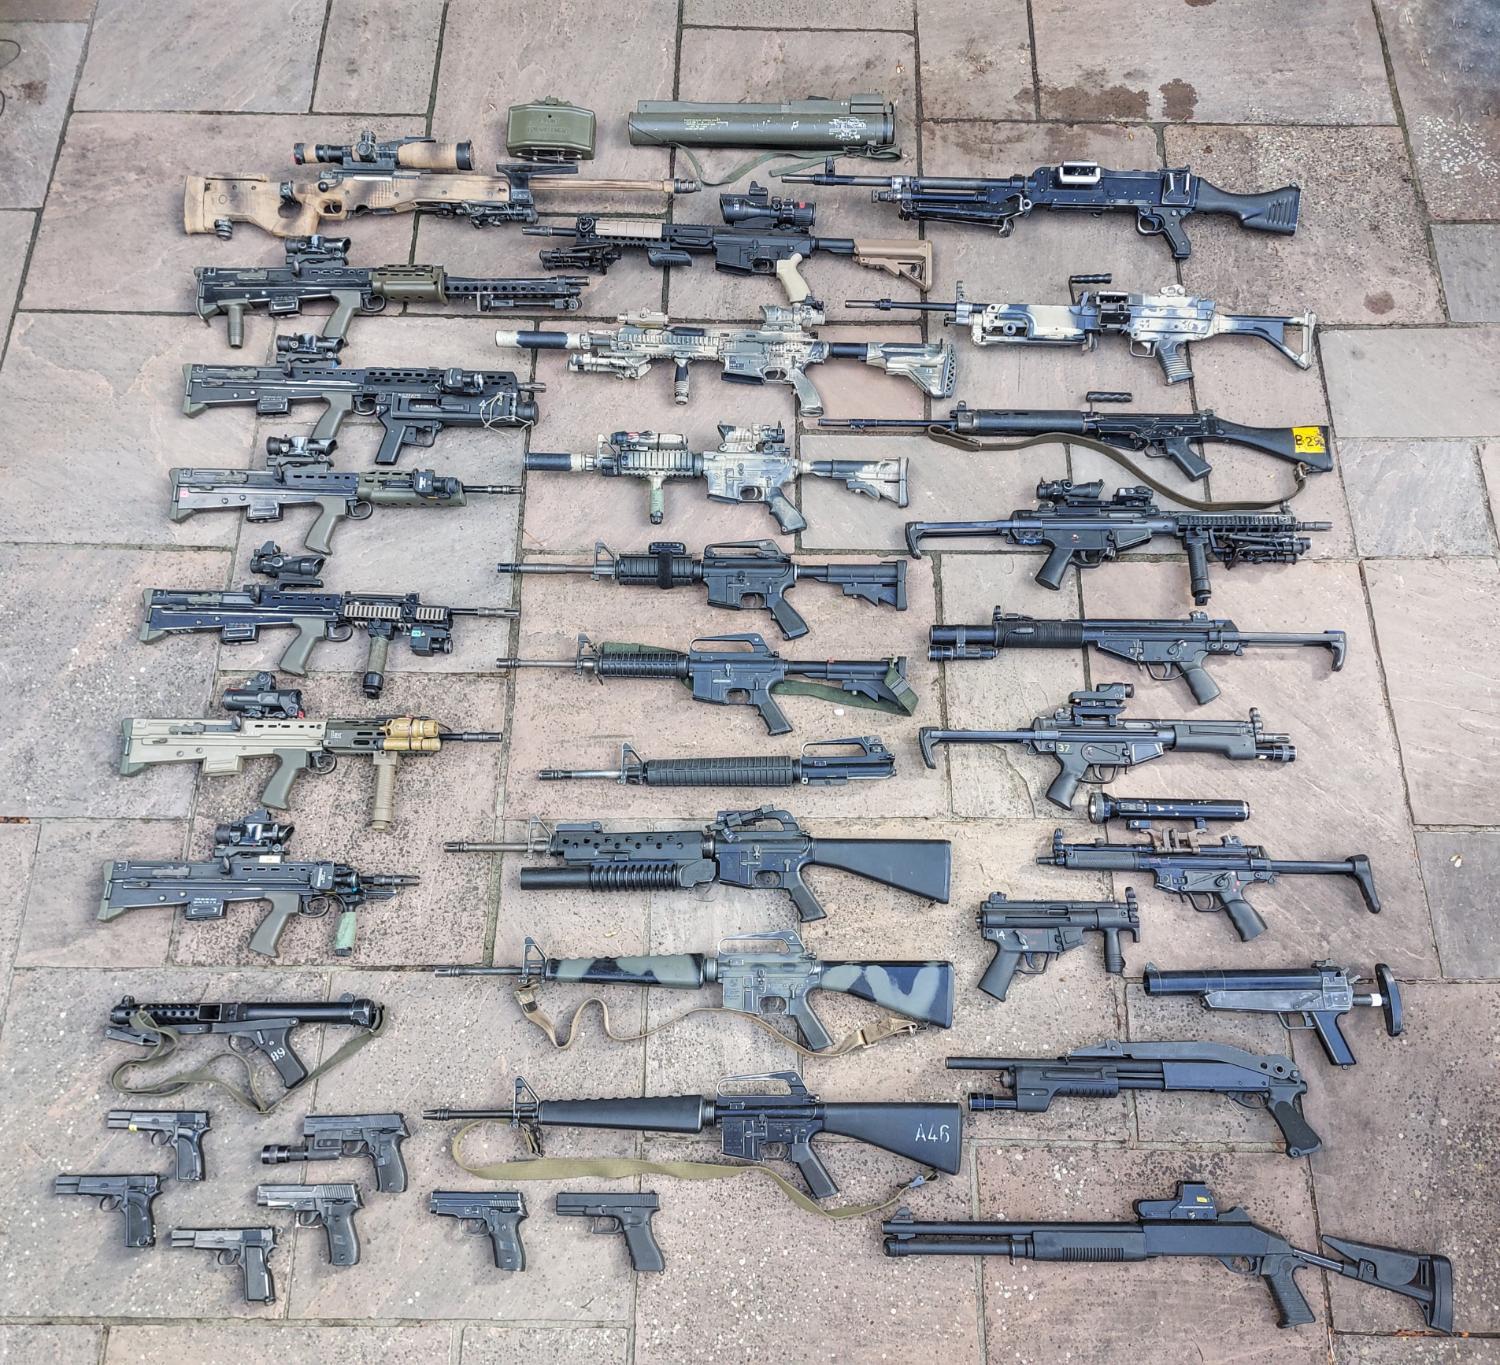
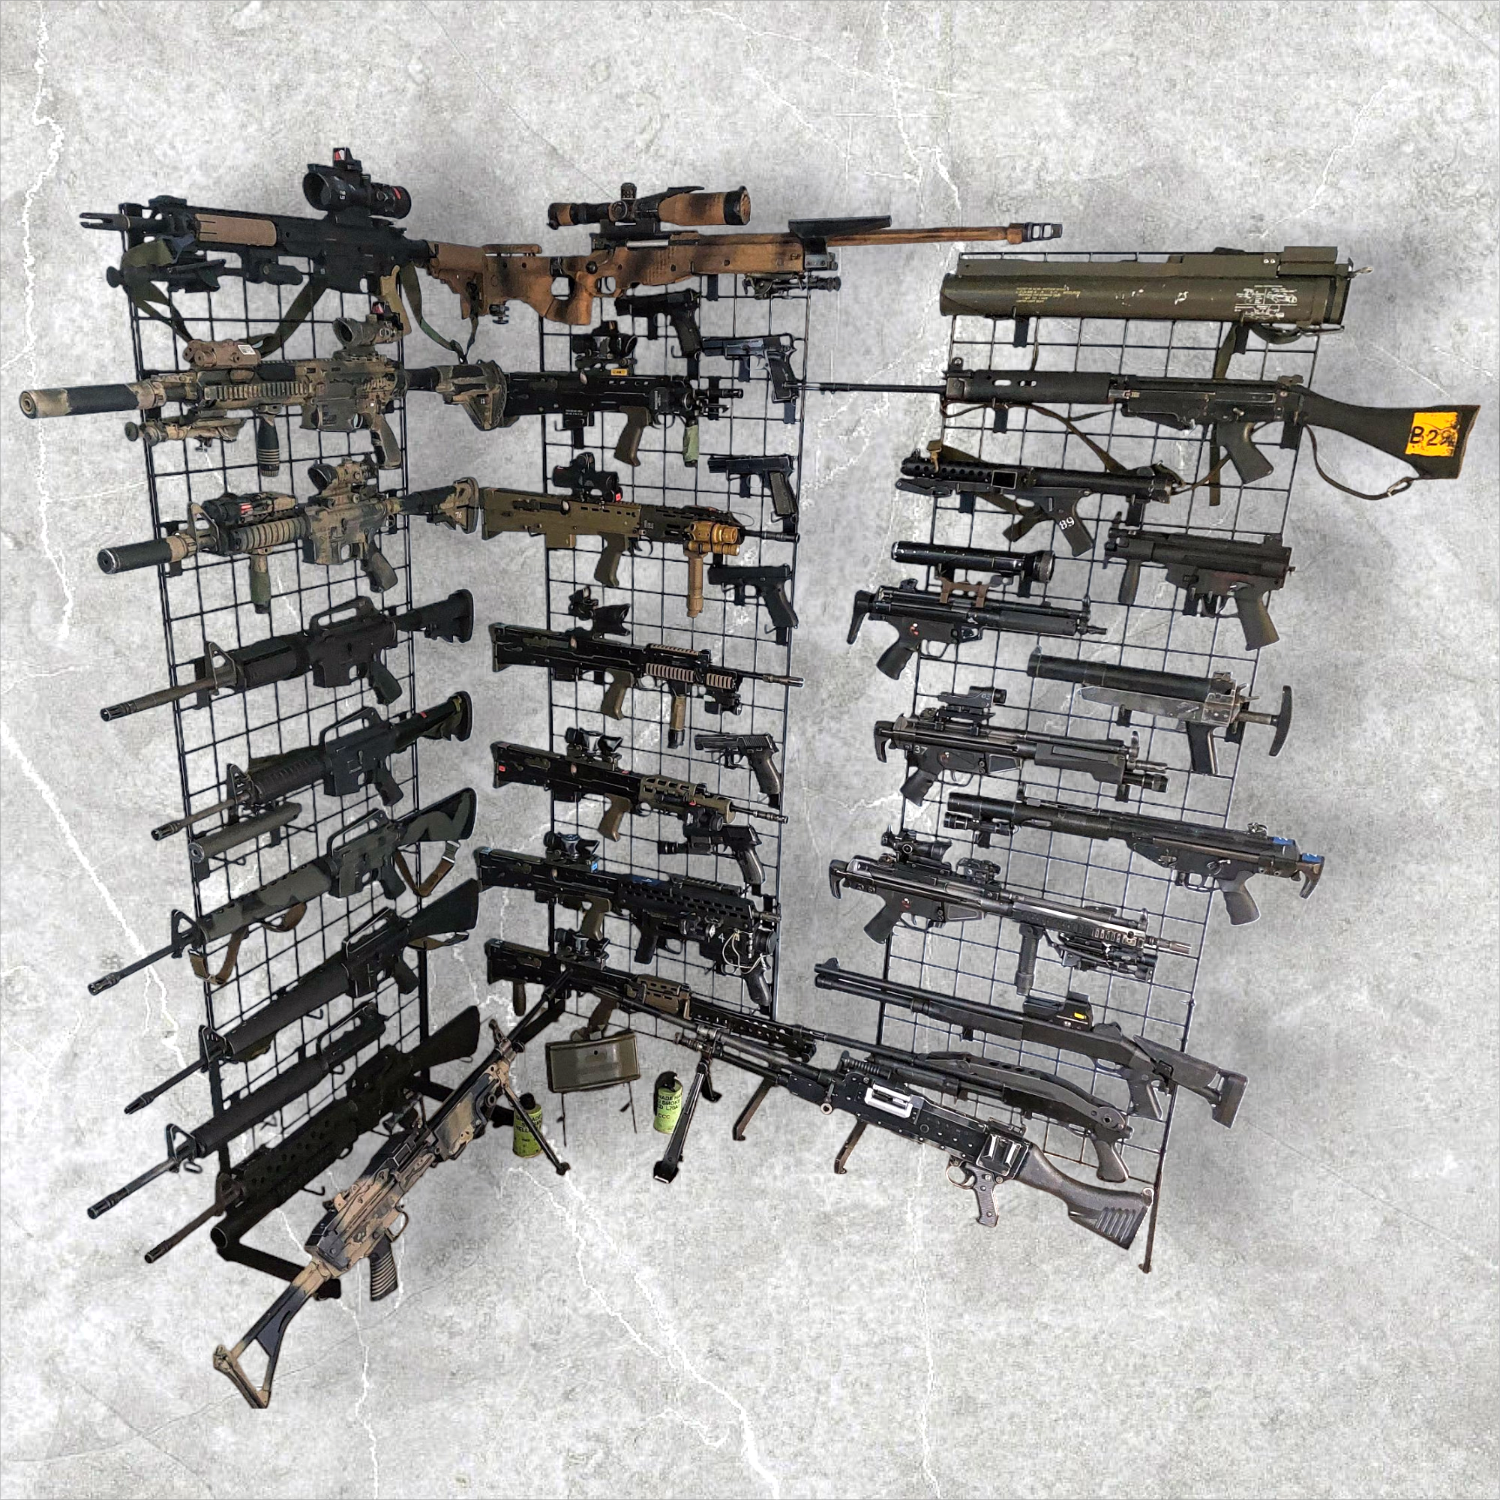
Thanks bud. No, they're completely stock. Trouble is, when the collection becomes as big as it has. I tend not to run them. I have a separate rifle and pistol for that. Plus buying boneyard (although still not cheap) makes the collection more achievable. Plus I tend to focus more on external accuracy then internal. A better pick of all the family together.....
-
You on about the YouTube vid of sales at naf walk-around? Then yes it is hahaha.
-
My take on it too. @ButcherBill are you able to adapt or alter your mount/torch. just i would cut a gap between the mounting holes on the torch.
-
Lct sa80?.... There's ares/star, g&g, ics and AA. Never seen a lct one. And g&g & AA are only ones to make an a1 type, as far as I'm aware.
-
Yeah too much for me. As will never get used. Hence looking second hand or preferably a boneyard. But externally complete.
-
Cheers bud. Oh do tell... haha. There's a few I don't have. But I'm not going too modern either. My cut off is 2020... yes I have a sa80 A3.... but was more just to aid with the family tree. Desperate for a boneyard G&G A1. But will have to wait now. Plus if money was no object haha, then a vfc m249 and a king arms m79 blooper would be nice.
-
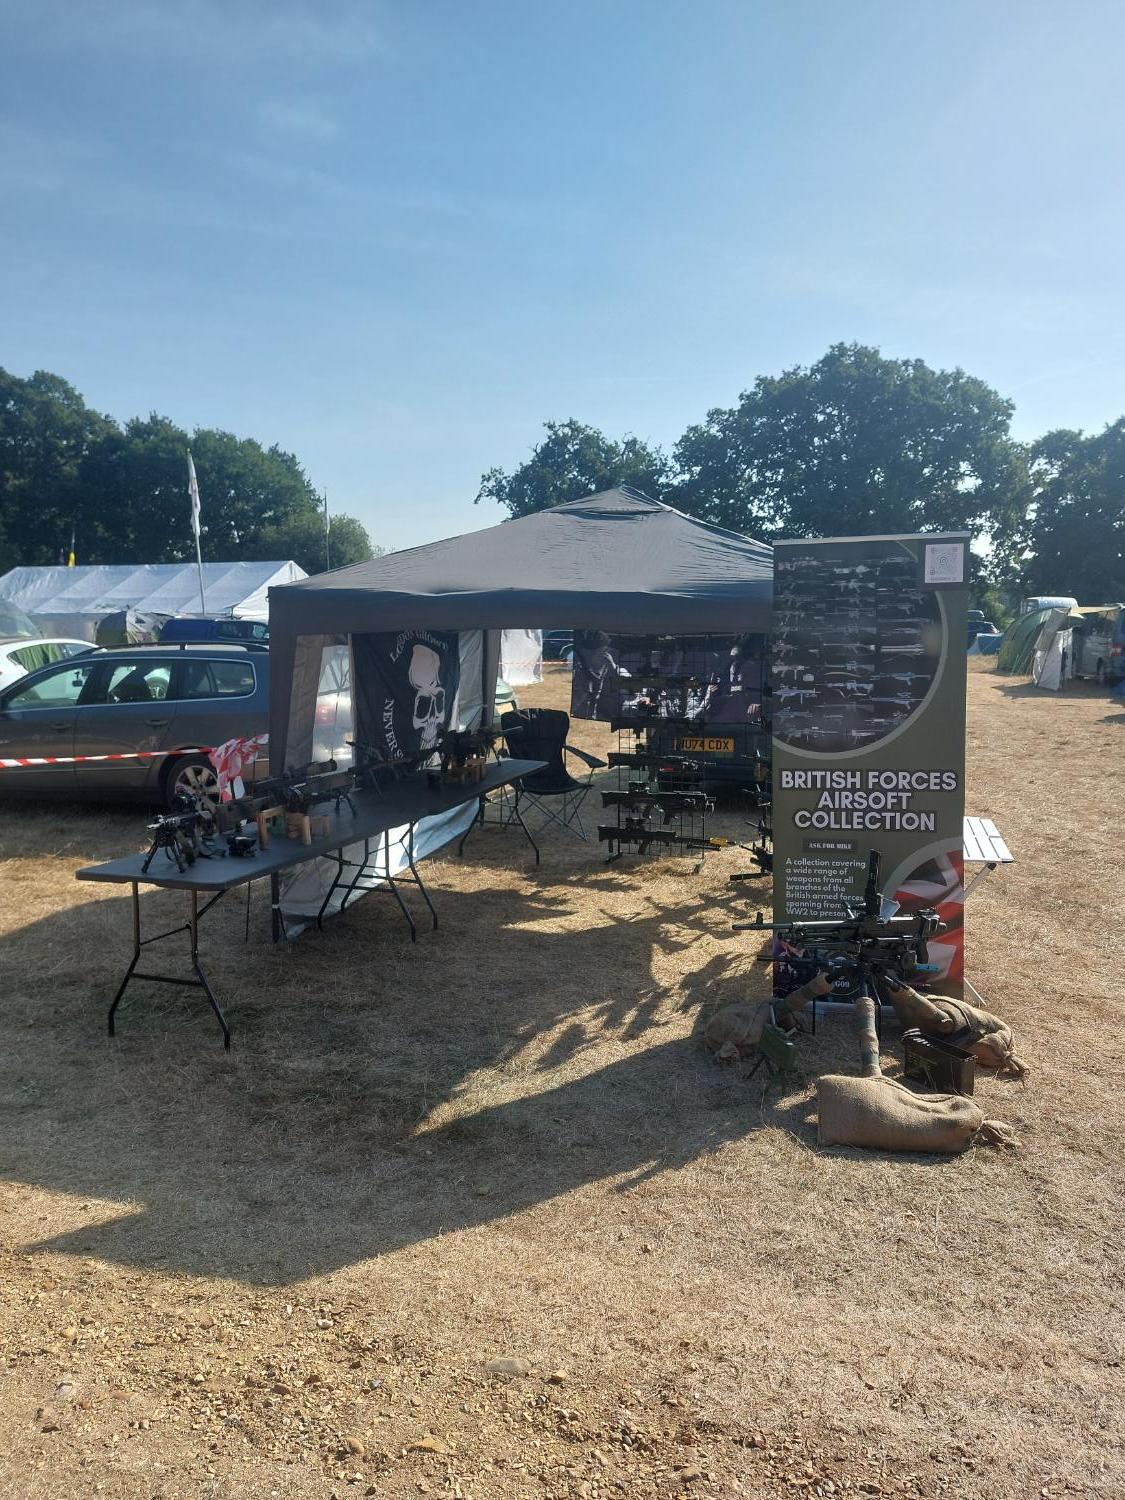
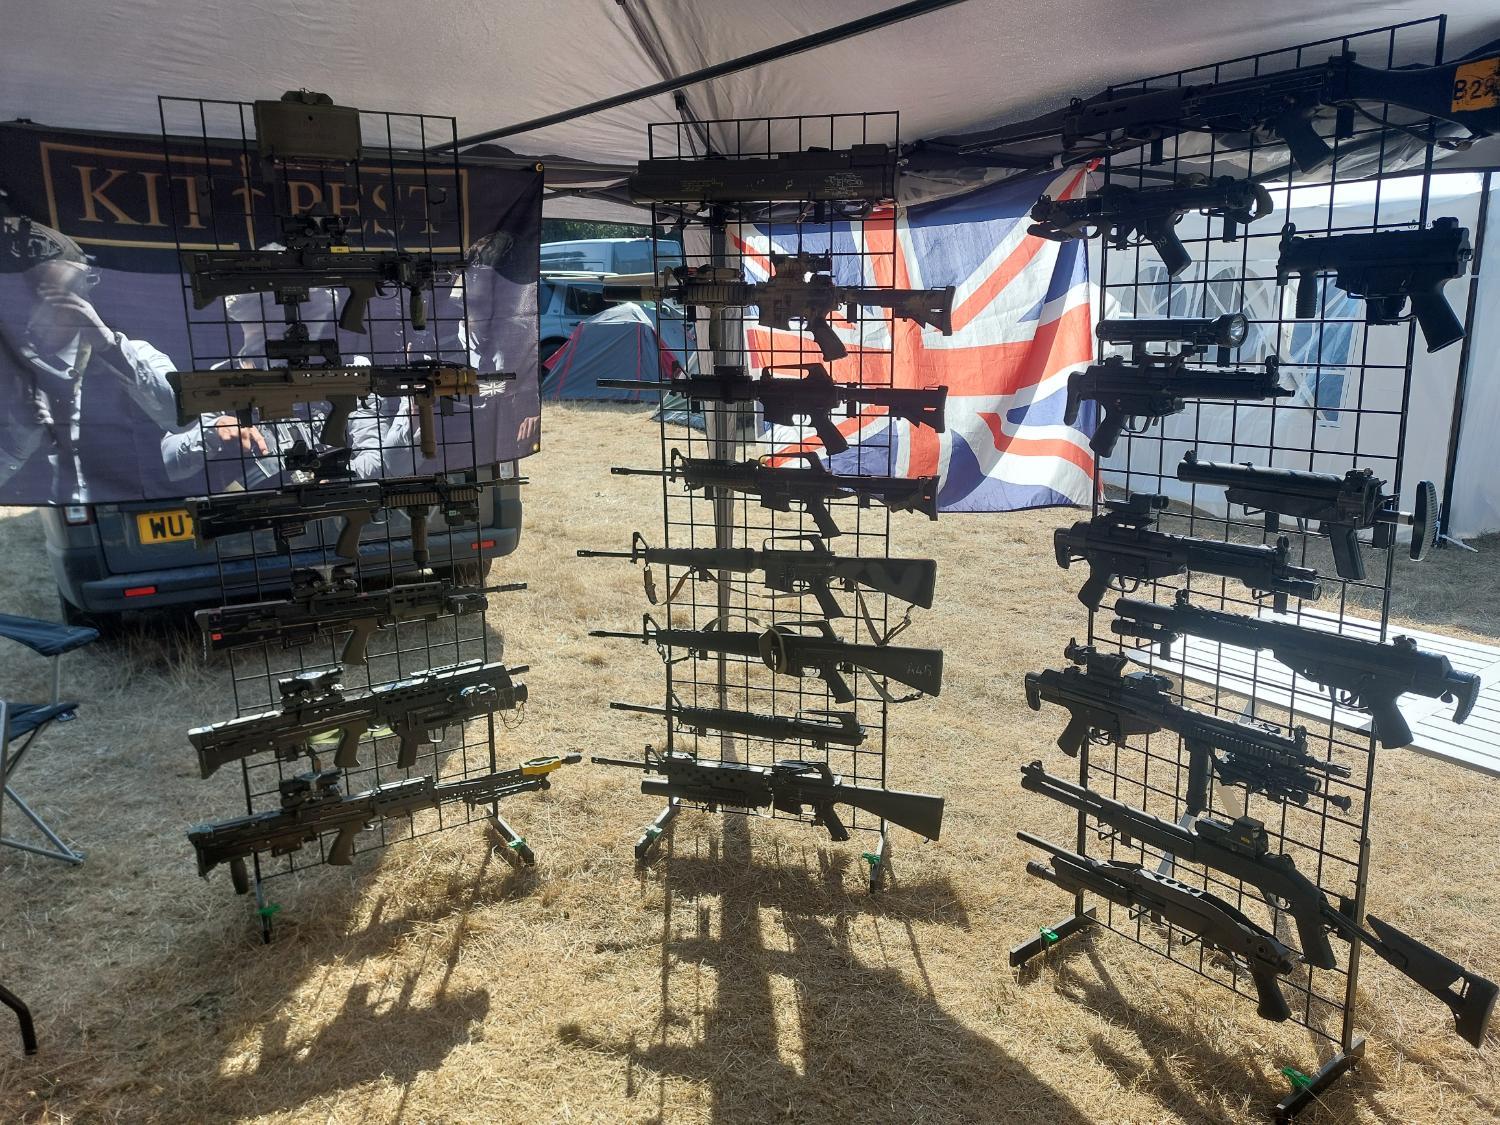
@ButcherBill No where near your legendary numbers, hahaha. But all my brit kit together. Getting it ready to take and display at NAF.
-
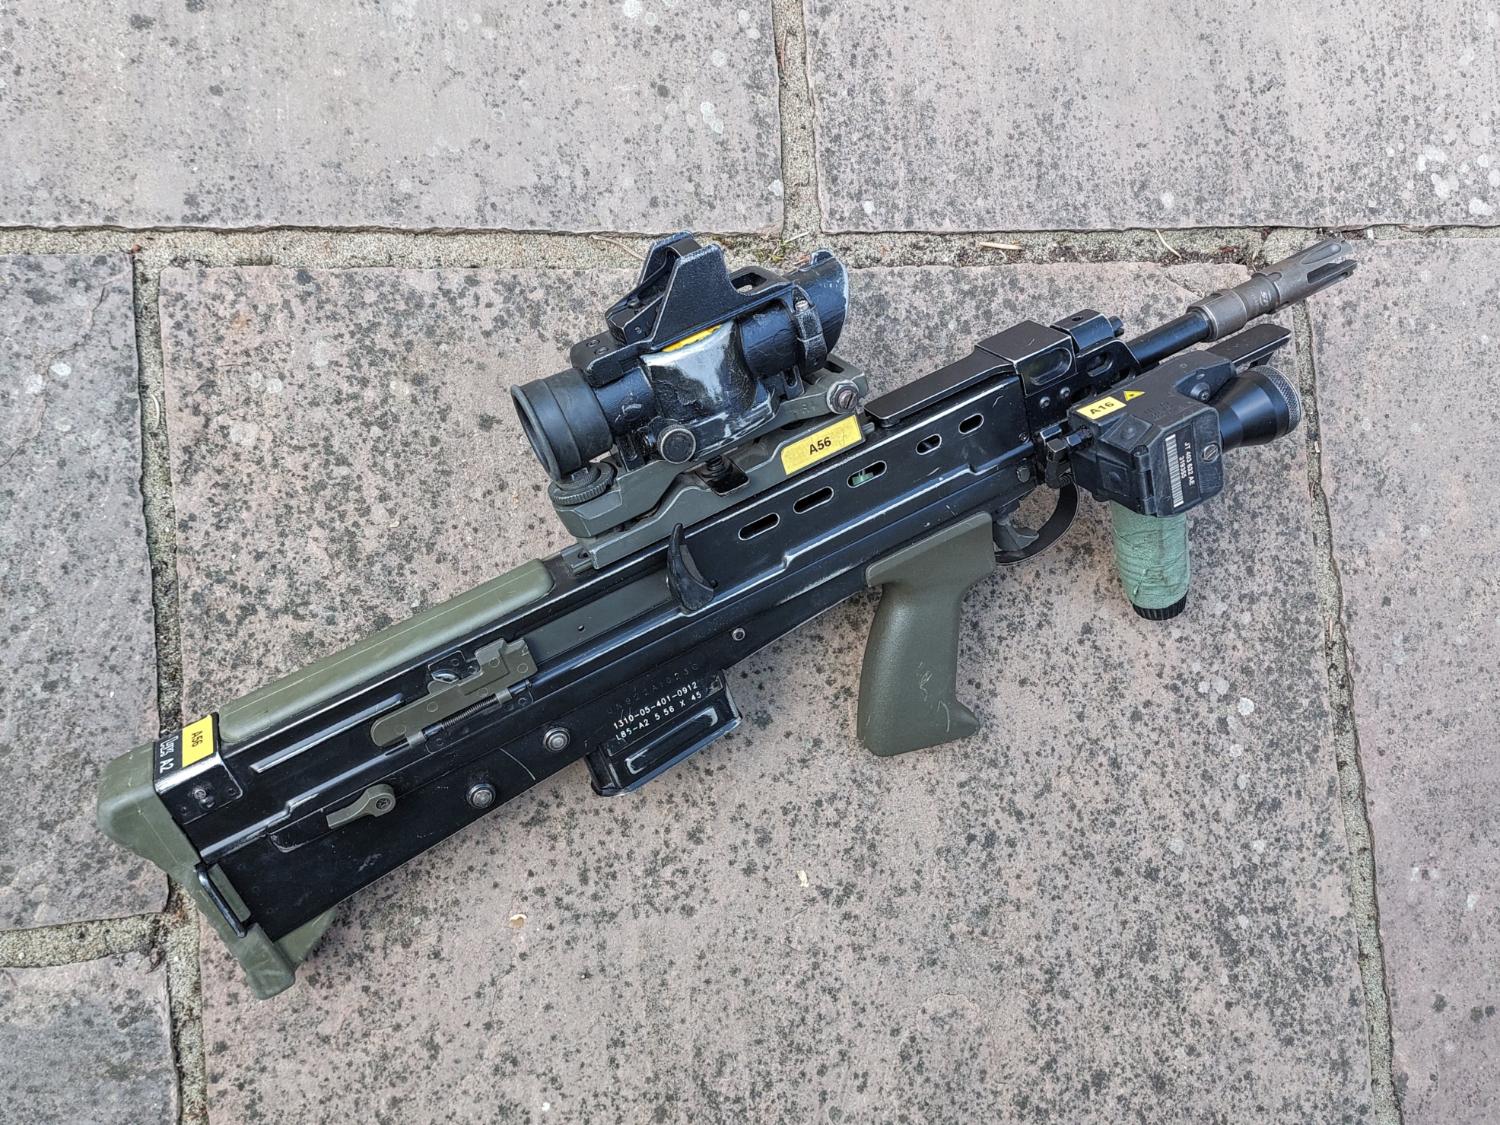
So... Managed to get hold of a replica susat shield mount and RS sight These were seen in use on UKSF sa80s and sa80 ULG's. L22's were also seen in use by UKSF. So decided to fiddle about. Added the correct sa80 surefire and the rmr mount. Weathered it all a bit. So sticking within the bounds of an accurate brit kit weapon, have made a nice naughty little cqb...
-
Sounds like my memoir.... hahaha. Apart from the drink. I do like a drink, but at home as its cheaper. Plus im a boring bugger too haha.
-
It looks like the markings have "DP" meaning it was a drill purpose weapon nefore it was deactivated. So at the time would be missing the firing pin, but would still go through all the motions when training. So would cock, chamber rounds etc. Would have had a white line sprayed around the handguard with DP marked in black on it. Obviously removed all that when sent for deactivation.
-
Don't fancy my chances with this one.... looks well warn out already. Hahaha On the ops question. It would be great to keep the forums going. Easy to navigate, find the right sections etc etc. I actually prefer them. But unfortunately, newer generations just want to post and move on Like with other platforms. Plus I've actually found that some people don't like forums, because you can't delete/hide negative comments. So on fb, if you make a post. You have control over who can comment etc. And still come out smelling of roses. Here, they have to face the honest truth, and can't hide from it!... Plus they can't be arsed to do the research themselves, where they can just keep asking the same 5 questions over and over hahaha. But I'm game to keep the forum as much as possible. I'd be interested to know how much it costs to run a forum. I'm not tech minded, so is a genuine interest here?
-
L2A1, still a wip.
-
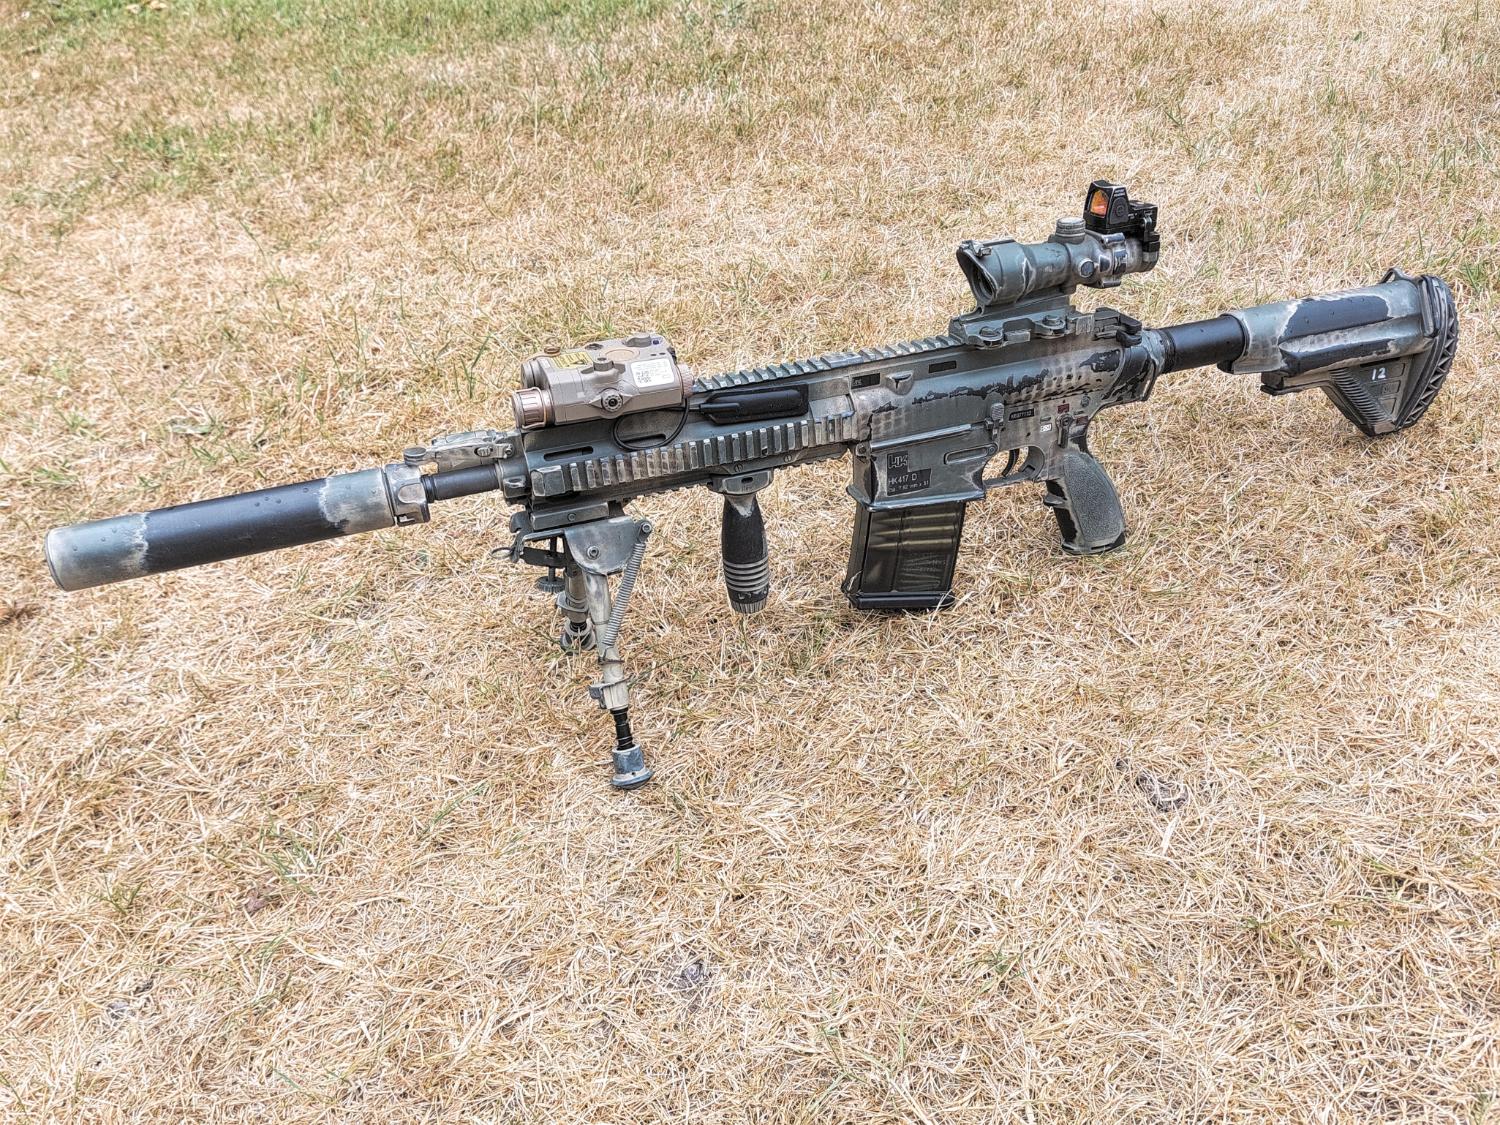
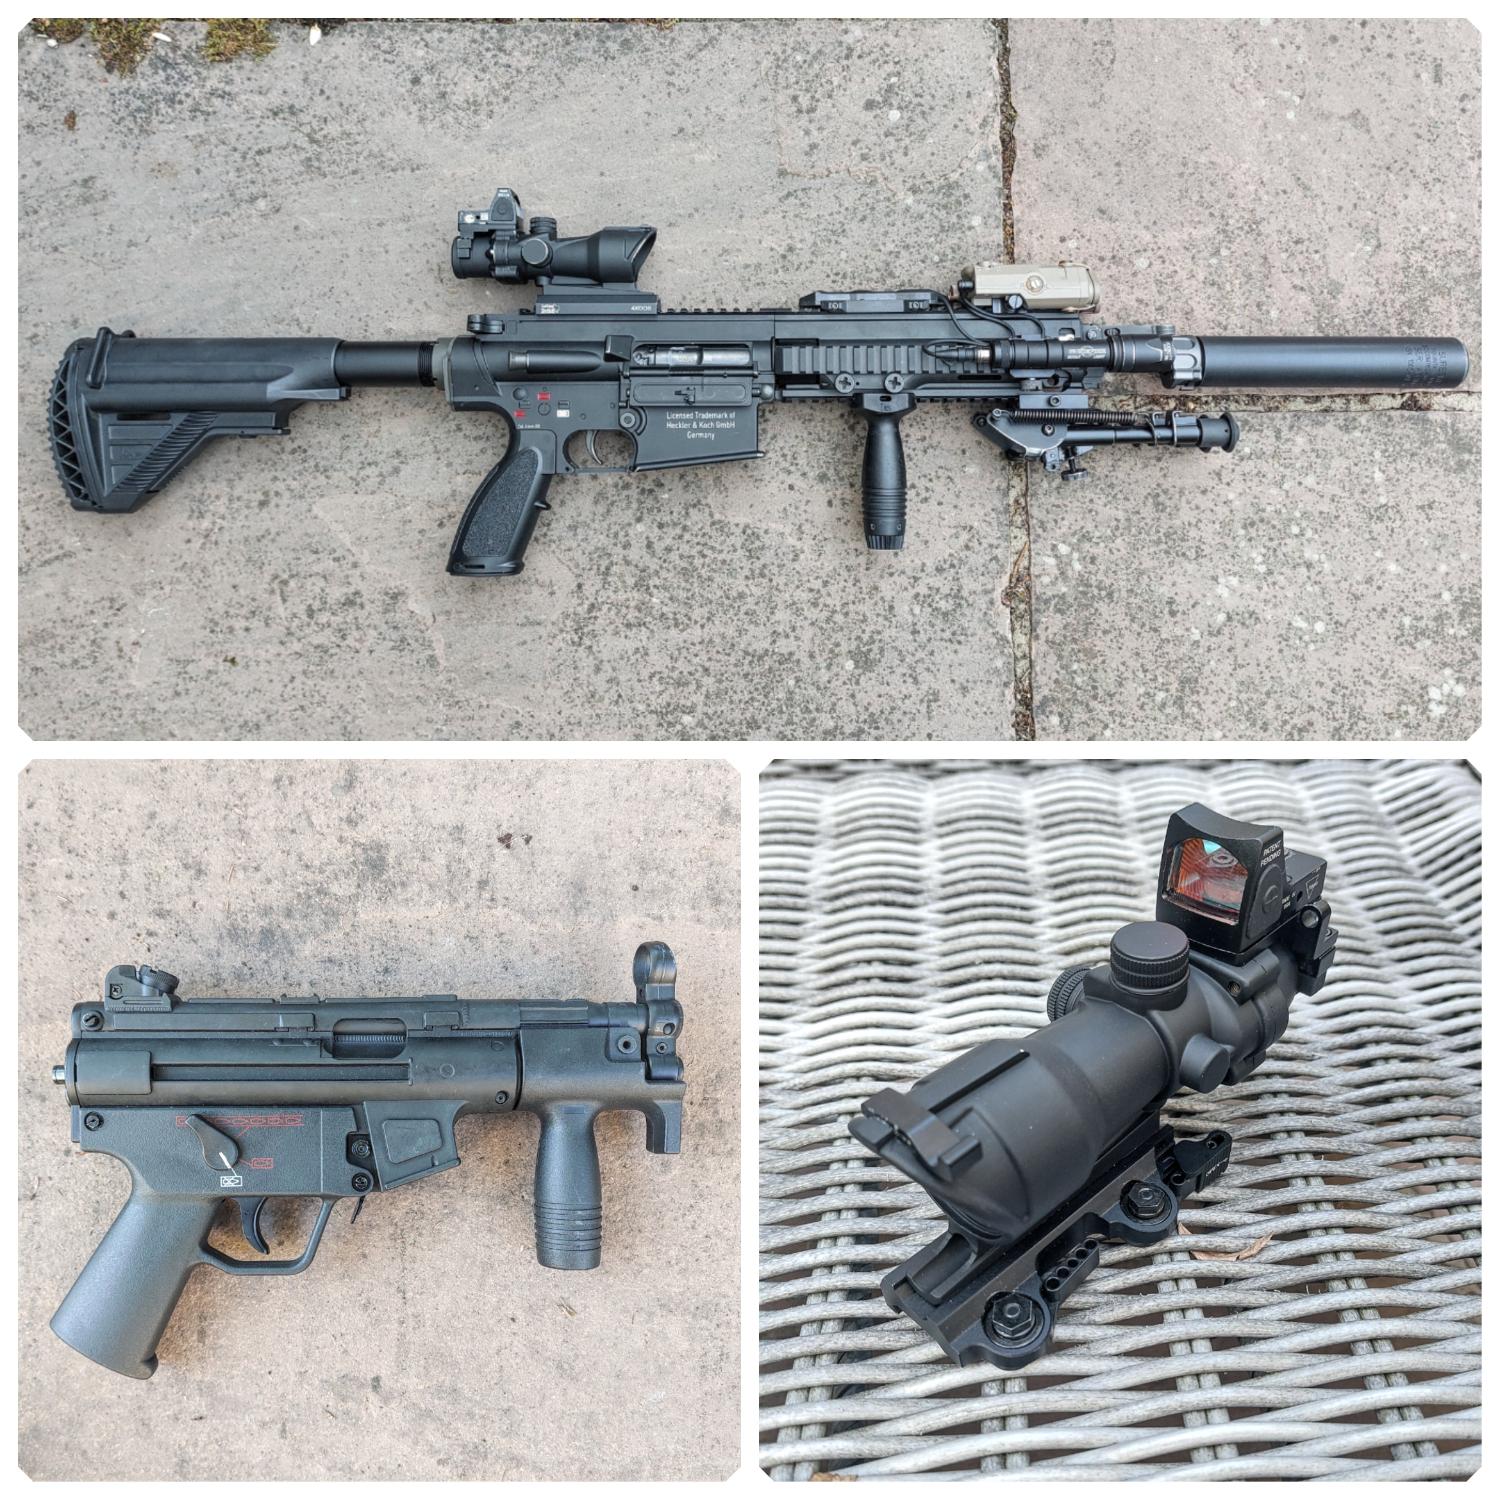
Another small update. 2 more rifles and an adapted acog. First, is the L2A1 SACTARASS (semi-automatic counter terrorist assault rifle and sniper system). (HK 417) This has been seen used with uksf for many years now. With 3 different variants. 12", 16" & 20" versions. Mine is a vfc 12" version with a surefire suppressor and acog. It's current set up as seen in a few reference pics that have been floating about. The acog has also had to be adapted. So the uksf were known for sticking with the TA01, but with the RMR. Meaning it has an off set front sight and larue mount. For airsoft, they never done this. Meaning I've had to pretty much butcher 2 acogs to make one. A box standard TA01, then a TA31 rco for the RMR and off set front sight blade. Second weapon is the L80A1 (MP5K) This has been In Service for decades. So nothing special to really report here. There was another version of the MP5K, that had its sights removed!... This was known as the L90A1.