nathan13n
-
Posts
78 -
Joined
-
Last visited
-
Feedback
100%
Content Type
Profiles
Forums
Buy a Patch
Classifieds
Everything posted by nathan13n
-
This advert is COMPLETED!
- For sale
- Used
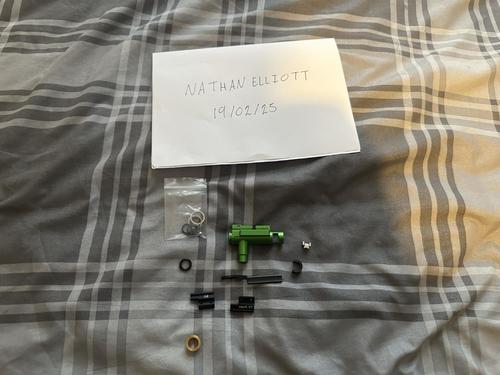
FOr sale is a pretty much new Begadi Pro MP5 hop up. Fitted it once but didnt work well with my Pulsar H ( known for having a horrible nozzle) Comes with everything pictrured paid almost £80 for ti so grab a bargain.£50
-

This advert is COMPLETED!
- For sale
- Used
Have some parts i have pulled off of Cyma MP5 2x MP5 Stocks 3x High cap MP5 mags £18 shipping and fees included£18
-
This advert is COMPLETED!
- For sale
- Used
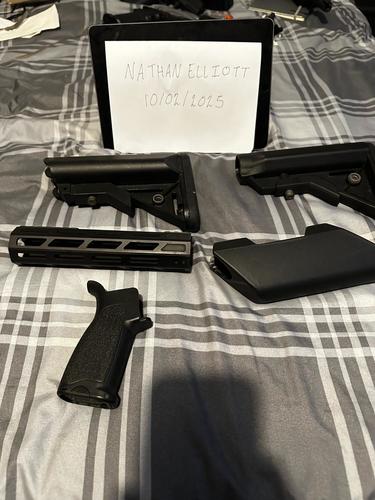
For sale i have some M4 Accessories i have pulled off a variety of guns 2x m4 Stocks 1x MOE check riser 1x Pistol grip ( motor ) 1x Mlok Rail All in £18 including fees and shipping£18
-
This advert is COMPLETED!
- For sale
- Used
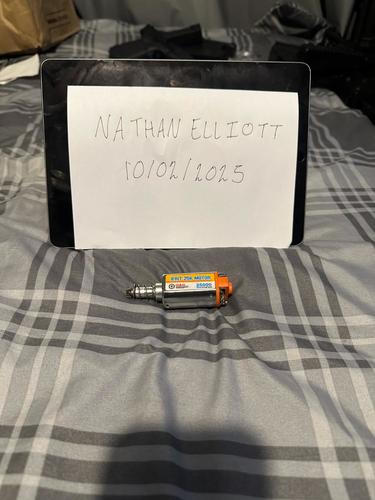
For sale is a XT high torque motor 22TPA. Used for ab out 4/500 round before i swtiched over to brushless great motor with only cosmetic sctraches. £20 including shipping£20
-
This advert is COMPLETED!
- For sale
- Used
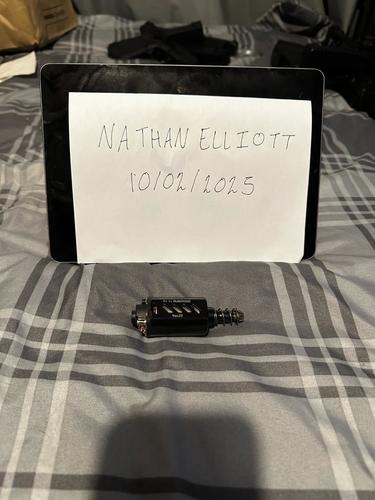
Pulled out of a new gun with barely any use it does have a few cosemtic scratches but works fine. £20 including postage and fees£20
-
This advert is COMPLETED!
- For sale
- Used
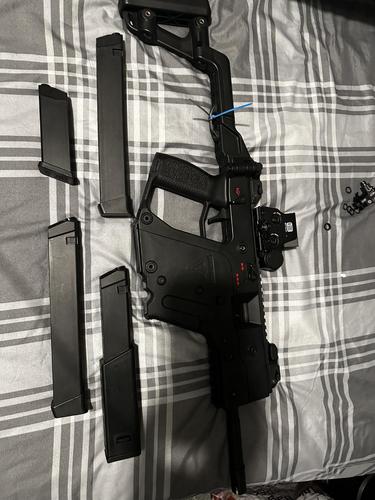
For sale is a Coyote G2 Vector, these were made by Ares but they didnt get the licensing agreement so this guns are farily rare. It has been serviced and does have the upgrades listed below 13:1. SHS gears with magnet so the integrate mosfet semi, 2 nd burst and full auto all work. SHS high torque motor SHS full metal piston SHS double Oring piston head Promethus bucking ZCI 6.02 inner barrel Gun comes with 3 120rnd mags and 155rnd mag Looking for £260 this includes shipping and fees£260
-
This advert is COMPLETED!
- For sale
- Used
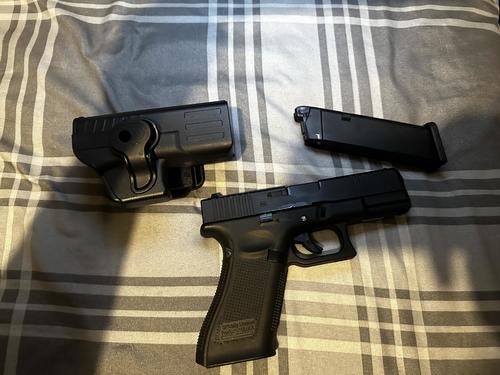
For sale is my E&C glock 45 mag, It has had minor upgrades of a ZCI 6.02 barrel and Maple leaf bucking 1 mag include is gas tight and feed perfect. Its only been used about 3/4 times so in good condition but does have a few marks will include the holster. Firing Video Price including shipping - £85£75
-
This advert is COMPLETED!
- For sale
- Used
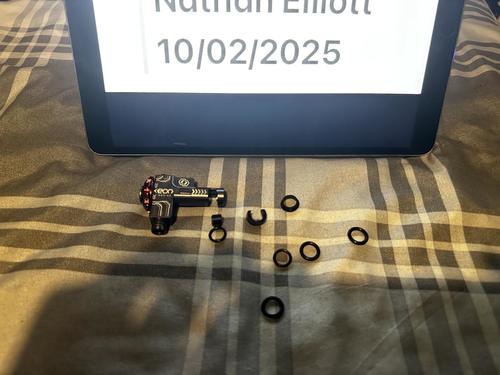
Gate EON hop up Pretty much as new has had less then 300 rounds though it eas purchased to test alignments from with my Pulsar H. £35 includes fee and shipping£35
-
This advert is COMPLETED!
- For sale
- Used
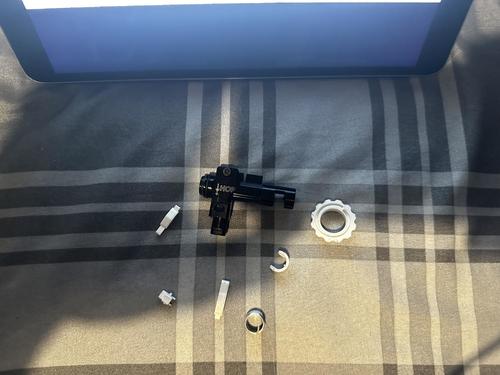
For sale is a retro arms Hop up was used a few times when i was going through hop ups trying to find the one that firs best with my Pulsar H. Does have some wear and tear marks but nothing bad. £18 including shipping and fees£18
-
Pulsar H I have seen a lot of hate towards the gate HPA systems and yes they can perform horribly if they are not setup properly so thought I would make a little post to try and help some people. I started off with a Pulsar S which I could get to work but not work well mainly with BBs curving left, right or up everything but straight as much as a raged and blamed the engine, gearbox, hop up hop rubber it ended up being the alignment. Gate seem to have a issues with the nozzles on the Gate pulsar series (not so much the D or H ) but the S has them in abundance. During the setup no matter what hop up your using make sure you are using the nozzle sleeve this just helps it keep centred a little bit better. Alignment This is the big thing with the pulsar Series the alignment has to be good there are many ways to do this, but I would recommend grabbing a cheap gearbox like a specna arms orion and tap some bolts on the left and the right hand side just below were the tappet plate runs this will help you centre the left and right of the gearbox. If you want to pull the gearbox up tighten the buffer tube, then the pistol grip. If you want to lower the gearbox tighten the pistol grip, then the buffer tube. THESE is the most important step. The pulsar H nozzle is vastly better then the standard S and gives you more room for error. When you are checking your alignment, you want to grab a small endoscope camera 6mm so you can push it down the barrel and see how the nozzle is sitting in the hop up. You want a black ring around the nozzle even on all sides. Also make sure you’re doing this with the magazine in as this could slightly change your alignment. Once you have got this figured out you are in great hands and the fine tunning on the settings for FPS is a lot easier. Settings As odd as it sounds if you’re using a gate titan or aster make sure you reset it and put the mosfet into HPA mode. For some unknown reason everyone I know has had a better tunning when they select the engine as a single solenoid engine instead of a pulsar S or H. Don’t ask me why I have no clue. Once you have set your PSI for about 1.1j on a 330mm barrel on the S I needed about 70psi on the Pulsar H due to how the nozzle and increased chamber size I needed 90psi. Fine tuning the consumption is easy and the same as all other HPA engine set the dwell time on the Pulsar H I found around the 4m/s with a refresh of around 10m/s got me a great consistency with a deviation of +/- 4fps. People have found if you are having issues with fluctuation changing the RPS to 24/25 helps to solve this. The Pulsar H is recommended to not push past 35rps, but I have been fine with either 1 with not too many issues. Hop Up and Bucking When it comes to hop up and bucking, I ran through a decent amount the main thing you want is a bucking that has a good lip as this will cause a lot of issues. The common consensus is 4auntum and MP super macron bucking are the best. Due to the extra force from the nozzle if you have a hop then has something that help stiffen the bucking lips like the silent industries this helps with consistency. Shooting anything under a 0.3g BB isn’t going to work they are too light with the force generate by the nozzle you’re more likely to get fliers. I run 0.32g or 0.36g and don’t get many if any fliers once the bucking was broken in. The hop I tried were the Gate Eon, Maxx M4e, retro arms and Silent industry alpha. They all work well if you have the alignment correct but for my gear and m4 body I found the silent industry gave me the best consistency, hop and deviation then any other setup up whilst using the MP super macaron bucking. From a 3000 48ci tank I’m easily able to get 3000 shots if not more and they will be spamming the trigger in binary and auto. So, a full day of shooting it going to be easy depending on your playstyle. So, it’s efficient and once you have the alignment setup properly you have a good engine that does have its quicks as it does play up a little bit in the winter. Verdict From a stand point of setup this is by fair the worst wolverine, polarstar f2 and jack or even the backdraft are all easy to setup and align mainly down to they just having better nozzles but the stand out feature is the mosfet being able to update all features on the fly and having more options then the stand hpa fet does set it apart ( can still suffer from the same issues ). I would learn towards another brand but if you are upgrading from a Pulsar S the H is a lot better to install and deal with then the pulsar s. If Gate spent some time fixing the issue with the nozzle that allowed for easier alignment and slowed down the beta release of software and had more stable releases the pulsar system would be fantastic but until then would really recommend if your already in the ecosystem with a S then the H is worth the upgrade if you just getting into HPA go for the wolverine, N7, Polarstar and deal with less issues.
-
Hahhah i did see his it was the reason i got the MWS instead of the CGS. CGS is a great system but i just prefer the ease of access to parts and upgrade bits.
-
To use the Precison nub you need to slightly sand down the hop arm. Jaeger precision has a video on it. if you don’t remove it you end up with it applying pressure with 0 hop which send even 0.40g to the moon. i have found with my Mr Hop and omega bucking I can hop 0.4+ with no issue but with price I still with the 0.32/36g The CYMA CGS is a good system but it’s a MWS style gbbr meaning Cyma has updated bit that the my thought were needed so some of the internals are different, threads and mags are also slightly different. Where the DE is pretty much a straight clone of the TM MWS system to the point we’re being nosey I was about to switch the bolt+ trigger box from my maters TM and the DE still worked flawlessly also would argue the DE has a better trigger feel. So for parts and spares you have to hope other brands support the CGS system otherwise you just waiting in CYMA
-
This advert is COMPLETED!
- For sale
- As new
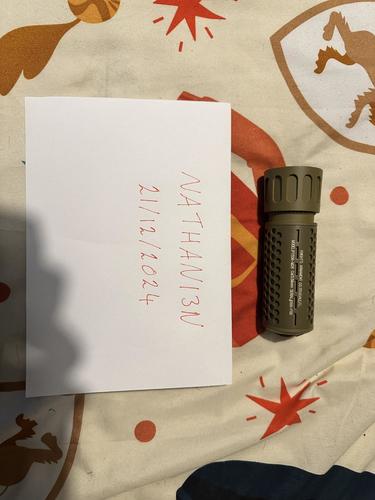
For sale is a KAC QD supressor, its brand new so in perfect condion selling as changed my mind on a build. Price includes shipping£20
-

This advert is COMPLETED!
- For sale
- Used
For sale is a G33 Eotech magnifer, its brand new so in perfect condion selling as changed my mind on a build. Price includes shipping£25
- GB
-
Yeah honesty. Was speaking to a few people at my local airsoft plantation, would be intresting to see how it holds up to use. Got a friend who spent 1200 in total ( includiong the gun ) on the TM MWS. Use mine and say it performs the same and all in im about £550 with no accessories. Will post a update once i have the Airtac adapter and longevity as it will get used heavily.
-
Hi, I had the Pulsar S that i converted over to The Pulsar H. It does help with the alignment but doesnt completely fix it. You will need to make sure its is aligned to the centre as much as possible or you will still get some curving usually to the end of the BB travel. I have recently got a 3d printed gearbox which aligns the gearbox and hop up which fixed this issue but would argue over HPA engine dont need it to work flawlessly inferno and Polarstar f2 for example. The big factor it has going for it is effecincy is farily good. in a good day of airsoft when im letting rip on my Pulsar H with a 48ci. 3000 psi tank i can run through 2000bs and still have 1000psi left in the tank. This is on a 85psi, 300mm barrel. getting me 1.15j lifting 0.32g. in all honesty. you can get it to run well but requires more fiddling then other engines of a similar price.
-
Recently got a noveske N4 and absolutely loved it but ran into a few things with the main bits being air seal. So it’s airsoft so I started tinkering to fix some issues to see how we nice we could get this shooting. Initial review out the box it shoots great but on green gas ( vorsk v6) I was only getting 0.8j, the lock back was very intermittent and struggled to hop 0.36g or higher BBs wit the stock bucking rubber. Upgrade 1 - Nozzle and upgrade springs i planned on installing a NPAS so i could have some finer adjustment of the FPS and everywhere flagged the DE nozzle just doesn’t work well. This is where the first upgrade comes into play Guns modified 3.5 nozzle, this was a smooth change over while is was going this I upgrade the nozzle return spring this was entirely needed as the stock DE is strong then the standard TM but has also been flagged as a point of breakage so dropped in a Waldo custom MWS 140% spring. After the upgrade we are now sitting at 0.9j with very little deviation while also helping bb feeding. Upgrade 2 - Bucking & Barrel I think I got one of the earlier guns where the installed barrel was pistol length of around 130mm this is a fast way of keeping the FPS low. So was always going to be upgrade to a full length. Prometheus 250mm barrel was installed with a 4antum bucking. I wasn’t trying to break the bank so went with something that was tried and tested. I use 4antum in some HPA builds and lifts 0.32g and higher easy with great consistency and the Prometheus has also been great bang for buck inner barrels a step up from ZCI but not as high a edgi. After the upgrade we got a huge boost to 1.1j which was great boost but also helped the grouping hugely. Upgrade 3 - Mag fixes On playing a few games the stock mags are not great I struggled on some mags to getting through a full 35 rounds. The best upgrade would be to get TM mags which seal better and have better efficiency out the box. BUT if you have already purchased the DE mags like I had you do have ways to help improve. One the gas routers aren’t great so the best swap is guns modify cold weather router which allow a great deal and work well in cold weather. The mags are also known for leaking and this is where gasket seal is your best friends. I used gasket seal in the top and bottom of the mag seals leaving 24hr to fully dry. While I had the mags apart I also trimmed down the tube inside the magazine to a 1/3 of its sizes which allows more gas into the magazine. after 24 hours and checking the seal I am able to get 2 1/2 reloads before needing to top up gas which is a huge improvement. After upgrade I found the seal and efficiency to be better this also helped push my joules upto 1.2j. Upgrade 4 - ZET plate and Feda Valve After getting the seal, mags and feeding consistent. It was team for the zet plate to help the lock back function and install the npas. I went with the Jaeger precision in stainless steel which is the same as the BavTac one which is in titanium so you can save some money there. It’s really easy to do once you remove the trigger box which is a lot easier than the TM MWS. The Feda valve is a straight replacement and doesn’t really offer a performance upgrade but allows you to adjust FPS to make sure your within site limits. Just to flag as I had already swapped the nozzle to a guns modify it meant this was a smooth insteal of the Feda valve but original DE nozzle are thicker and may need to be glued down to get the NPAS fitted. the zet plate has allowed more consistent lock up once the mag is out of BBs. The NPAS allow me to adjust FPS from 0.8j - 1.4j depending on gas on the fly without doing a full strip down. overall the upgrades have been really nice to help improve the performance which are a lot of the issues the TM MWS also has ( apart from the mags ). On full tilt on green gas it hits 1.2j, red gas pushes it to 1.4j. What makes this great is the entry point of the DE N4 it’s almost half the price. For now I’m really happy with the performance and may look into getting a HPA adapter so will drop a update on this once I tested a few out but absolutely loving the DE a few upgrades and it’s matching a upgraded TM for a fraction of the cost. Upgrade 5 - Airtac MWS/ DE HPA adaptor This took a little bit longer as my first airtac had a leak and really wasn’t sent up for the DE. So it’s not as smooth as a drop in that they claim but the dudes at Airtac were great. Sent my Airtac back and indicated I will be running it in a DE which meant the added a green spacer to help it engage the knocker easier ( this as well as spare lips are included) I still found even after this the fit was very lose which resulted in the FPS being a bit all over the place. Using some plumber tape I was able to shim ( which swap this out for Velcro ) this to sit better. This helped my consistency so much I’m getting constant 282-288 on 95psi which was great for a system which is running on air tank given me great performance all year round ad I struggle with the gas mags in anything below 10degrees. Using HPA you will need to regrease kit bolt and trigger unit more as you don’t have the silicone from the green gas to coat bits. Even with the extra weight of the tank, line being a bit more restrictive the increase in reliability of the feeding, constant FPS is great and you have the great tuning being able to push the adapter all the way to 150psi which gives you a really strong kick and have the npas I can balance it out and get the Js I need.
-
This advert is COMPLETED!
- For sale
- As new
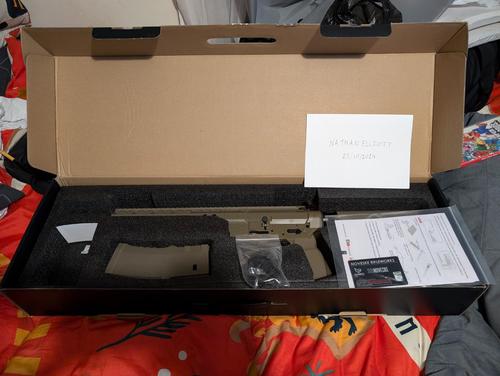
For sale is an EMG Noveske N4 GBBR Gen 3 (MWS System) by Double Eagle Purchased it a week ago for £330 on HPA UK to get offered a deal for an upgraded one with 6 mags. This is brand new and has only been fired to check that its works never skirmished. Grab a bargain. The Price includes shipping and Paypal Fees£290
london - GB
-
sure roll with that.
-
Granted to be fair I see it on almost every thing on there, zero in, discord and what's app selling pages and followed suit, one is not hard to really find out and for the loss of interest fair enough but the pistol with the work gone into and the price asked is a strap since I would rather see it go to home where someone will use it then it be in the box. It's just asking the lines of if he doesn't have anything good to say don't say it, if you lose interest go right past it. I do understand your point I honestly didn't think you did know how Google worked but well done, since it probably takes the same effort as typing it in and waiting for a response.
-
Type in paypal fee calculator and wouldn't you look at that it comes up, crazy how google works isn't.
-

This advert is COMPLETED!
- For sale
- Used
For sale, I have my trust Raven Glock EU18 with a few upgrades PDI 6.01mm Inner Barrel 122mm Maple Leaf 50 autobot bucking 3d Printed Flash hider to hide extension WE hammer set 2x Leak free mags Shoots spot on great sidearm I'm selling it as I have 3 other pistols and this doesn't get used. Will supply with a Holster along with this. Price include postage buyer pays paypal fee£55
-
 pmd
pmd -
I will update this one with a better video when i can find a better camera and the pistol im looking to do a internal tracer unit on the 18c aep so fingers crossed i can pull it off
-
I must not be the only one who wanted a tracer unit that was integrated into the silencer making your gun about 3 foot long so I was looking up Hop up tracer units and if you want to buy one of them its like £ 30 for the special hop-up * bull shit* and £40 for the led unit to go onto your special hop up all sounds like such shit. So I went about researching and making my own cos £70 for a tracer unit is a bit crazy. Research So I went about researching it and a lot of people have done Hutu unit but don't document the process well and all have different setups so I'm just documenting the one that worked best for me. LED LED wise I used 3mm UV LEDs which have a common brightness which is about 3,000mcd which in common I couldn't find anything higher but if you could find a high mcd then I would say get it. It would be hard to as UV light doesn't register on the scale the same way. I have heard to use 12,000 mcd blue led but they didn't perform as well as the UV LEDs the reason for this is the substances the BBs are coated in react to UV light very well as you can see from the picture below. My chose is 3mm UV 3,000 mcd BBs (UV light on bb picture ) BBs BB colour is up to you but I tested Blue, Red and Green and green was the best one by far it gave the best contrast in most settings in most conditions obvious in the sunlight no matter what colour it's very hard to see. so my chose is Green BBs Equipment Now that you know what LEDs and BBs to use it would be great to know what sort of equipment you would be using, Hot Glue Gun Black glue sticks Dremel / Rotary tool Rotary cutting disc Clear coat nail polish JST wires Drill 3.1mm Drill bit Some Wires Super Glue 6mm Dowel UV led ( non diffused ) Resistor A battery capable of 30 amps that's all you need Prototype 1 So on the prototype, I used two LED on an old plastic G&G sr25 to know what I needed to do, So I drilled two holes using a 3.1mm drill bit for the hop up once this was done. I then worked on the LED you to want to trim this down as low as you can without touching the element this will get a cloudy white colour an easy way to bring the clearness back is to apply a thin coat of clear coat to the LED leave these to dry I then insert the dowel into the bottom of the hop up so the led wouldn't interpret the path of the bbs I then used a little bit of super glue to hold the LED in place on the edge of the led so it doesn't diffuse the colour. The then wired LEDs up in series so connecting the positive to the negative side and adding the JST lead on hot glueing everything down to stop any light bleed out the side of the gun The BB glow was a little bit dead the glow was really weak so I would need to wire them into parallel and add in a resistor as my first prototype lasted 48 hours before the first led failed as my battery was delivering over 38 amps. Parrel or Series So after a little research, I realised that in series the battery voltage was cut in half for the LED so if I added more LEDs it would just decrease the voltage for each LED reducing the brightness so I would need to run it in parrel and so all the LEDs will get the same voltage allowing for a better overall performance so I did a small test to compare brightness. In Series In Parrell From this small test you can see the LED in Parrell are a fair bit brighter so for the second mockup I will add the two more LED brings the total to 4 and add in a 320ohms resistor. Prototype 2 For the second prototype, I added two more LEDs to bring it to 4 ass you can see comparing it is a fairly big difference in brightness I also added the resistor to the end of the positive LED leg that goes into the JST plug this limited the position I could put the cables into feed the through the gearbox to the battery into pistol grip. I know what to do for the final unit I will be making. I had an idea of drilling into my prowin unit but I drill wasn't strong enough neither was my drill bit as one warped under the pressure and heat generated but the concept carried over. Final HUTU unit for the final HUTU unit, I used an SHS plastic hop up which is the same as the Prowin and SHS aluminium, So I drilled out the led holes using the 3.2mm bit the same as the first prototype, cut down the LEDs and clear coated the same way. Glued them in the using super glue wired them up in parallel and added the JST plug onto the end. I then added the resistor into the extension cable so it gave me way more space to flex the cable giving it a nice compact look and allowing the hop up unit to fit right and compact without getting in the way Once this is done I then connected everything in and made a bypass cable that allows me to run the Wolverine trigger board and Hutu of the same battery the one I'm using that give me a nice smooth 30 plus amps that give the Hutu enough amps to run at full brightness and the trigger board to run as it should. Turnigy Graphene 950mAh 2S 65C. Below is the Hutu all wired in and Video of it firing. The video isn't the greatest quality so I may change it if I can get a better video recorded.The green glow is from the tracer round inside the hop unit. Video Slow Mo Video AEP tracer Video Any questions let me know. I will be working on an AEP pistol internal tracer unit I posted the info for this in my Cyma 030 / TM g18c upgrade thread.