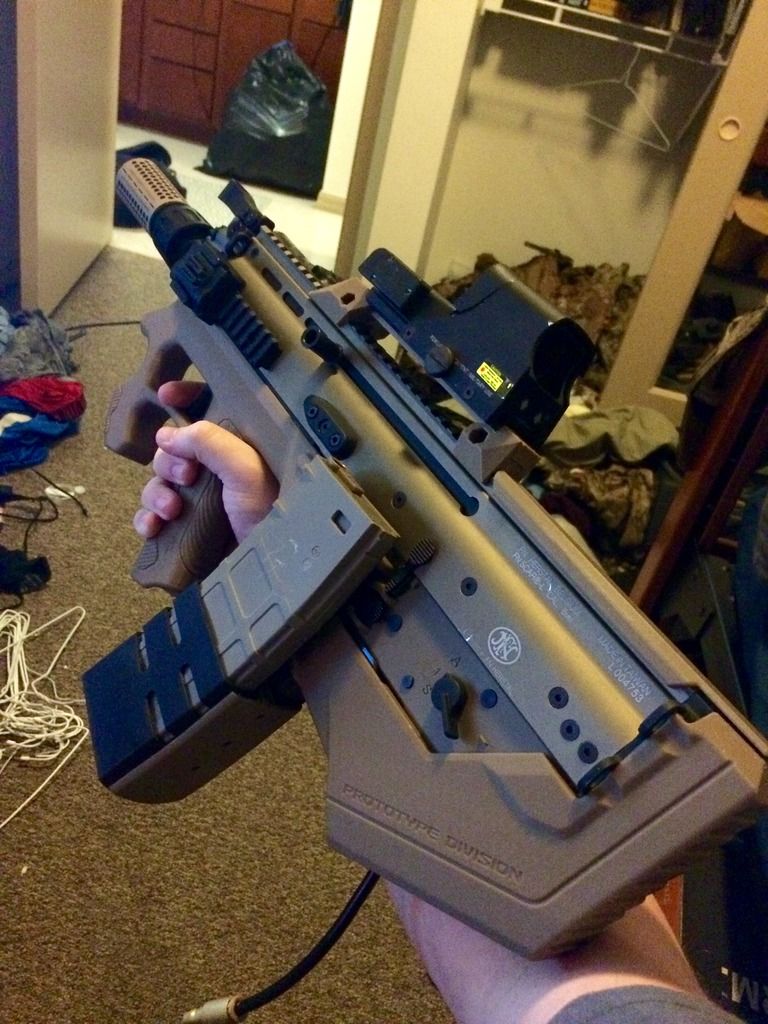
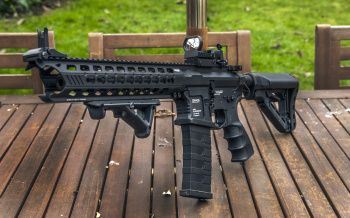
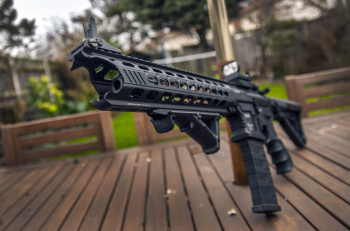
And it is done. Mostly. My one of a kind Scar-L. Seen here in it's standard and Thermal versions. God was this a PITA to make... preforms well though.
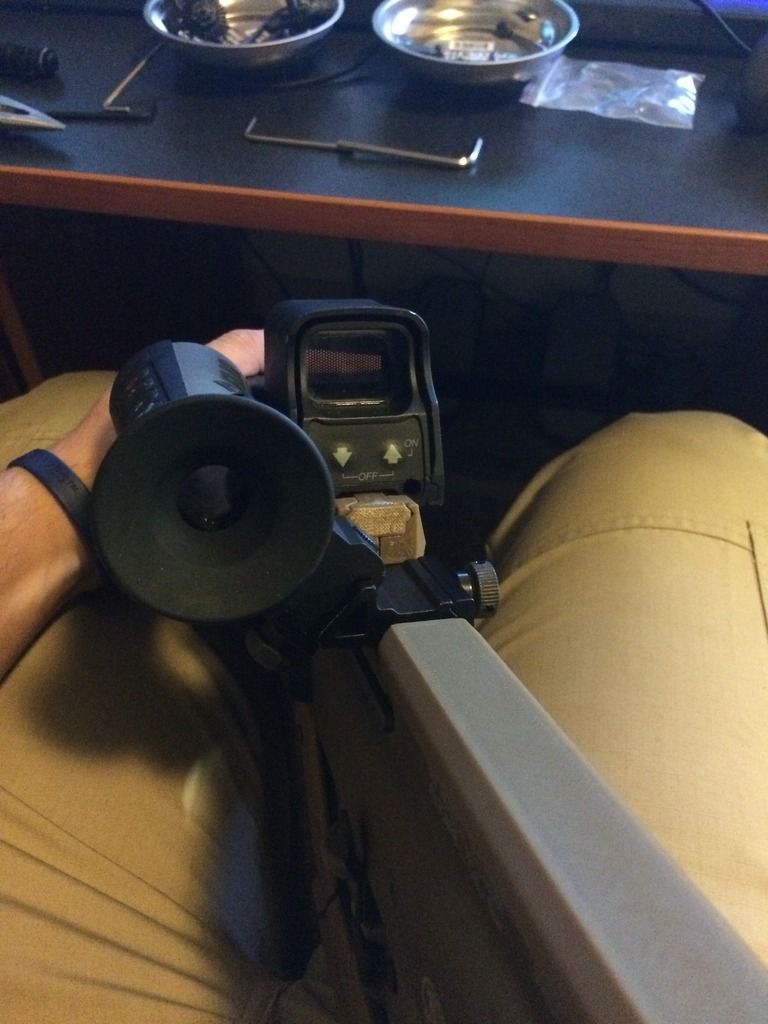
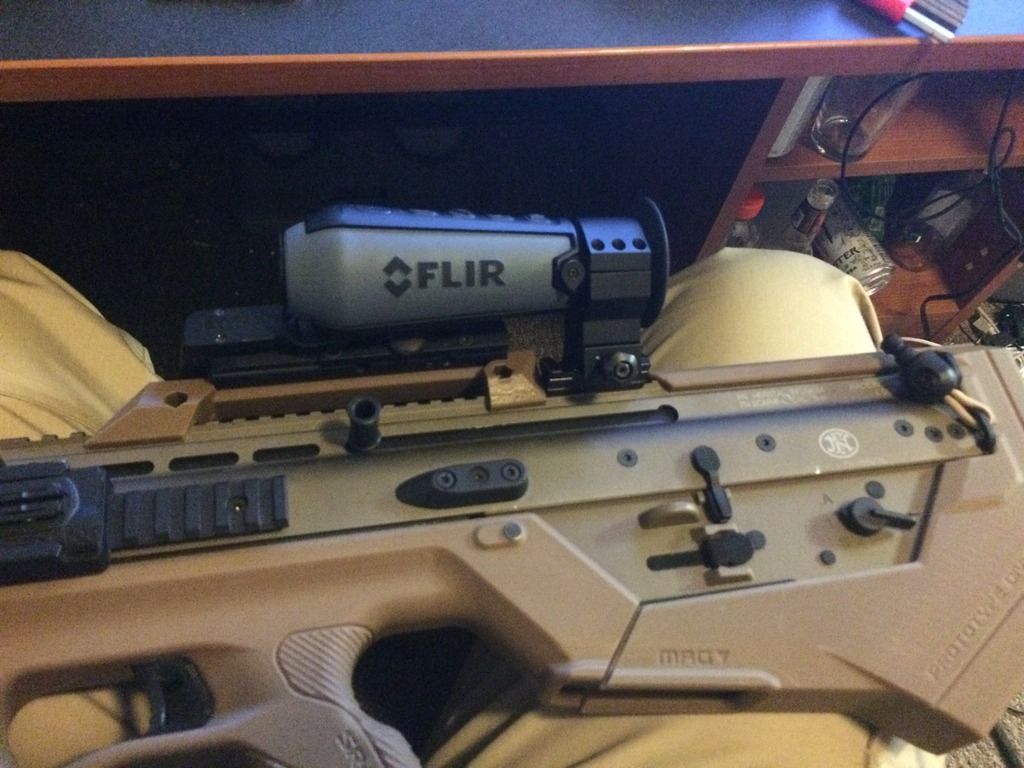
Started out life as a VFC Scar-L, perhaps the best looking Scar out there. Then I got my hands on a SRU prototype kit that is made for WE Scar-L GBBRs. I decided to make the gun run by HPA, as there is no way to get this working with anything other than gas - there is no room for a motor after all. So in goes a Polarstar Jack. I had to whittle down the trigger guard, as the WE apparently has a thinner one - the VFC's was too wide to fit. Then, out came the dremel, as the base of the gearbox stuck out enough that I had to open up space in the stock for it. That took a long time, and is one of the few things left to do (notice in image 3 there is a small gap between the halves - I need to remove about another cm of material). Finally the stock went on (the front half required no modification). I enlarged and angled the hole for the Jack's line next, as the pre-drilled hole needed to move backwards about an inch to work. Next thing - the trigger. This kit extends the trigger of the gun to the front half (obviously). Some light sanding was needed to make the trigger pull smooth. Several layers of electrical tape were added onto the pull face of the trigger's triggering piece, then cut to size, and superglued into place. The triggering mechanism itself was too tight, so the front half of it had to be removed as well. This created the issue of the trigger bar not holding the trigger mechanism, so it was superglued, then the glue seal was broken to create enough surface to create friction so it would catch, but not be permanent (as I still needed to be able to take apart later). Then the SRU kit was done. I put a Venom Tech 6.02 TBB in it, and a Madbull red hop that I had to cut down slightly (that thing is tight...). I also got one of SRU's rails, which I had to cut down with my dremel to fit my Eotech (visible in image 1 and 3) I also had to replace both my FCU wire and my trigger switch, as both had broken somewhere along the way. I added my genuine Eotech 552 with the LBC (Laser Battery Cap), a Knight's Armament QD suppressor, one of my 950 lumen Powertac e5 lights on the right rail, a Contour mount for my facecam on the left, a Safariland single point sling mount, and I use my Gen 1 Magpul P-Mags in a Safariland dual-mag mount.
It's taken me about three months to make, and Im happy with the result.


")