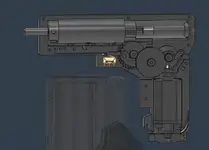
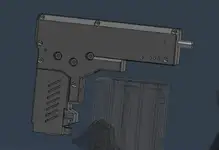
• Hi Guest. Welcome to the new forums. All of your posts and personal messages have been migrated. Attachments (i.e. images) and The (Old) Classifieds have been wiped.

    The old forums will be available for a couple of weeks should you wish to grab old images or classifieds listings content. Go Here

    If you have any issues please post about them in the Forum Feedback thread: Go Here

Sky's Halo airsoft projects (WIP)

Quick update, I fixed the AEP gearbox and cleaned the factory earwax grease out. I don't hold much appreciation for the engineer that designed the gearbox, as it was quite a nightmare to reassemble. With a fully charged 7.4v and barrel installed, I think it sounds rather nice for an AEP. 

View attachment 136009

A quick shooting test gave me an indication that it should give surprisingly decent range with 0.25 or 0.28 BBs. I suspect the soft foam "nub" is causing inconsistent hop to be applied, so I'll be modifying the arm to accept an omega or H-nub tomorrow. Hoping it's not an air-seal problem. 


VID_20240905_203238823.mp4


Last edited by a moderator:
Just a quick update on a few things.

The BR-55 had its first game at the start of this month. It worked well for the whole game, though I found afterwards that the V1 Maple Leaf magazine springs I used are useless and lost most of their shape. The V2 ML springs have apparently improved on this, so I'll have to pick some up before the next game. The "squashed" springs should work fine for the SMG magazines however, so no great waste. After a long day it made me realise I need to work on my arm strength more.

I've sorted the small problems and sticking points, redesigned the bolt slightly, so it has a nice HK esque lock and slap now (allows a Halo 3 accurate BR reload). Still have one or two little cosmetic details to touch up, but I'd basically call the thing done short of threading the barrel. I had to find a decent cylinder head, nozzle and tappet combo that had good tolerances to stop the midcap syndrome. I still had to shim the tappet and nozzle a bit. I've heard of some people gluing them together, but I didn't particularly want to do that. I also significantly improved the airseal / consistency. Ironically though, having tested it to +/- 2 FPS at home, the moment I got to the site, it varied wildly on the chrono. I suspect it may have just been the first few round in the magazine giving me trouble. Sadly the magwell was too narrow to fit an M4's hi-cap / flash mag internals. I think for future long rifles I'll look at integrating existing magazines into a shell.

Small video after optimising the pre-cocking, 7.4v 35C, stock LCT motor and gears.


VID_20241029_174825558.mp4


Here's the basic 2 point sling with fast adjustment that I put together. Credit for the design goes to Thrifty Operator on youtube.

View attachment 140428

I'm also working on a new helmet, based on the Halo 3 Marine, specifically the action figure version as it has a sleeker UA plate on the front. I made it detachable as I'd never seen this done before. The helmet looks very much like some of the concept art helmets without it. I've also included a built in 5015 fan in the peak that will hopefully blow air into my glasses. Worst case scenario it becomes a head cooler if I can't duct it efficiently.

Unfortunately I was tempted into attempting to print it in plain ABS. I had a spool sitting around that needed using for something. I've never printed anything in plain ABS, only improved, and was not prepared for it. Sadly there was much splitting and warping, and this caused the print of the back to fail near the end. I had to graft on a freshly printed part using ABS sheet mixed into a gloop with acetone.

I'm looking at the D30 stealth helmet padding when I can affort it in combination with EVA foam placed where needed to bulk up. It's a little pricy, but worth it for the protection, durability and comfort.

See, experience of printing ABS (left), experience of printing PLA super tough (right). Note the many patches of smeared ABS gloop to fill the cracks and bond the two disparate halves together.

It'll be a (not so fun) experience sanding into to a smooth finish. That is at least one strength of ABS, the ability to repair and patch it together with its liquid counterpart.

View attachment 140432

View attachment 140433

Very advanced and certainly not janky method of holding the back of the helmet on while the ABS gloop dried. Trust me I'm an engineer.

View attachment 140429

The ABS as it starts to melt (took a while).

View attachment 140430

View attachment 140434

PWM circuitboard and battery (yellow)

View attachment 140435

Fan intake at the front of the peak, TPU rubber fan duct (interchangeable.

View attachment 140436

I'm still scrounging up money for a HPA unit, but I'm hoping to have a Scalar Seraph in hand by early next year for building the HPA SMG and MA5. In the meantime, working on this helmet and stuff to sell like my Halo medkits, biofoam etc to fund more projects. The Halo Reach M73 concept art LMG is something I'd also like to pursue.

Take care, thanks for reading. ?

View attachment 140431

 
Hello again,

It's been a slow few months. The moths inhabit the empty wallet, and the paint is slow to dry in the cold of late winter / early spring.

I have since acquired the HPA engine (Scalar Seraph, though I've yet to acquire the tank and regulator. I've started working on the HPA adaptation of the M7 SMG, and will be looking to do do some preliminary thinking and design work for the MA5B (Assault Rifle).

View attachment 148553

Cute lil thing.

I reprinted the entire helmet as the prior one was too small for me. I also printed it as one piece instead of 2, out of PLA-ST instead of ABS. I got a significantly cleaner and stronger print. 

While experimenting with the electronics, it turned out that DC fans usually don't like PWM unless they're designed for it. This means that unfortunately I had to ditch the controllable fan speed for a simple on / off switch.

View attachment 148550

Preliminary sanding done using orbital sander, proxxon pen sander for details, and hand sanding. My fingers and tendons thanked me for buying the pen sander.

View attachment 148536

Layer of Motip spray putty that needs to be sanded right back to the base material. Leaving too much on makes the paint easy to chip / flake off.

Unfortunately I spent a lot of time sanding the helmet smooth, painting it with a rather heavy top coat of Maston olive green, before figuring out an alternative finish that I'd rather use. It sealed the deal when I foolishly thought the paint was fully set and I turned it over to paint the bottom. Somehow I hadn't thought of making a helmet stand, and the paint on the top marked from the bubble wrap I'd set it on. I sanded it back a bit before applying the textured finish.

The technique I discovered was simply painting over a textured spray paint, which provides a nice textured finish that's extra matt and scratch resistant. Unfortunately this meant I wasted rather a lot of somewhat expensive paint.

View attachment 148539

View attachment 148538

Comparison between the same paint, both smooth and textured.

View attachment 148540

Rustoleum textured paint. Created a helmet stand for painting without the paint ever touching anything.

View attachment 148532

Overcoated with Maston olive green.

View attachment 148533

Unfortunately the black also didn't fully set, and the masking tape marked it lightly. The lacquer evened it out well enough thankfully. I've never had this many issues with paints not setting even after days, even in the cold months. I had the same paint mark from sitting on fabric weeks after painting. I ended up using a food dehydrator inside a large cardboard box, set to 50'C for 12 hours to "bake" the paint. It seems to work well.

View attachment 148541

View attachment 148529

View attachment 148621View attachment 148623

View attachment 148624

Voila. I think it came out rather well. The chin strap was a bit of an experiment, to see whether a fully elastic strap would work. It didn't, it's *too* elastic. You want a little bit of flex to allow your jaw to wag, but too much and it allows the helmet to shift and pull right off your head if you fall. So as you can see there are multiple layers of elastic with some inelastic strap to remove the elasticity rather than ripping all the stitches. I'll certainly change it at some point. I've used a magnetic buckle as I did with my previous helmet that makes it easy to secure with gloves on. Due to the buckle, you can't get a cheek weld on the side it's on. It can be reversed easily, but not something you'll be doing mid game. Getting a cheek weld in general is awkward, but it's the price you pay to use a "sci fi" helmet. It is possible, and better than my prior helmet in most ways.

I've also added TPU (rubber) pads to the inside and bottom of the mandibles to stop any scraping against guns to protect the finish of both and reduce noise.

View attachment 148530

The padding is a rather crucial part of this helmet. Not only is it about comfort, but it's about safety too. I see a lot of dodgy custom helmets, and I wanted this one to not be a death trap while running around playing in the woods.

I've bought a set of quality D30 pads from a body armour shop, which are amazing at absorbing impacts. Some may know D30 from motorbike armour / padding. These form the primary padding around the skull, while my own DIY padding protects the neck from rotation of the helmet. It consists of 20-30mm of hard / dense EVA foam, with a soft open cell fronting and sewn mesh covering. The fan and battery is integrated in such a way that it doesn't protrude or create any pressure points.

The fan is a little louder than desired, but it does actually work to clear / prevent fog if you tilt your glasses slightly so there's a gap at the top for the air to pass into. I imagine it works well for goggles as the top vents would be closer to the duct outlet. The side panels can also be replaced with low profile ones that should allow wide goggles to fit. Key thing for me is it's low fuss, no tubes to mess with, and it's there when I need it. It's a little noisy for running all day, but there's enough capacity in the 18650 battery to do so.

Something I may look into eventually is fitting a full face shield, a little like the NMPD police helmets in ODST. The Bolle sphere would be the main candidate as it has a 16J impact rating.

One more project I'll be working on is a backpack for my kit and the HPA rig. I wanted to do the hardcase trooper backpack from Halo Reach. This'll be a tall print, using up 359mm of the XL's 360mm build height. I want to add some MOLLE modularity to it. I'll be sewing the straps and padding system, and likely padding out the inside so it's not a rattle can.

On another post I'll detail the DIY chestrig I made once I have the chestplate and pouldrons finished up.

View attachment 148552

View attachment 148554

Thank you for reading, more updates to follow :)

 
Last edited by a moderator:
Damn, you're taking this seriously.  Good call on the D30, and the 5150 fan.  Mine's round the back, and I'm forever trying to find a ducting solution that works reliably.  Having it on the front and blowing straight down is a great idea.

 
Hello again, 

I've made a fair bit of progress, so I felt I should drop an update on what I've been up to. 

The biggest project has been the SMG. To be seen completed (to be painted still) below, complete with functional suppressor and fairly game accurate red dot sight. 

The red dot is a Vector optics 1x22 V3. A very good value optic. It has an auto-off, which is great as I have a habit of killing batteries by leaving optics on... 

View attachment 152987

It's seen some improvements to the selector switch (new higher quality toggle switch), stock detent system, grip battery panel, and now includes a threaded barrel. The magazine was also improved (now a few mm wider to allow for  extra M2 bolts which ensure no flexing apart of the two halves when using strong springs). These improvements will translate to the AEP version if I ever make another. It's also printed in a new ASA (123-3Ds brand), that I've found to be exceptionally printable in a mildly warm chamber. It's a little bit more flexible than the PLA-ST I used previously, but it's more temp resistant (fine to be left in a summer car in direct sun) and long term environmental stability (10y+). 

I've since acquired an Airtac tank, reg and line, along with a filter and pump. It's gruelling work (doubly so when I found the reg outlet had a leak, and I didn't turn the reg off, letting out most of the air), but tolerable. 

Parts were acquired for the M7, such as an FPS airsoft 185mm barrel, Lonex AUG hop chamber, XT barrel extensions, and an alu toob. Various little bits and pieces.

First testing of the engine went well, though when I got it into the actual gun, ran into some consistency issues. As it turns out, stock tappet springs aren't nearly strong enough, and a stronger one had to be stolen from another replica. Unfortunately the extra strength tappet springs are ludicrously expensive for what they are. 

(sound warning)


VID_20250703_212547966.mp4


See the basic working setup of the gun. The Seraph is a particularly unusual engine in that it requires a carriage with a tappet plate to be made. Thankfully I nailed the dimensions on the first go. 

View attachment 152970

See, comically large "ultra super sneaky suppressor". 

View attachment 152973

And torch mount with completed suppressor. The suppressor has a series of plastic rings holding some rods that keep the foam out of the path of the BB, while allowing the air to expand into the foam. I lined the inside wall of the suppressor with TPU rubber, and included some TPU cones. I'd do some testing to find what's most effective, but I'm plenty happy with it as is. 

View attachment 152975

I believe the extra moving parts (tappet plate) adds some unsuppressable noise. The loud crack is successfully deadened however. 


VID_20250726_215728216.mp4


Another improvement over the original is metal detent sockets for the foregrip. I went to the effort to add a metal plate in the stock, so I figured, why don't I have metal inserts for the foregrip also? I didn't like having metal on plastic, when I value longevity. 

View attachment 152972

I've also successfully managed to print polycarbonate (eSun) for the first time, so any clear parts you see are now in polycarb. This includes any high wear pieces or pieces that benefit from being stiffer, such as the feed nozzle, magazine release and hook etc, and the magazine base (which is very thin at the base, so benefits from the far better impact resistance over PETG). It's clear to allow you to see how many rounds are in the magazine (though unfortunately not while it's in the gun).

View attachment 152971

The backpack is near completion, though due to life, it has sat with only spray putty, ready for more work for a time now. Padding, lid and straps are done. Hopefully soon to be completed, so I can use it to carry the HPA tank for the SMG. 

Buckles are 3D printed and magnetic. 

It's also a rather unintended design point that alice pack straps can be used if wished. 

View attachment 152967View attachment 152966View attachment 152968

I've also finished sewing the chest rig, completed some more BR-55 pouches (unfortunately run out of ranger green cordura, and now don't have enough for SMG pouches), and completed the arm panels for the pouldrons. 

Unfortunately ranger green cordura is shocking scarce, and the one place I can buy it, it's £30 per meter, 3 or more times the going rate for similar material. 

View attachment 152983View attachment 152984

View attachment 152980View attachment 152979

View attachment 152982

(don't know why this one is flipped, can't fix it). 

View attachment 152985

One small last thing, I added a USB charging board for the 3.7V battery on the helmet. Fancy! 

View attachment 152986

Thank you for reading. I plan to get some decent pics of me in gear soon.

o/

View attachment 152974

 
Last edited by a moderator:
That M7S is a thing of beauty, but man I'm very envious of that Marine helmet.

Looking forward to your upcoming SOEIV project

 
Thank you lads. The helmet's a bit front heavy with the armour panel, but I've designed and printed one that's about half the weight that I need to paint up. 

Bit of a shameful self plug, but I do sell the helmet on Etsy under Thunderhead Armoury. 

SOEIV coming up. Parachute, a big metal bucket, and a cliff. 

 
I'd call these rather poor quality photos, but here you go regardless. Unfortunately most are done with a phone camera with the notable exception of the first one. 

View attachment 153280

View attachment 153281

View attachment 153283

View attachment 153285

View attachment 153287

View attachment 153292

Paint me like one of your French Marines

View attachment 153286

This was a bit rushed, so I'll probably get another set of photos with a better camera, and hopefully do a shooting video or two. 

 
Hello again, 

Op Venezian, the UK's first dedicated Halo LARP / Airsoft event has come and gone. It was a great event, with some lovely people and fun times. It was hosted at Gunman in Eversly, so a bit of a trek for me. Luckily some Scottish ODSTs picked me up on the way down. 

I'm glad to say that the HPA M7S performed flawlessly. I really enjoyed using it. It's so damn quiet with the suppressor. It was quite handy when I was playing as the Flood given I could easily one hand it to swing around wildly. The torch was pretty handy in the Flood infection night game (rather inspired and hair raising by the way, very fun). 

View attachment 156414

(Credit, Bipocalypse)

View attachment 156415

(Credit: Bipocalypse)

View attachment 156410

(Credit: Bipocalypse)

Spartan Jess' episode 1

https://youtu.be/l1x2rKwVcvM?si=2vf9XkYxjTZ1Y2W2

If anybody's interested in attending next year, I can shoot you an invite to the discord. We actually had a lack of people willing to play URF (rebels) with minimal Halo gear which was surprising. 

View attachment 156416

View attachment 156417

Credit: SpartanJess

I did finish the Reach backpack in time. Unfortunately in my sleep deprived rush, I managed to spill superglue on the cordura lid. I've yet to take decent photos, so I'll save that for another post. 

I've since started two new projects. Both very much WIP. 

One for later when it's fiscally feasible, a support weapon / emplacement for next year's event. Halo 2's M247 mounted machinegun. 

It'll require an order of steel and a lot of filament. It's 1.55m long, using a V3 gearbox and 15mm steel box section spine similarly to the BR55. I would use an M249 gearbox, but they're 3x the price and not very readily available. I'll build a tripod for it also. 

View attachment 156413

I've shelved that for now after making a start in favour of a project I can do right now. The MA5B. Powered by HPA, using basically any engine with a universal plugboard. Right now that's the Scalar engines and the Polarstar F2, maybe the Jack as far as I know. I am looking into the very real possibility of making a version that uses the P90 V6 gearbox eventually. The stock would have to be extended (easily done), the magazine would need to be different (smaller), and the gearbox would need a different cylinder head, nozzle and custom 3D printed tappet plate. I will be looking to sell the files to this as a sort of trial to see whether I run into issues with people being untrustworthy, and determine if I want to sell files in the future. I've designed it so it can be printed on standard sized printers and I'll be using steel rods only with no drilling of metal required. 

It will be using the tachyon round counter, and I'll make provision for either a custom torch to be used or a tactical one ( Fenix PD35 for example). 

View attachment 156412

View attachment 156411

Short-ish update today. 'Til the next post. 

 
Last edited by a moderator:
Hello again, 

Op Venezian, the UK's first dedicated Halo LARP / Airsoft event has come and gone. It was a great event, with some lovely people and fun times. It was hosted at Gunman in Eversly, so a bit of a trek for me. Luckily some Scottish ODSTs picked me up on the way down. 

I'm glad to say that the HPA M7S performed flawlessly. I really enjoyed using it. It's so damn quiet with the suppressor. It was quite handy when I was playing as the Flood given I could easily one hand it to swing around wildly. The torch was pretty handy in the Flood infection night game (rather inspired and hair raising by the way, very fun). 

View attachment 156214

(Credit, Bipocalypse)

View attachment 156215

(Credit: Bipocalypse)

View attachment 156216

(Credit: Bipocalypse)

Spartan Jess' episode 1

https://youtu.be/l1x2rKwVcvM?si=2vf9XkYxjTZ1Y2W2

If anybody's interested in attending next year, I can shoot you an invite to the discord. We actually had a lack of people willing to play URF (rebels) with minimal Halo gear which was surprising. 

I did finish the Reach backpack in time. Unfortunately in my sleep deprived rush, I managed to spill superglue on the cordura lid. I've yet to take decent photos, so I'll save that for another post. 

I've since started two new projects. Both very much WIP. 

One for later when it's fiscally feasible, a support weapon / emplacement for next year's event. Halo 2's M247 mounted machinegun. 

It'll require an order of steel and a lot of filament. It's 1.55m long, using a V3 gearbox and 15mm steel box section spine similarly to the BR55. I would use an M249 gearbox, but they're 3x the price and not very readily available. I'll build a tripod for it also. 

View attachment 156211

I've shelved that for now after making a start in favour of a project I can do right now. The MA5B. Powered by HPA, using basically any engine with a universal plugboard. Right now that's the Scalar engines and the Polarstar F2, maybe the Jack as far as I know. I am looking into the very real possibility of making a version that uses the P90 V6 gearbox eventually. The stock would have to be extended (easily done), the magazine would need to be different (smaller), and the gearbox would need a different cylinder head, nozzle and custom 3D printed tappet plate. I will be looking to sell the files to this as a sort of trial to see whether I run into issues with people being untrustworthy, and determine if I want to sell files in the future. I've designed it so it can be printed on standard sized printers and I'll be using steel rods only with no drilling of metal required. 

It will be using the tachyon round counter, and I'll make provision for either a custom torch to be used or a tactical one ( Fenix PD35 for example). 

View attachment 156212

View attachment 156210

Short-ish update today. 'Til the next post. 
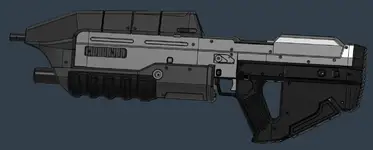

Might just be me but... Every single one of your images has corrupted in this message

 
Damn, wasn't sure if it was just the site not loading them. I have tested a few other photos and it has the same issue. I'll try again. 

Edit: turns out it was my browser, librewolf. Works fine on Firefox. 

 
Last edited by a moderator:
Back
Top